Installing phpIPAM on Ubuntu 16.04
Installing phpIPAM on Ubuntu 16.04
I have been thinking, for a while now, about deploying an IP Address Management (IPAM) system in my Home Lab environment to keep track of my assigned addresses across my various VLANs. In looking for the right solution, I came across many different choices, from Infloblox to Microsoft’s very own IPAM feature within Microsoft Windows Server 2012 R2. I read many articles, and kept seeing rave reviews and tons of praise about phpIPAM and that it was simple to install and get it running (at least that’s how it’s advertised). I went to the phpIPAM website to lookup more information and noticed they have an installation guide available. Upon observing it, I quickly became disappointed at the lack of detailed instructions to actually deploy it on a system. I guess they assume everyone has adequate knowledge of Linux operating systems, but myself personally, I’m still pretty novice at Linux and am looking to become more proficient with it. I figured this is a good opportunity to get some hands-on Linux experience since I already knew how to, at the ver least, install an OS!
So like any normal “noob” at this, I started consulting “Mr. Google” searching for easy to follow guides on installing phpIPAM and stumbled across one that made it all look very simple (I will share all links at the end of this post). I spun up an Ubuntu VM and followed the guide precisely, step-by-step, and was disappointed when I could not access the phpIPAM installation web page. After more searching, I stumbled on even more articles and each one used different methods to get it to work properly. I thought to myself, “there has to be an easier way to get this working right?”
So after countless hours of trial and error, taking little tid-bits from several references, I managed to finally get phpIPAM successfully deployed and working on Ubuntu 16.04. At this point, I figured it would be a great idea to document my installation steps so that I can share my experience with all of you and hope that this guide will be of some value. Let’s get to it!
Prerequisites:
- Ubuntu Server 16.04 64-bit
- Linux, Apache, MySQL, PHP (LAMP) configuration
- apache2
- MariaDB (MySQL replacement) or MySQL
- php7.0 + modules
- libapache2-mod-php7.0
- php7.0-cli
- php7.0-curl (optional)
- php7.0-gmp
- php7.0-json
- php7.0-ldap
- php7.0-mcrypt (optional, for phpmyadmin)
- php7.0-mysql
- php7.0-xml
- php-pear
- php-apcu (to speed-up php)
- phpmyadmin (optional)
- php-mbstring
- php-gettext
- Linux, Apache, MySQL, PHP (LAMP) configuration
- phpIPAM
- Web Browser
For the purposes of this guide, I will not cover the actual OS installation steps and am confident that you can easily get an OS installed and running.
I will first configure the server with a LAMP configuration. I began with a “vanilla” or shall I say “minimal” installation of Ubuntu Server 16.04 64-bit and I will be running all of the commands as the root user. Having had Linux installed and my server ready means that the “L” part of the “LAMP” configuration is already done. FYI – features that define a LAMP configuration and be installed in any order.
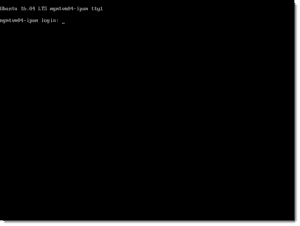
Log in with your local account then enter:
sudo su
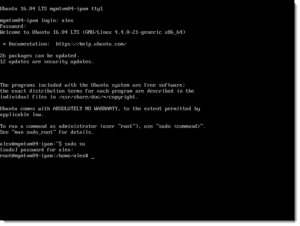
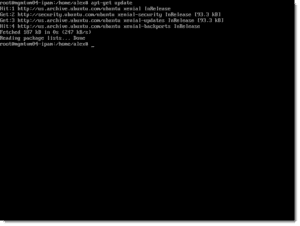
First, I updated apt-get by running:
apt-get update
Once completed, we will move on to the “M” phase of the configuration and install the MySQL database. I chose to use MariaDB instead of MySQL as I’ve read there are many performance improvements over MySQL.
To install MariaDB, run the following:
apt-get -y install mariadb-server mariadb-client wget

When the components have finished installing, we can set a root password for MariaDB by entering the following:
mysql_secure_installation
You will then be asked the following series of questions:
- Enter current password for root (enter for none): <– press enter
- Set root password? [Y/n] <– y
- New password: <– Enter the new MariaDB root password here
- Re-enter new password: <– Repeat the password
- Remove anonymous users? [Y/n] <– y
- Disallow root login remotely? [Y/n] <– y
- Remove test database and access to it? [Y/n] <–y
- Reload privilege tables now? [Y/n] <– y
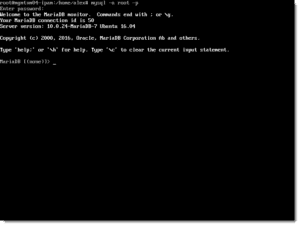
Next, test the login to MariaDB by entering the following:
mysql -u root -p
Enter the root users password that you previously configured. If successful, you should see a screen similar to this:
To exit MariaDB, type quit and press Enter
Now, I have just completed the “M” phase of our LAMP configuration and can move on to the “A” phase and install Apache2.
To install apache2, simply run the following command:
apt-get -y install apache2
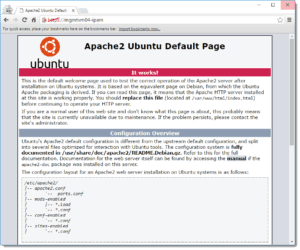
When that has finished, test apache to make sure it works by opening a web browser and browse to the VM’s IP or FQDN (http://<ipaddress> or http://<FQDN>). I will use Google Chrome and access it via hostname (FQDN) since I’ve created the DNS record already.
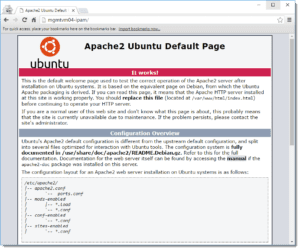
Success! This now completes the “A” phase of the LAMP configuration and I can now move on to the final “P” phase by installing PHP7.0
I will begin by simply installing php7.0 and the Apache2 php module. To do this, enter the following:
apt-get -y install php7.0 libapache2-mod-php7.0
When that finishes, restart apache by running:
systemctl restart apache2
To test that PHP7.0 installed successfully, I will make an info.php file in the web server directory by running the following:
vim /var/www/html/info.php
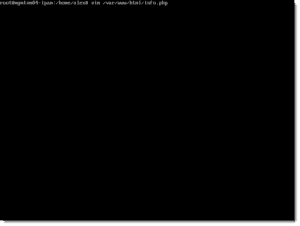
You can also use nano instead of vi or vim. Then I add the following lines by first pressing “I” for “Insert**“
<?php
phpinfo();
?>
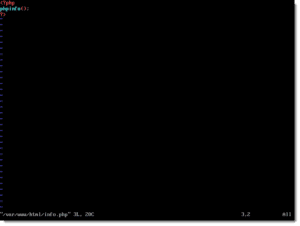
Save the file by pressing “esc” followed by “Shift :” then type the letters “wq” and press Enter. Next, run the following command to change ownership of the file:
chown www-data:www-data /var/www/html/info.php
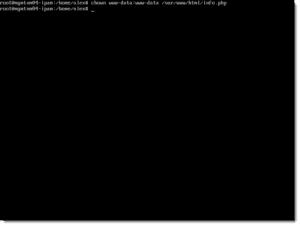
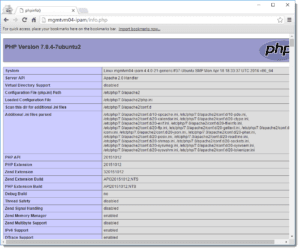
Now, I can test to ensure PHP is running under Apache2 by opening a web browser and navigating to the IP or FQDN /info.php link (http://<ipaddress>/info.php or http://<FQDN>/info.php). If successful, you should see a page like this.
Perfect! Now I will add some additional php modules that will be needed for phpIPAM to work along with some others to add support for MariaDB. I’ll start with the following command to list the available php7.0 modules.
apt-cache search php7.0
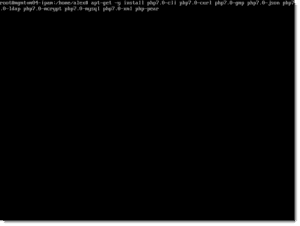
I’ll then install the necessary php modules that are needed by phpIPAM to add support for the database (MariaDB) by entering the following (some of them may have already been installed via php 7.0 installation earlier) :
apt-get -y install php7.0-cli php7.0-curl php7.0-gmp php7.0-json php7.0-ldap php7.0-mcrypt php7.0-mysql php7.0-xml php-pear
Restart apache2 by running:
systemctl restart apache2
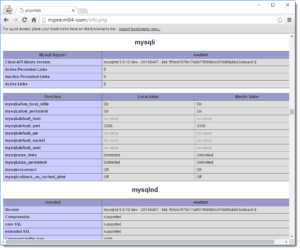
Point your web browser to the /info.php page again and reload it. If all is well, you should see the new modules installed along with “mysqli“. Now I know that MariaDB is supported in my php 7.0 installation
At this point, I have finished the “P” phase in the LAMP configuration and can move on to installing phpIPAM. But before doing that, I want to add a few extra modules to my PHP configuration to make it run faster via APCU, and to add support for PHPMyAdmin and SSL.
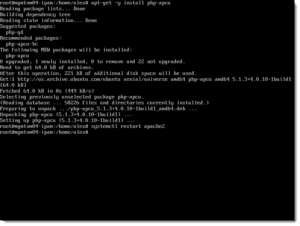
Start by entering the following to speed up PHP
apt-get -y install php-apcu
Then restart apache2 with
systemctl restart apache2
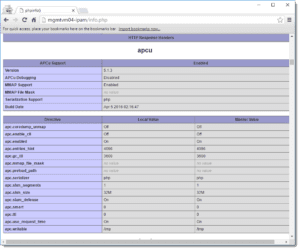
If you want to ensure it’s installed and running, again load the /info.php site in your web browser and look for the following
If you’d like, and for security concerns, you can delete the info.php at this time by running
rm -f /var/www/html/info.php
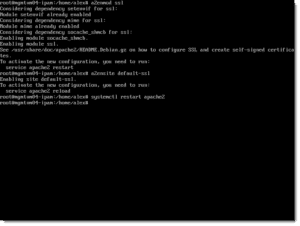
Now, I am going to enable SSL so that I have (https://) access to my web server as well. Do this by running the following:
a2enmod ssl
a2ensite default-ssl
Then restart apache2 again with
systemctl restart apache2
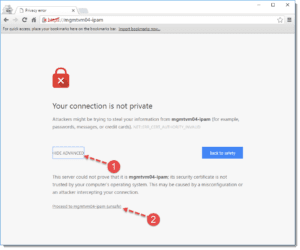
Test it by launching your apache web server link in your web browser using (https://<ipaddress> or https://<FQDN>)
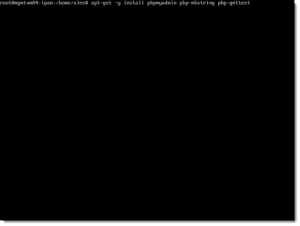
The last thing to officially complete my “P” phase of my LAMP configuration is to install phpMyAdmin to allow me to manage my database easily from a web browser. To install, enter:
apt-get -y install phpmyadmin php-mbstring php-gettext
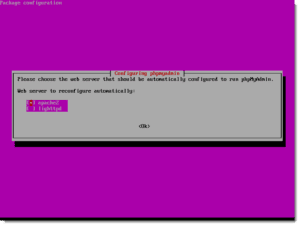
You will be presented with the following screen. Select the “apache2” option by pressing the “space bar” on the highlighted object, and press Enter.
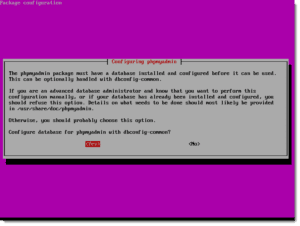
Next, you will be presented with this screen. Select “Yes” and press Enter.
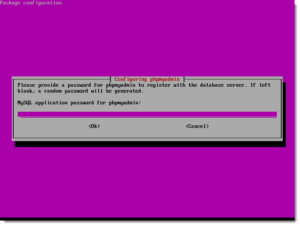
On this next screen, just press Enter as a random password will be generated for the phpmyadmin account
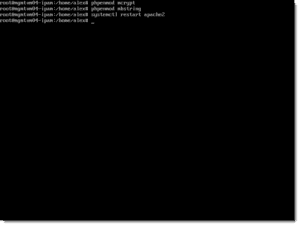
Next, I need to explicitly enable “crypt” and “mbstring” or the web page will not load properly. Do this by running the following:
phpenmod mcrypt
phpenmod mbstring
Then, restart apache 2 again with:
systemctl restart apache2
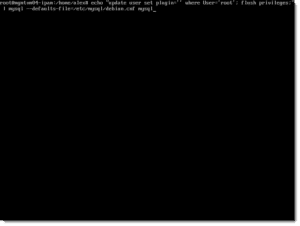
And the final command to finish the installation is to run the following:
echo "update user set plugin='' where User='root'; flush privileges;" | mysql --defaults-file=/etc/mysql/debian.cnf mysql
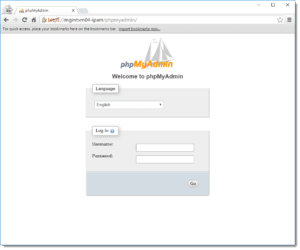
Test phpMyAdmin by navigating to the web server /phpmyadmin page (http(s)://ipaddress/phpmyadmin or http(s)://FQDN/phpmyadmin). The login is root and the database password you created earlier.
Excellent! Now, my LAMP configuration is complete and I can start with the phpIPAM configurations and installation.
Since I’ve already installed all of the required modules, the next thing to do is download the phpipam file and then extracting it to the web servers directory (/var/www/html). Start by changing over to the /tmp directory
cd /tmp
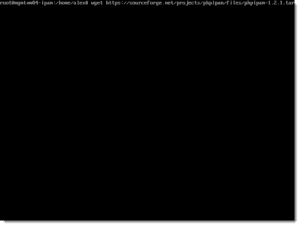
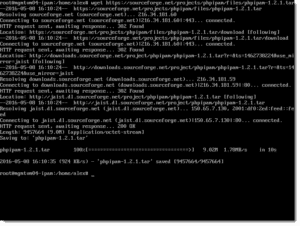
Next, download phpipam. I am using the latest version which, at the time of this writing, is phpipam-1.2.1.tar
wget https://sourceforge.net/projects/phpipam/files/phpipam-1.2.1.tar
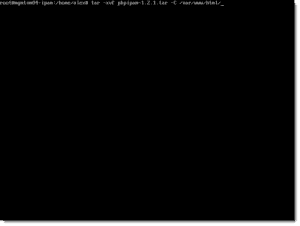
Extract the file to the web server directory:
tar -xvf phpipam-1.2.1.tar -C /var/www/html
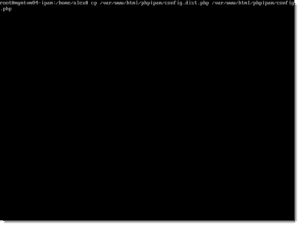
The files have been extracted to a new folder at /var/www/html/phpipam. Now we need to edit the config.php file in that directory. But there is no such file so we have to create it by copying the default config.dist.php file to config.php. Do this by running:
cp /var/www/html/phpipam/config.dist.php /var/www/html/phpipam/config.php
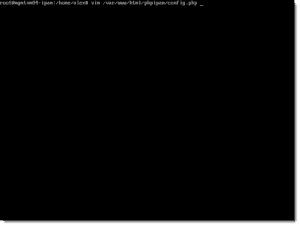
Now we can edit this file with vim, vi, or nano:
vim /var/www/html/phpipam/config.php
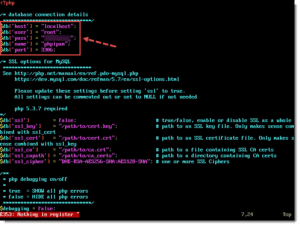
By default, the file will look like this and I will need to change the following selections:
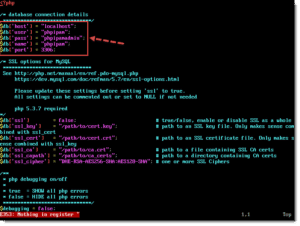
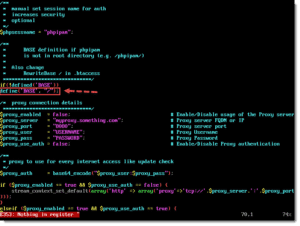
I will make the following changes before saving and exiting the file:
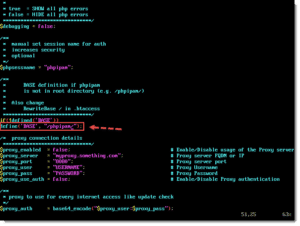
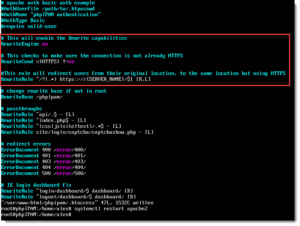
Since I have defined the ‘BASE’, it also explicitly said to change this in the .htaccess file. To open and edit this file, enter:
vim /var/www/html/phpipam/.htaccess

By default, the file looks like this and I will be changing the following line
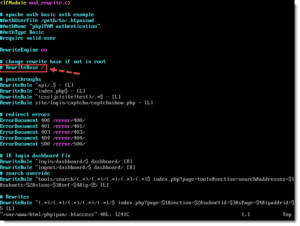
To look like this before saving and exiting the file:

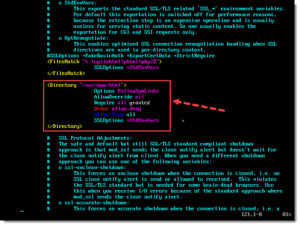
Next, I will edit the default apache web file (000-default.conf) by entering:
vim /etc/apache2/sites-available/000-default.conf
By default it looks like this:
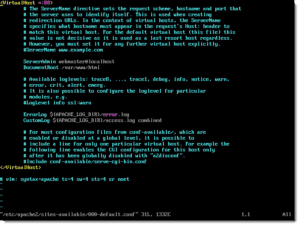
I will be adding the following lines before saving and exiting the file. This will also allow you enable “Prettify Links” while using an HTTP connection.
<Directory "/var/www/html">
     Options FollowSymLinks
     AllowOverride all
     Require all granted
     Order allow,deny
     Allow from all
</Directory>
If you would like to enable “Prettify Links” while using an HTTPS connection, you need to edit the default apache https web file (default-ssl.conf) by entering:
vim /etc/apache2/sites-available/default-ssl.conf
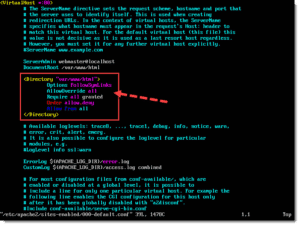
Look for the same “Directory” area as in the previous step (scroll about halfway down). By default it will look like this:
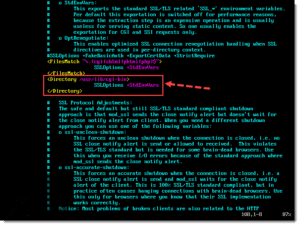
Change the entry to the following:
<Directory "/var/www/html">
     Options FollowSymLinks
     AllowOverride all
     Require all granted
     Order allow,deny
     Allow from all
     SSLOptions +StdEnvVars
</Directory>
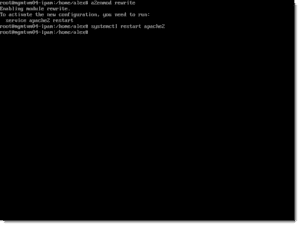
Now I have to restart the apache2 service again but before doing so, I need to enable “mod_rewrite” by first entering the following and then restarting apache2 as described earlier:
a2enmod rewrite

systemctl restart apache2
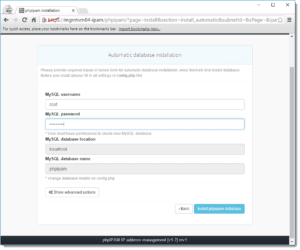
If all is successful, you can now open your web browser and navigate to your web server’s /phpipam URL (http(s)://ipaddress/phpipam or http(s)://FQDN/phpipam) and be presented with the following:
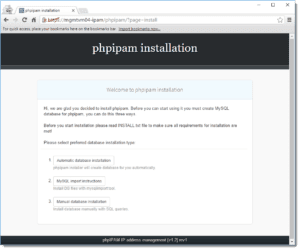
This is awesome!! Now, I can select “Automatic database installation“, enter the “root” username and password and click “Install phpipam database“
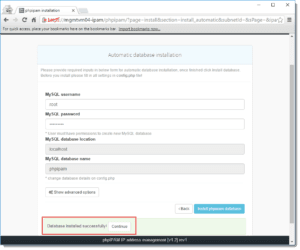
After a few brief moments, you should see the “Database installed successfully” and you can press “Continue” to log in.
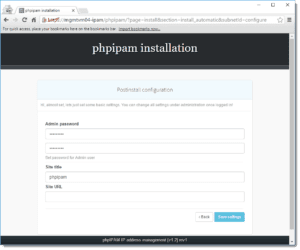
Enter a password to set the “Admin Password” then click “Save Settings“
After another brief few seconds, you will see a “Settings updated, installation complete!” message and you can click “Proceed to login“
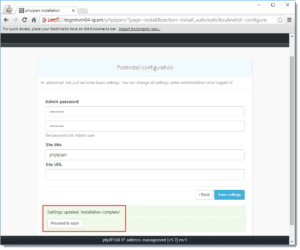
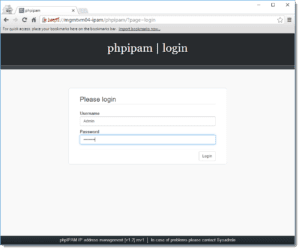
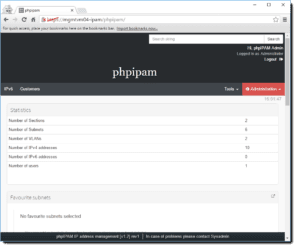
At this point, you will be presented with the phpipam login screen, where you can enter “Admin” and the password you’ve created for the account, then begin configuring your subnets, etc within the dashboard! I will not go over the configurations in this post as I still need to poke around it a bit, but I’m sure you will find it pretty easy and self-explanatory.
Well, that is it! I hope that you’ve all found this guide to be useful and I welcome any feedback. Please feel free to rate this post above and share!
Update
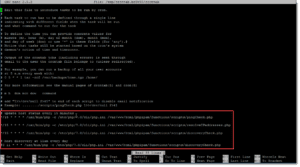
- If you would like to check the status by running a ping check, resolve IP addresses, and add the ability to automatically scan for new hosts to automatically add to phpIPAM every 15 minutes, you must add the following cronjob…
crontab -e
Then enter the following at the end of the file…
*/15 * * * * /usr/bin/php -c /etc/php/7.0/cli/php.ini /var/www/html/phpipam/functions/scripts/pingCheck.php

*/15 * * * * /usr/bin/php -c /etc/php/7.0/cli/php.ini /var/www/html/phpipam/functions/scripts/resolveIPaddresses.php

*/15 * * * * /usr/bin/php -c /etc/php/7.0/cli/php.ini /var/www/html/phpipam/functions/scripts/discoveryCheck.php
(Optional)
Instead of running a Discovery Check at the specified 15-minute interval, I also added a rule to do a check every day at 11 AM (see code below). Please note that I currently have the rule disabled by adding a “#” at the beginning of the line, but if I ever do decide to use that instead of the 15-minute check, I can remove the hashtag and place it in front of the 15-minute check rule.
0 11 * * * /usr/bin/php -c /etc/php/7.0/cli/php.ini /var/www/html/phpipam/functions/scripts/discoveryCheck.php
- If you’d like to force phpIPAM to always use HTTPS, edit the .htaccess file again:
vim /var/www/html/phpipam/.htaccess
Enter the following:
RewriteCond %{HTTPS} !=on

RewriteRule ^/?(.*) https://%{SERVER_NAME}/$1 [R,L]
Cheers!
-virtualex-
Pingbacks
- How to setup phpipam on Ubuntu 14.04
- Ubuntu 16.04 LAMP server tutorial with Apache 2.4, PHP 7 and MariaDB (instead of MySQL)
- phpIPAM: A Web Based IP Address Management System
- How to Install and Secure phpMyAdmin on Ubuntu 16.04
- Automatic Host Availability Check
- PHP7.0 API Fix
Historical Comments
Hi Bill – Unfortunately, I am not one of the product developer so I cannot provide support or answer questions of the product. Please visit the developer’s GitHub (https://github.com/phpipam/phpipam) page and post your questions there to get the proper attention/support.
Thanks so much for the positive feedback!
Hello, is it possible to have http://ipaddress direct to phpipam instead of the Apache2’s index.html? I would like to be able to use http://ipaddress load phpipam directly. Thanks and sorry, bit of a newbie here!
Awesome tutorial. Easy to follow!
I think this was actually an issue with mysql. I was using an Ubuntu server that had been installed w/ the LAMP option at setup. I reinstalled without the LAMP option, and installed the “AMP” components separately as you did in the directions, and it worked flawlessly. Top notch documentation, by the way. Thank you very much!
I know this is quite an old post, and I may not get a response, but can anyone explain exactly what this command does, and can I skip it? I’ve tried this installation three times from scratch now, and every time I run this command, I lose the ability to login to mysql with root. I can login with root only if I do mysqld_safe –skip-grant-tables. I can log in with debian-sys-maint if mysql is running normally. Is this command simply a security measure that can be skipped, or is it necessary to complete the setup of phpipam? I’d like to just skip it if possible, since it seems to majorly hose mysql access.
Hi @johnnyengberg, thanks for the positive feedback! I’d suggest you raise your issue to the developer on their GitHub page. https://github.com/phpipam/phpipam/issues
Hi Christopher – Thanks for the positive feedback! Unfortunately, I am unable to assist with your error. You’r best best would be to post this question as an issue on the developers GitHub page. https://github.com/phpipam/phpipam/issues
Excellent tutorial. Any chance you could help with an error with ping scanning? Trying to scan 10.1.0.0/16 and after each scan completes I click add addresses to data base and get an error of max_input_vars set to 1000 in php.ini. I change it to 65537 in two php.ini files and restart all serviecs. still getting the error.
Hi, the error you are seeing is mentioned here: https://goo.gl/Q7030Y with a solution.
Cannot install sql SCHEMA file: SQLSTATE[42000]: Syntax error or access violation: 1067 Invalid default value for ‘lastSeen’
Hi and thanks for a great guide!
I’m having an issue with custom field data not showing in the subnet view. When
doing a search, the data in the custom field is displayed correctly. My database is imported from an installation
from an old Debian 6 and all worked ok there. Anyone else experiencing issues with the
custom fields?
Hi @disqus_tb1z938Js4:disqus, What issues are you running into and can you reproduce the error? This installation is pretty straight forward. Unfortunately, I do not proclaim to be a Linux or MariaDB expert so support will be fairly limited from my end. Can you try starting over and ensuring that you are running the following commands to install MariaDB and set your root password. Let me know if you are successful and be sure not to “fat-finger” any of the syntax.
sudo su
apt-get update
apt-get -y install mariadb-server mariadb-client wget
mysql_secure_installation
mysql -u root -p
Hi,
Thanks for the effort for this write-up.
I have an issue, i am havigdifficulty installing the database.
Any help?
Hi @disqus_sO1FZCr6Mu:disqus thanks for visiting and pointing this out. You are indeed correct as the accompanying screen shot for said command has the proper syntax. Unfortunately, the websites formatting changed it when I saved the post and resulted in turning the ” into a “
good to know @disqus_4iBtlTX78k:disqus! Thanks for visiting and pointing this out!
good to know @@disqus_4iBtlTX78k:disqus! Thanks for visiting and pointing this out!
Great write-up, just one small thing, I ran into an error when running the snippet
echo “update user set plugin=” where User=’root’; flush privileges;” | mysql –defaults-file=/etc/mysql/debian.cnf mysql
instead I ran
echo “update user set plugin=” where User=’root’; flush privileges;” | mysql –defaults-file=/etc/mysql/debian.cnf mysql
this uses two apostrophes after the
“update user set plugin=
instead of quotations in the first code snippet ( Although they look nearly identical)
Thanks again for the great write-up
There might be issues with php7 and the API part of phpipam. https://github.com/phpipam/phpipam/issues/540. At this moment, possibly the safest choice is to install php-5.6.