Creating a Single-Node VSAN
Creating a Single-Node VSAN
Many of us homelab enthusiasts tend to build “whitebox” systems from spare PC parts and a few internal hard drives for local storage that we’ve either ordered or had laying around in order install ESXi and run a single-node lab environment. VMware Virtual SAN (VSAN) enables the ability to build a local SAN environment utilizing the local hard drives in the host. The only downside/caveat is that you need a minimum of (3) ESXi hosts in a cluster to enable and configure VSAN. Bummer!
Well, thanks to some very smart people in the community, there is a way to create a VSAN on your single-node host!
Keep in mind that this is not supported by VMware and is recommended for testing purposes only and should not be done in a production environment so use at your own risk.
I will mention that this topic has been covered by other bloggers (one of my favorites, William Lam, and a few others…) in the community but for my own knowledge and sharing, I decided to write this post detailing how I configured this in my environment.
Below, I will show you how to configure a hybrid and an all-flash VSAN on your ESXi host. Again, I remind you that running a single-node VSAN is not supported by VMware and you run the risk losing all your data in the event of a disaster scenario (system crash, etc.) Please be sure to understand the risks when deciding to use this in your own home lab.
Prerequisites:
- (1) vCenter Server (Windows-based or VCSA)
- (1)ESXi host in a cluster
- (1) vmk for VSAN Traffic
- (1) SSD for Caching Tier
- (1) SSD for Capacity Tier (All-Flash configuration)…or…
- (1) HDD for Capacity Tier (Hybrid Configuration)
- SSH access to Host
For simplicity’s sake, I will be using a VCSA and ESXi VM deployed in VMware Workstation 12.1.1 Pro on Windows 10 for this demonstration.
Be sure that you have connected your ESXi host to your vCenter Server and have added it to a cluster, you do not need to enable VSAN on the cluster yet. Add an additional vmk to your vSwitch for VSAN traffic. Also ensure you have started the SSH service on the ESXi host.
Open an SSH session to your ESXi Host. If you’ve added a vmk for VSAN but have not enabled it for VSAN traffic yet, enter the following command.
esxcli vsan network ipv4 add -i vmkN
(Where “N” is the number of your vmk port – ie: vmk1)
In my environment, I already created a VSAN vmk and enabled it for VSAN traffic so I was able to skip the command above.
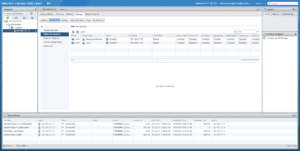
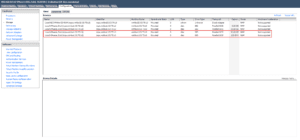
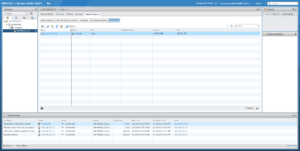
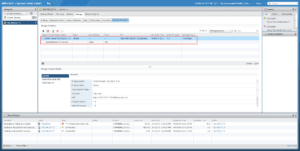
Using the vSphere Web Client or C# client, verify the hard drive that you want to use for your VSAN datastore. I will be using these drives, the 30GB will be my cache disk and the 120GB will be the capacity disk.
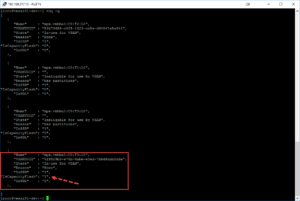
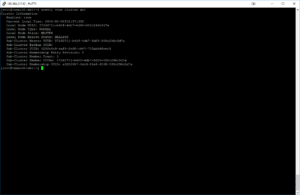
Back in your SSH session, enter the following command to determine and confirm the eligibility of the disks intended for use to create your VSAN.
vdq -q

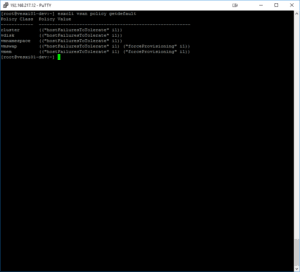
Next, enter the following command to get the current default VSAN policy.
esxcli vsan policy getdefault
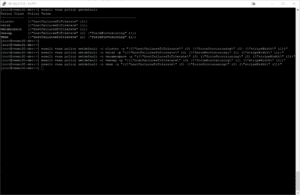
We will need to change the current policy by running the following commands.
esxcli vsan policy setdefault -c cluster -p "((\"hostFailuresToTolerate\" i0) (\"forceProvisioning\" i1) (\"stripeWidth\" i1))"
esxcli vsan policy setdefault -c vdisk -p "((\"hostFailuresToTolerate\" i0) (\"forceProvisioning\" i1) (\"stripeWidth\" i1))"
esxcli vsan policy setdefault -c vmnamespace -p "((\"hostFailuresToTolerate\" i0) (\"forceProvisioning\" i1) (\"stripeWidth\" i1))"
esxcli vsan policy setdefault -c vmswap -p "((\"hostFailuresToTolerate\" i0) (\"forceProvisioning\" i1) (\"stripeWidth\" i1))"
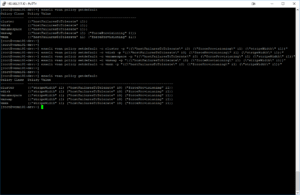
Run this command again to confirm that the policy has been changed.
esxcli vsan policy getdefault
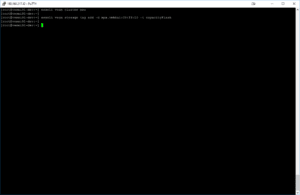
Run the following command to create a new VSAN cluster
esxcli vsan cluster new
Now, since my disks are all SSD, I am creating an All-Flash VSAN configuration. I need to run the following command to tag the capacity SSD as the data disk. The “-d” represents the “capacity disk” and you need to specify the identifier of the disk to tag. You can simply copy the identifier number directly from the ESXi hosts storage devices section in Web Client/C# Client, or from the SSH session where we ran the “vdq -q” command.
Note – If you are deploying a Hybrid VSAN, this command is not needed so you can skip to the next command to add the “cache & capacity” disks to your VSAN.
esxcli vsan storage tag add -d <disk identifier> -t capacityFlash
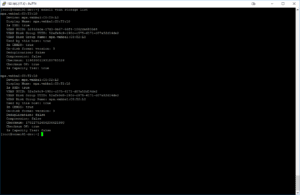
If you’d like to confirm that the disk has been tagged for “capacityFlash” simply run the “vdq -q” command again and check the disk.
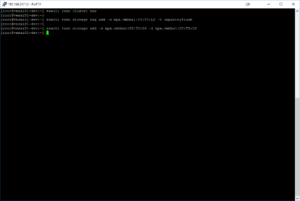
Next, run the following command to add both your disks (cache & capacity) to your VSAN storage volume. The “-s” represents the SSD “cache disk”, and the “-d” represents the “capacity disk”. Be sure to enter the correct identifier number for the respective disks.
esxcli vsan storage add -s <disk identifier> -d <disk identifier>
Run the following command to show the VSAN cluster info.
esxcli vsan cluster get
Run the following command to list the VSAN storage
esxcli vsan storage list
Congratulations, if everything has been followed correctly, you should now have created a single-node VSAN datastore!
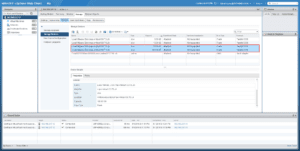
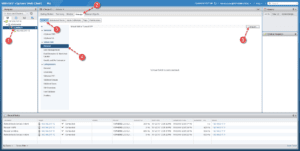
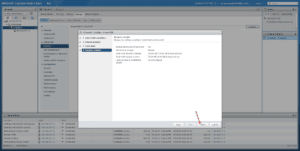
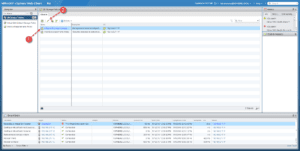
But we are not quite finished just yet. Even though I can see the VSAN datastore, I still want to officially enable VSAN on the cluster in vCenter. Do the following…
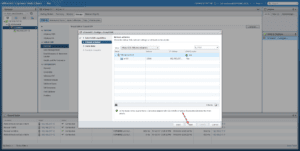
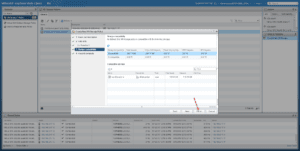
In my environment, I have an extra disk in my host, but I do not want to claim this as part of my VSAN. So, from the drop-down menu, I selected “Do not claim” and hit Next then Finish.
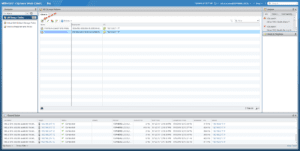
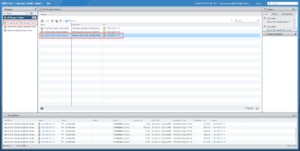
Now I can see that VSAN is “Turned On” and can see the disks that are associated with the Disk Group.
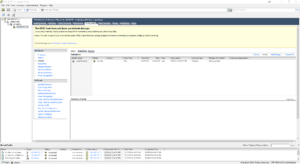
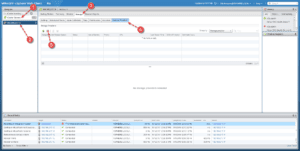
But, there’s still a bit more to be done for me to be able to provision VMs on this datastore. I need to edit the VSAN VM Storage Policy. Personally, I prefer to leave the default policies intact and instead create a new policy for my single-node datastore. I will show both editings of the default policy, for those who do not want to bother with creating a new policy, as well as creating a new policy. First, let’s check the VASA storage provider and ensure it has been synchronized so that we can edit/create our VSAN Storage policy.
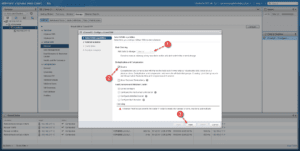
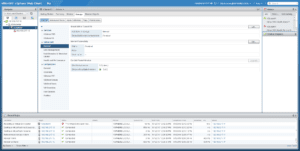
Editing Virtual SAN Default Storage Policy
Here we need to simply change:
- Number of failures to tolerate = 0 (Default is 1)
- Force provisioning = Yes (Default is No)
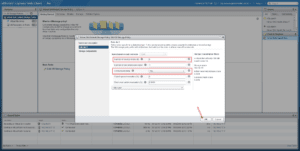
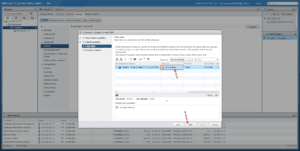
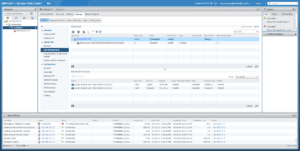
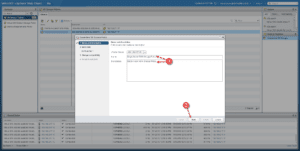
Creating a new Virtual SAN Storage Policy
Give it a Name and a Description then hit Next.
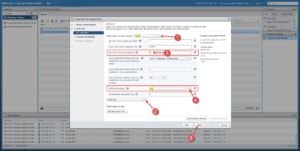
Select VSAN from the “Rules based on data services” drop-down, then add all the rules from the drop-down and configure the same settings mentioned above, then hit Next and Finish.
- Number of failures to tolerate = 0 (Default is 1)
- Force provisioning = Yes (Default is No)
And, there you have it! A fully functional Single-Node VSAN to provision VMs on. You still have to add a VSAN license, but that will not be covered here as you should already be familiar with the licensing process.
The Finishing touches
The following optimizations commands are optional but highly recommended for better performance and stability in your VSAN environment.
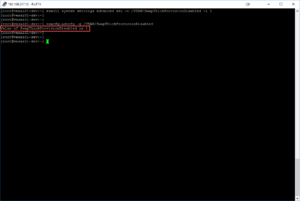
Since this is a homelab, the disks I used may not be on the official VMware HCL and can potentially impact the performance of the lab environment. Corman Hogan wrote a great blog and included a tip on how to disable VSAN device monitoring. Open an SSH session to your host again and run the following command.
esxcli system settings advanced set -o /LSOM/VSANDeviceMonitoring -i 0
To confirm that the command was successful, run the following command. It should return a value of “0” as the default value is “1”.
esxcfg-advcfg -g /LSOM/VSANDeviceMonitoring

Cormac Hogan also wrote another great post about the new “Sparse VM Swap Object”. ESXi 6.0 Update 2 (aka 6.2) brings a new setting in VSAN 6.2 which allows VSAN to provision a VM swap object as thin instead of thick, where thick has historically been the default. So if you’d like to disable thick provisioning and use thin, run the following command.
esxcli system settings advanced set -o /VSAN/SwapThickProvisionDisabled -i 1
To confirm, run the following command. It should return a value of “1” as the default value is “0”.
esxcfg-advcfg -g /VSAN/SwapThickProvisionDisabled
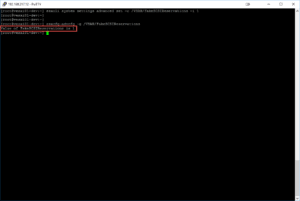
And last, but definitely not least, if you intend on running any Nested ESXi VMs on your newly created VSAN, be sure to run the following command to prevent any errors when trying to create SCSI disks for your ESXi VM. This will enable an advanced ESXi setting that will “fake” SCSI reservations. William Lam has a nice post about this here.
esxcli system settings advanced set -o /VSAN/FakeSCSIReservations -i 1
And to confirm it took, run the following command. It should return a value of “1” as the default value is “0”.
esxcfg-advcfg -g /VSAN/FakeSCSIReservations
That’s all folks! I hope that you’ve found this post to be of use to you and I hope you come back for more content. Feel free to comment, share, and subscribe!
Giving credit where it is due, shout out to William Lam and Cormac Hogan!
-virtualex-
Historical Comments
Thanks for the reply.
I was able to figure it out and got it working.
On to trying to Register a vCenter Appliance.
@dannyestevez:disqus – it seems like you are on the right track but missing part of the command. Just like the error states, you need to add the -d (or –disks) parameter. When I look at what you entered, you only added the -s for the “cache disk”. Even though both disks are SSD’s, 1 needs to be used as “cache” and the other needs to be used for “data” hence the -d parameter needs to be specified.
Example:
esxcli vsan storage add -s -d
Your correct statement/syntax should be as follows:
esxcli vsan storage add -s t10.NVMe____Samsung_SSD_950_PRO_512GB_______________4C8AB06158382500 -d t10.ATA_____Samsung_SSD_850_EVO_1TB_________________S2RENX0HB08493A_____
Try this and let me know of you are successful, then you can continue following the how-to.
I am trying to create a vSan using only SSD drives but am running into some issues.
I have 2 Intel NUC’s.
Here are the specs:
2 – Intel NUC i5 6th Gen
32GB Memory in each
2 – Samsung NVMe M.2 512GB
2 – Samsung 850 EVO 1TB SSD
2 – SanDisk 16GB Ultra Fit USB
ESXi 6.5
I was able to install ESXi 6.5 on the USB drives and the servers boot up with no issues.
When I attempt to create the vSan this is what I am seeing:
vdq -q command:
[root@ESXi-1:~] vdq -q
[
{
“Name” : “t10.SanDisk00Ultra_Fit000000000000004C530001151112120280”,
“VSANUUID” : “”,
“State” : “Ineligible for use by VSAN”,
“Reason” : “Has partitions”,
“IsSSD” : “0”,
“IsCapacityFlash”: “0”,
“IsPDL” : “0”,
},
{
“Name” : “t10.ATA_____Samsung_SSD_850_EVO_1TB_________________S2RENX0HB08493A_____”,
“VSANUUID” : “”,
“State” : “Eligible for use by VSAN”,
“Reason” : “None”,
“IsSSD” : “1”,
“IsCapacityFlash”: “1”,
“IsPDL” : “0”,
},
{
“Name” : “t10.NVMe____Samsung_SSD_950_PRO_512GB_______________4C8AB06158382500”,
“VSANUUID” : “”,
“State” : “Eligible for use by VSAN”,
“Reason” : “None”,
“IsSSD” : “1”,
“IsCapacityFlash”: “1”,
“IsPDL” : “0”,
},
When attempting to add the flash drives to the vSan Datastore:
[root@ESXi-1:~] esxcli vsan storage add -s t10.NVMe____Samsung_SSD_950_PRO_512GB
_______________4C8AB06158382500
Error: Missing required parameter -d|–disks
Usage: esxcli vsan storage add [cmd options]
Description:
add Add physical disk for VSAN usage.
Cmd options:
-d|–disks=[ … ]
Specify hdds to add for use by VSAN. Expects an empty
disk with no partitions in which case the disk will be
partitioned and formatted. Otherwise this operation
will fail. The command expects the device name for the
disk to be provided, e.g.: mpx.vmhba2:C0:T1:L0.
Multiple hdds can be provided using format -d hdd1 -d
hdd2 -d hdd3 (required)
-s|–ssd= Specify ssd to add for use by VSAN. Expects an empty
ssd with no partitions in which case the ssd will be
partitioned and formatted. Otherwise this operation
will fail. If an ssd which is already added for use by
VSAN, is provided along with ‘-d/–disks’, then the
disk mentioned with ‘-d’ will be added to the existing
diskgroup created under this ssd and in which case,
the ssd won’t be partitioned and formatted. The
command expects the device name for the disk to be
provided, e.g.: mpx.vmhba2:C0:T1:L0 (required)
Not sure what I am doing wrong.
Let me know if you require more information.
Any help will be greatly appreciated.
Thanks,
Danny
I am trying to create a vSan datastore using all Flash drives.
I have 2 Intel Nuc’s i5 6th Gen.
I have the following drives installed locally on each:
1 Samsung SSD 850EVO 1TB
1 Samsung NVMe SSD 950 512GB M.2
When I run “vdq -q” the following names are displayed for my drives:
t10.ATA_____Samsung_SSD_850_EVO_1TB_________________S2RENX0HB08493A_____
t10.NVMe____Samsung_SSD_950_PRO_512GB_______________4C8AB06158382500
When I run the following command: “esxcli vsan storage add -s t10.NVMe____Samsung_SSD_950_PRO_512GB
_______________4C8AB06158382500”
I get the following message:
“Error: Missing required parameter -d|–disks
Usage: esxcli vsan storage add [cmd options]”
What am I doing wrong?
Any help is greatly appreciated.
Thanks,
Danny
Hi,
i have this problem when i add the 2 disks to vsan:
COMMAND: esxcli vsan storage add -s t10.ATA_____XXXXX -d t10.ATA_____YYYY
This is error:
Unable to add device: Disk with VSAN uuid 52c716ea-…….. failed to appear in CMMDS
Anyone have the same problem?
thank you