VMware Cloud Foundation 9.1 Upgrade - Part 6: Post-Upgrade Housekeeping and the Workload Domain
With the management domain upgraded in Parts 1 to 5, this final part covers the cleanup tasks that round out the upgrade, and then the workload domain. (As always, the series overview has the environment and prerequisites if you need them.)
Post-upgrade housekeeping
Most of these can be scheduled for a quiet maintenance window instead of done immediately.
vSphere Distributed Switch
Broadcom’s upgrade table lists the vSphere Distributed Switch upgrade right after the NSX finalize, with the ESX and vCenter upgrades as the prerequisite (docs).
- On the vSphere Client Home page, click Networking and navigate to the distributed switch.
- Right-click the switch and select Upgrade → Upgrade Distributed Switch.
- Pick the version to move to and click Next.
- After the compatibility check, review the selections and click Finish.
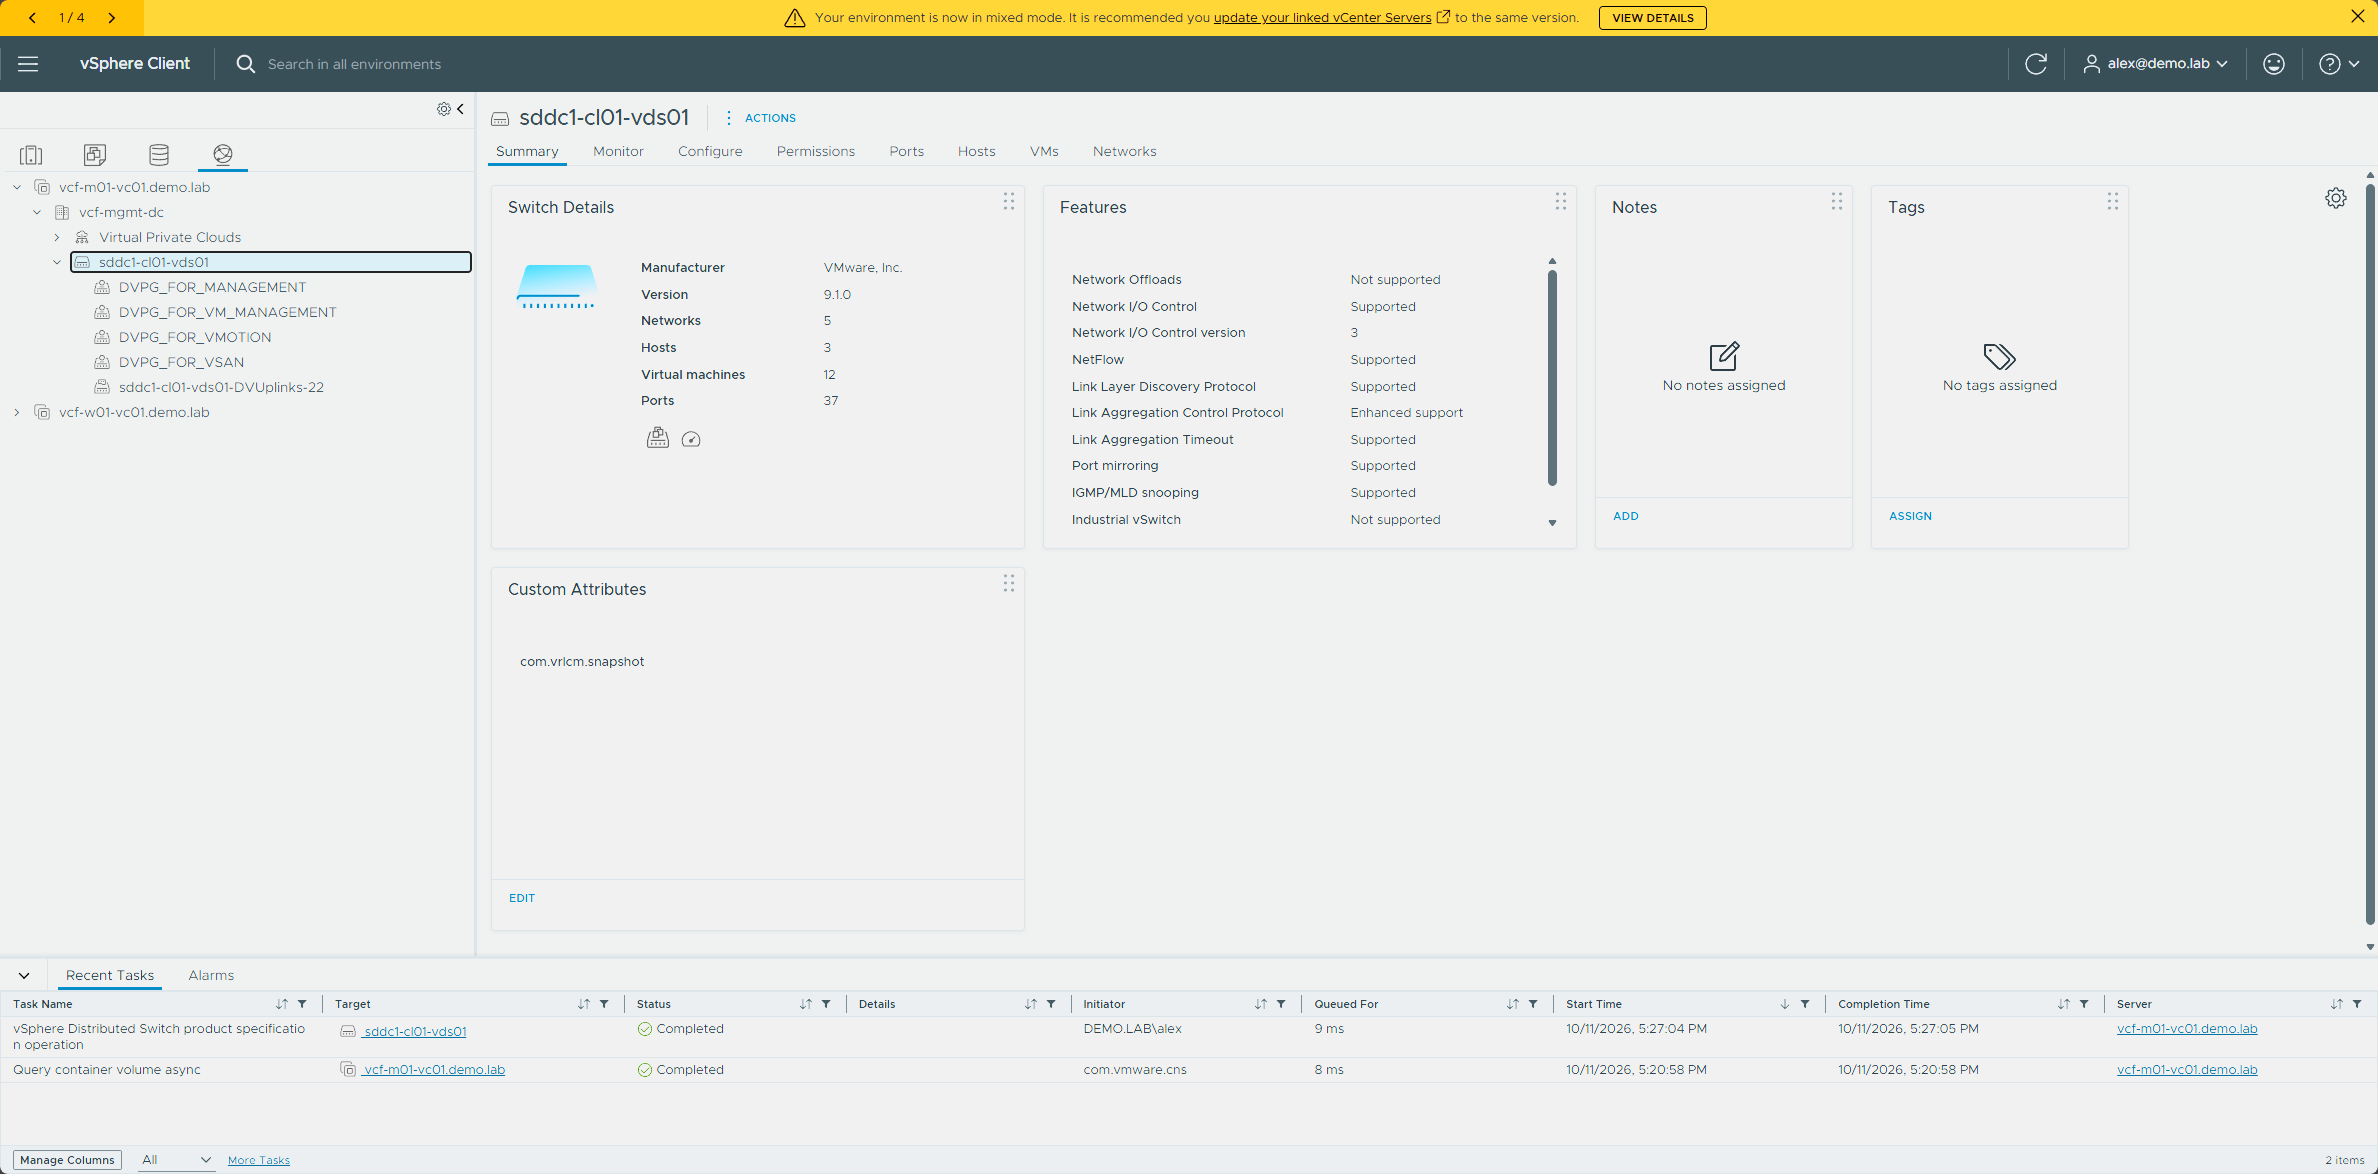
The switch was on version 9.0.0, and I picked 9.1.0 and later. Afterward, sddc1-cl01-vds01 showed version 9.1.0 and the task completed.
VMware Tools
The Tools upgrade is optional, and I’m not walking through it step by step. Upgrading to the latest version isn’t always necessary, so evaluate whether your environment needs the new features (VMware Tools docs). You can upgrade it manually per VM, or configure your VMs to upgrade it automatically, and automatic upgrades for Windows guests are performed when you power off or restart the VM.
Tools comes before the VM compatibility bump, because the first step in upgrading a virtual machine is to upgrade VMware Tools (docs).
Virtual machine compatibility
This is the VM hardware version bump. It’s optional too, and I’m not walking through it either. You can do it from the vSphere Client, either manually or scheduled for the next reboot, or with vSphere Lifecycle Manager (docs).
vSAN on-disk format
The ESX and vCenter upgrades are the prerequisite for this one (docs).
Before starting, the disks should be healthy, no hosts in maintenance mode, and no resyncs running on the cluster.
- In the vSphere Client, navigate to the vSAN cluster.
- Open Configure → vSAN → Disk Management.
- Click Pre-Check Upgrade. It analyzes host, disk, network, and object status.
- With the pre-check clean, click Upgrade, then confirm.
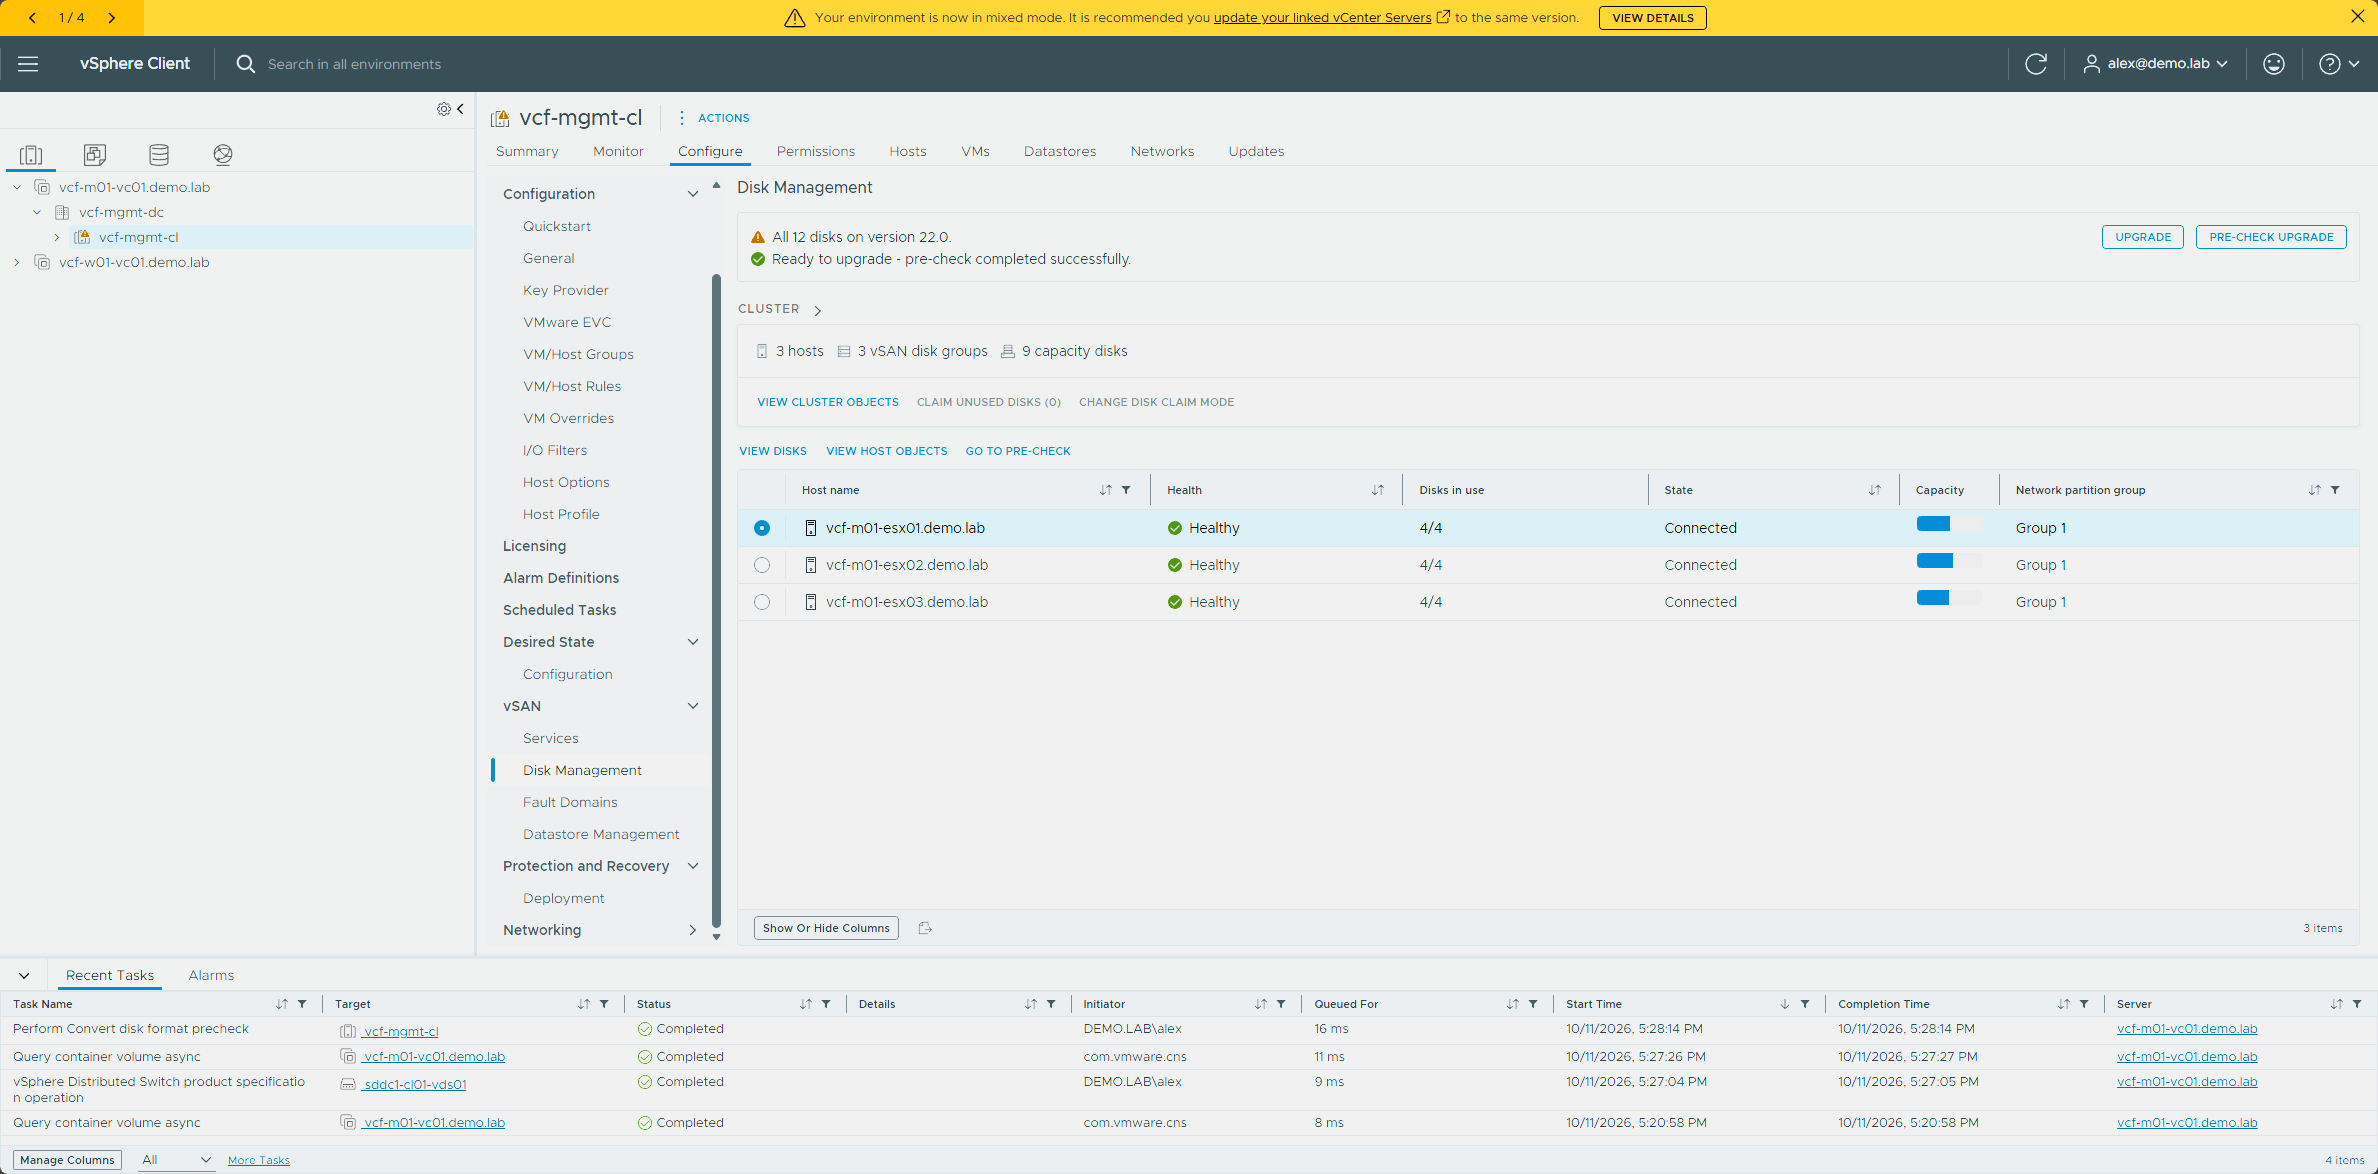
On vcf-mgmt-cl, the page said all 12 disks were on version 22.0 and to run the pre-check before upgrading. The pre-check came back with “Ready to upgrade - pre-check completed successfully.”
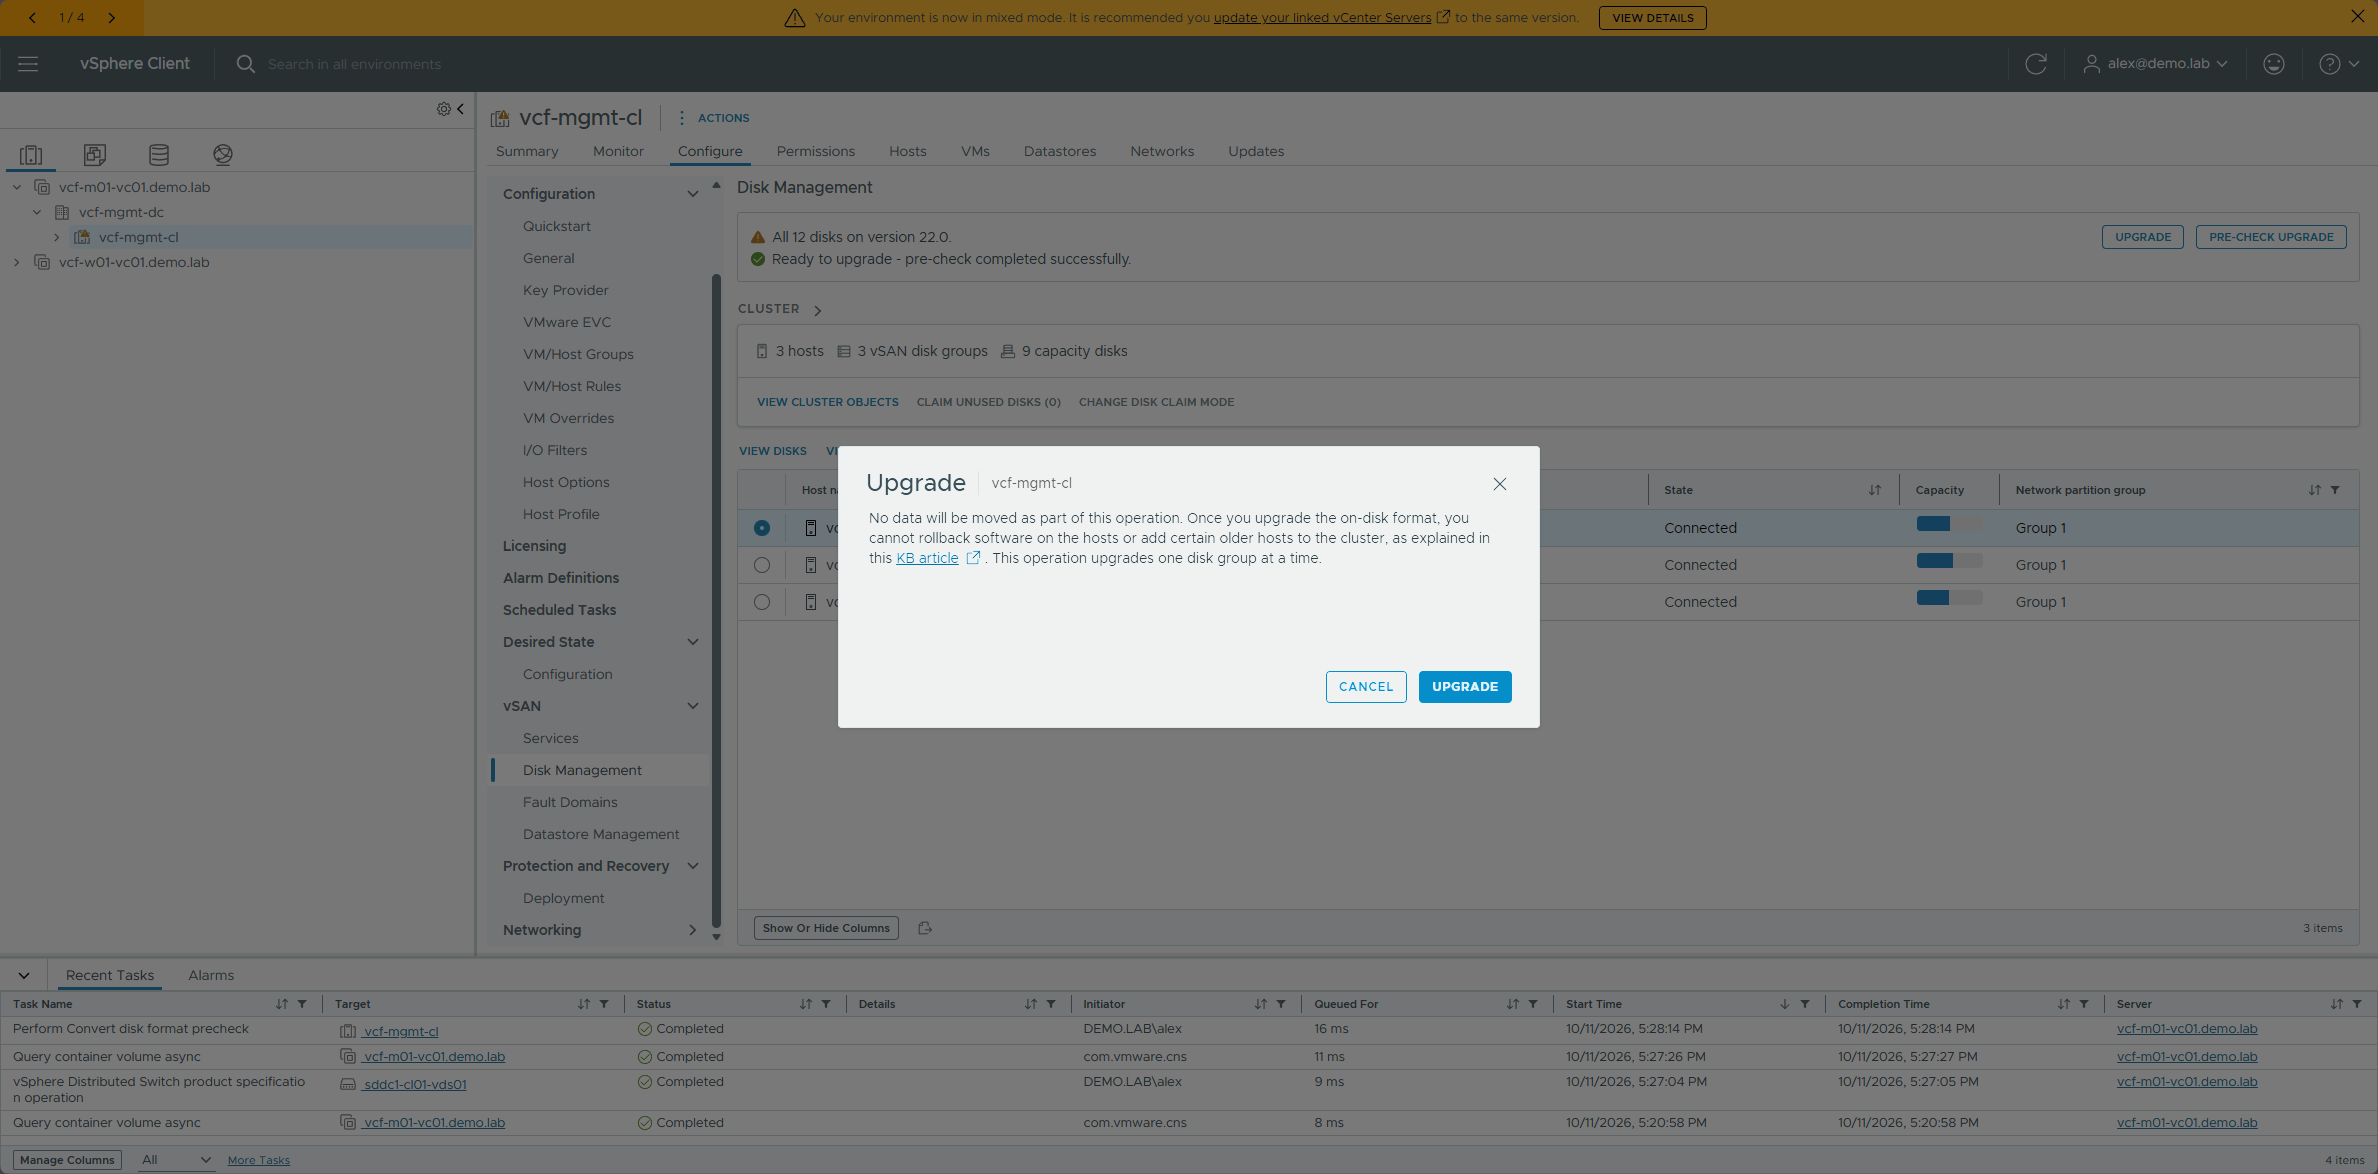
I clicked Upgrade.
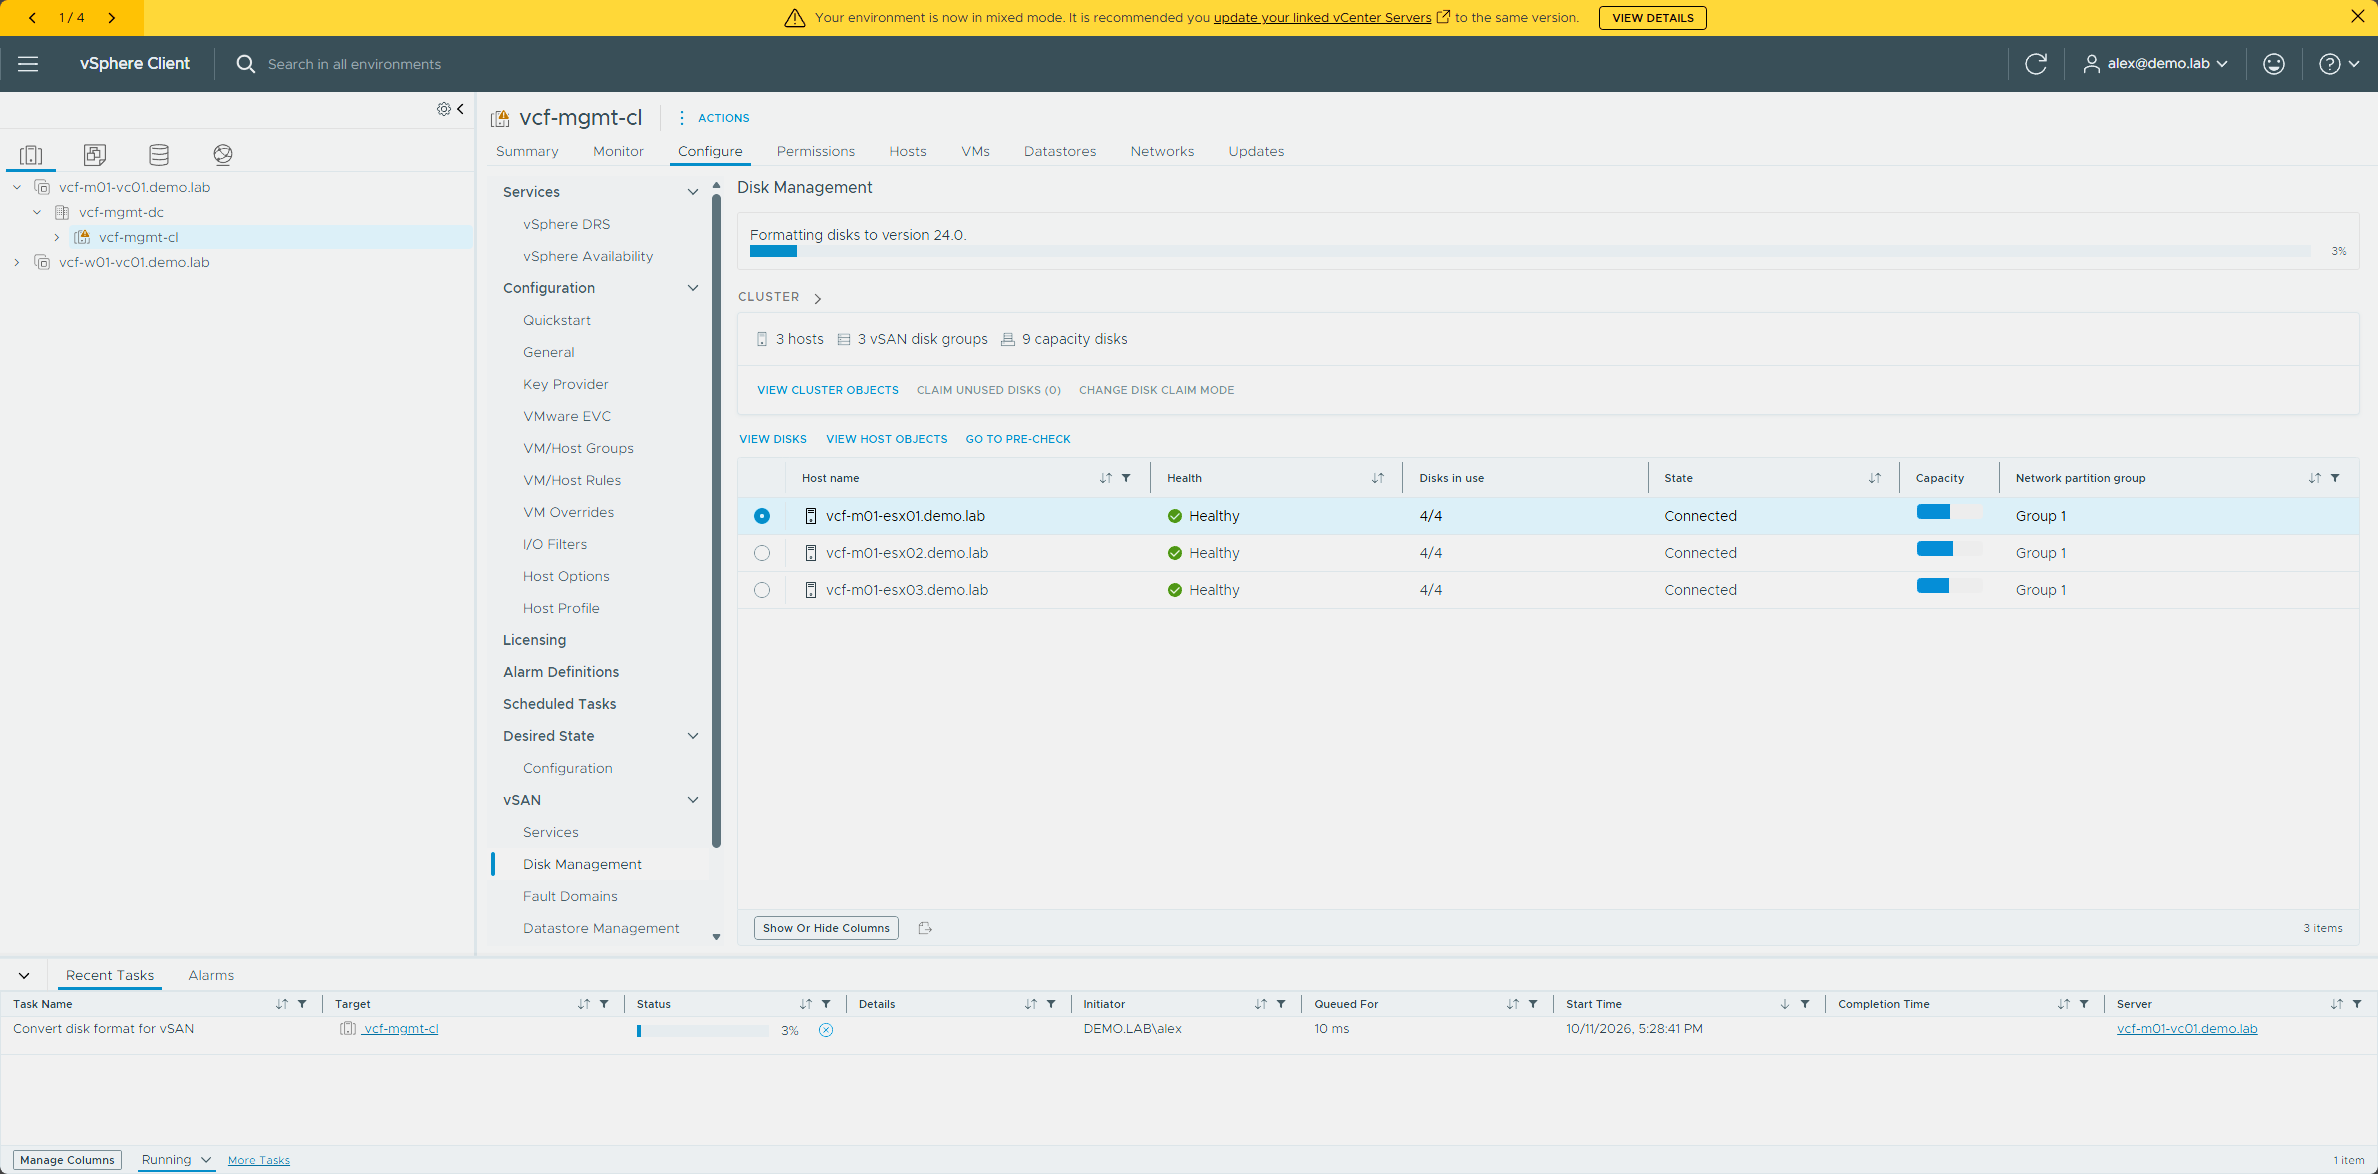
The page showed the disks formatting to version 24.0.
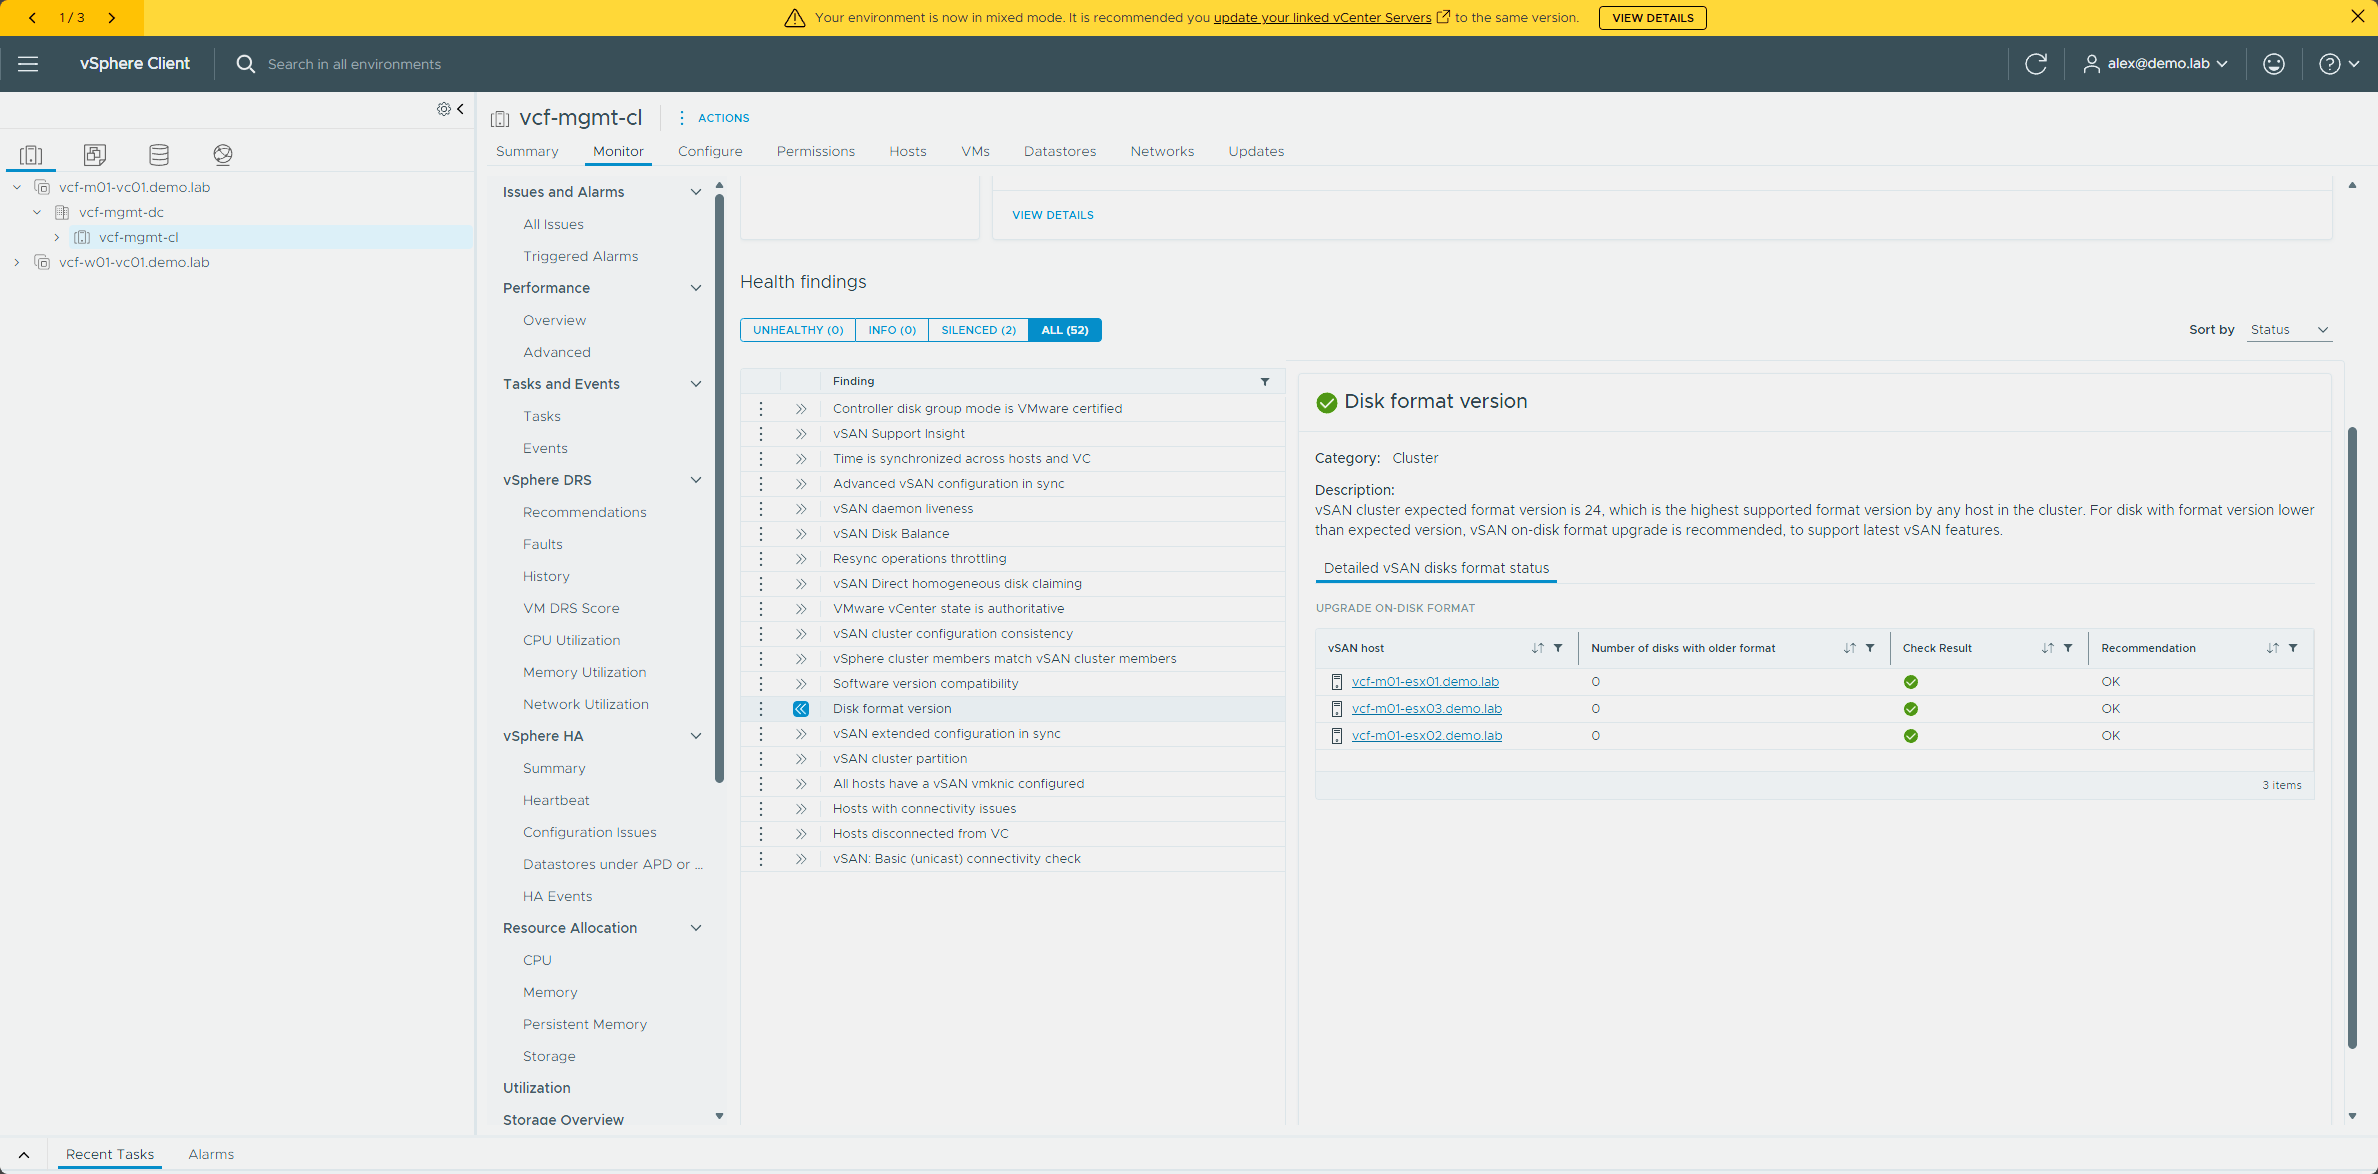
Afterward, Skyline Health showed no unhealthy findings, and Disk format version reported no disks with an older format on any of the three hosts.
vSAN file service
If you run vSAN File Service, it needs the on-disk format upgrade done first (docs). The upgrade is under the cluster’s Configure → vSAN → Services → File Service page (select Edit, then Check upgrade). If you don’t use File Service, skip this one.
Retire the leftovers
The upgrade powers things off but doesn’t delete them. My management cluster was short on space, so I deleted these sooner than I’d planned: the Fleet Management appliance at the end of Part 2, the old Automation node and the old Logs appliance at the end of Part 3, and the SDDC Manager snapshot at the end of Part 4. If you’d rather wait until the end, this is where they go. The newly installed components should also be backed up (workload domain upgrade).
Last, I applied the configuration upgrade I left pending in Part 4 (apply configuration upgrades):
- On the domain’s Upgrades tab, expand Available Configuration Upgrades and click Apply All.
- Follow the progress on the Apply Configuration Upgrade page. The upgrades disappear from the table once they’re applied.
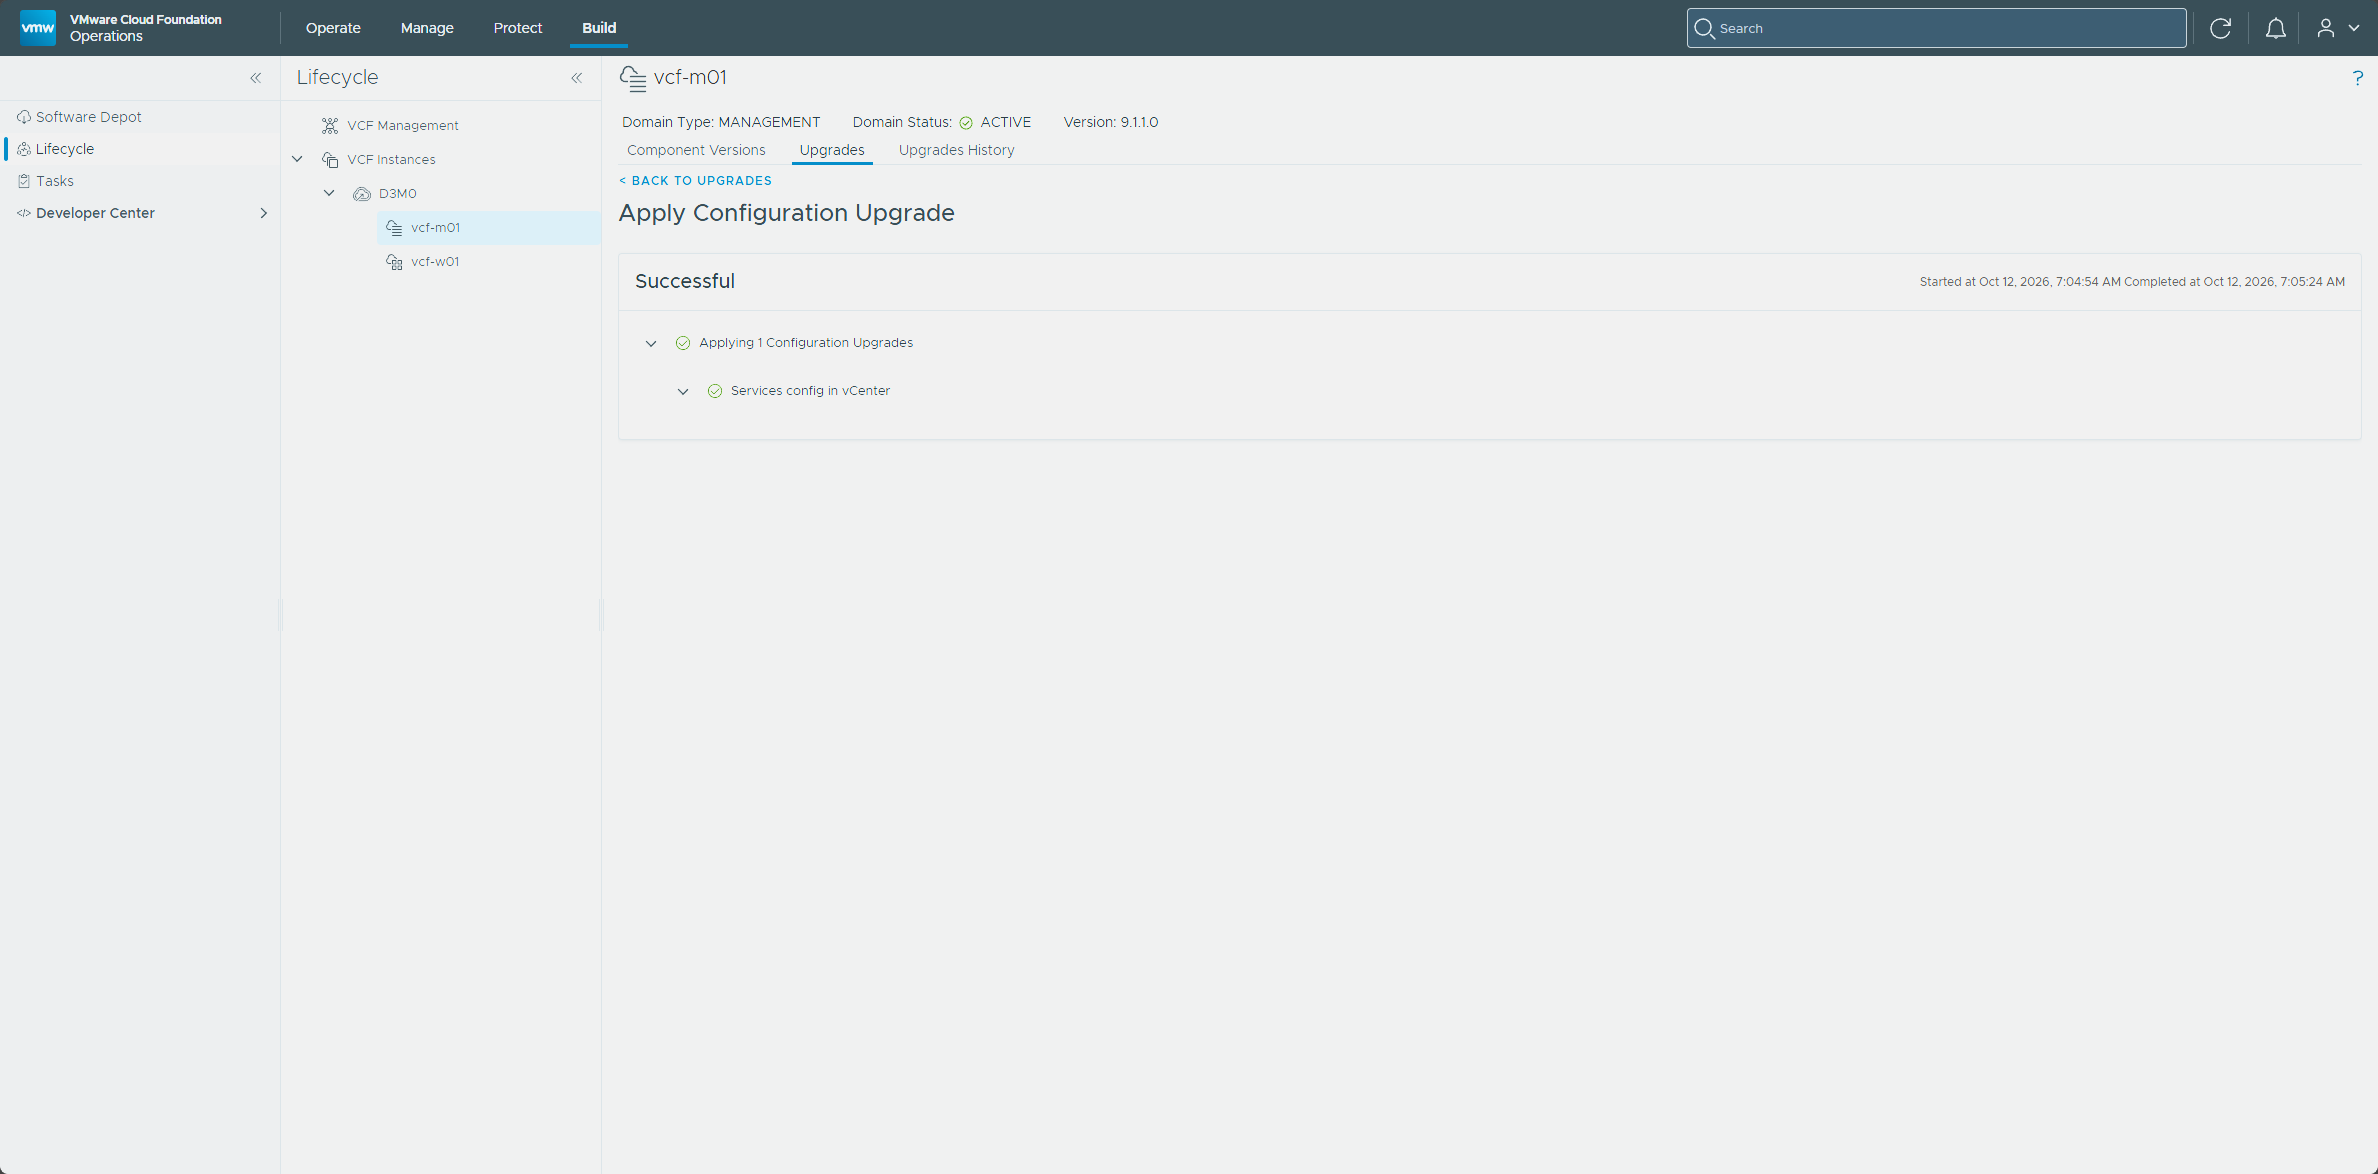
I clicked Apply All, and Services config in vCenter applied successfully in about 30 seconds.
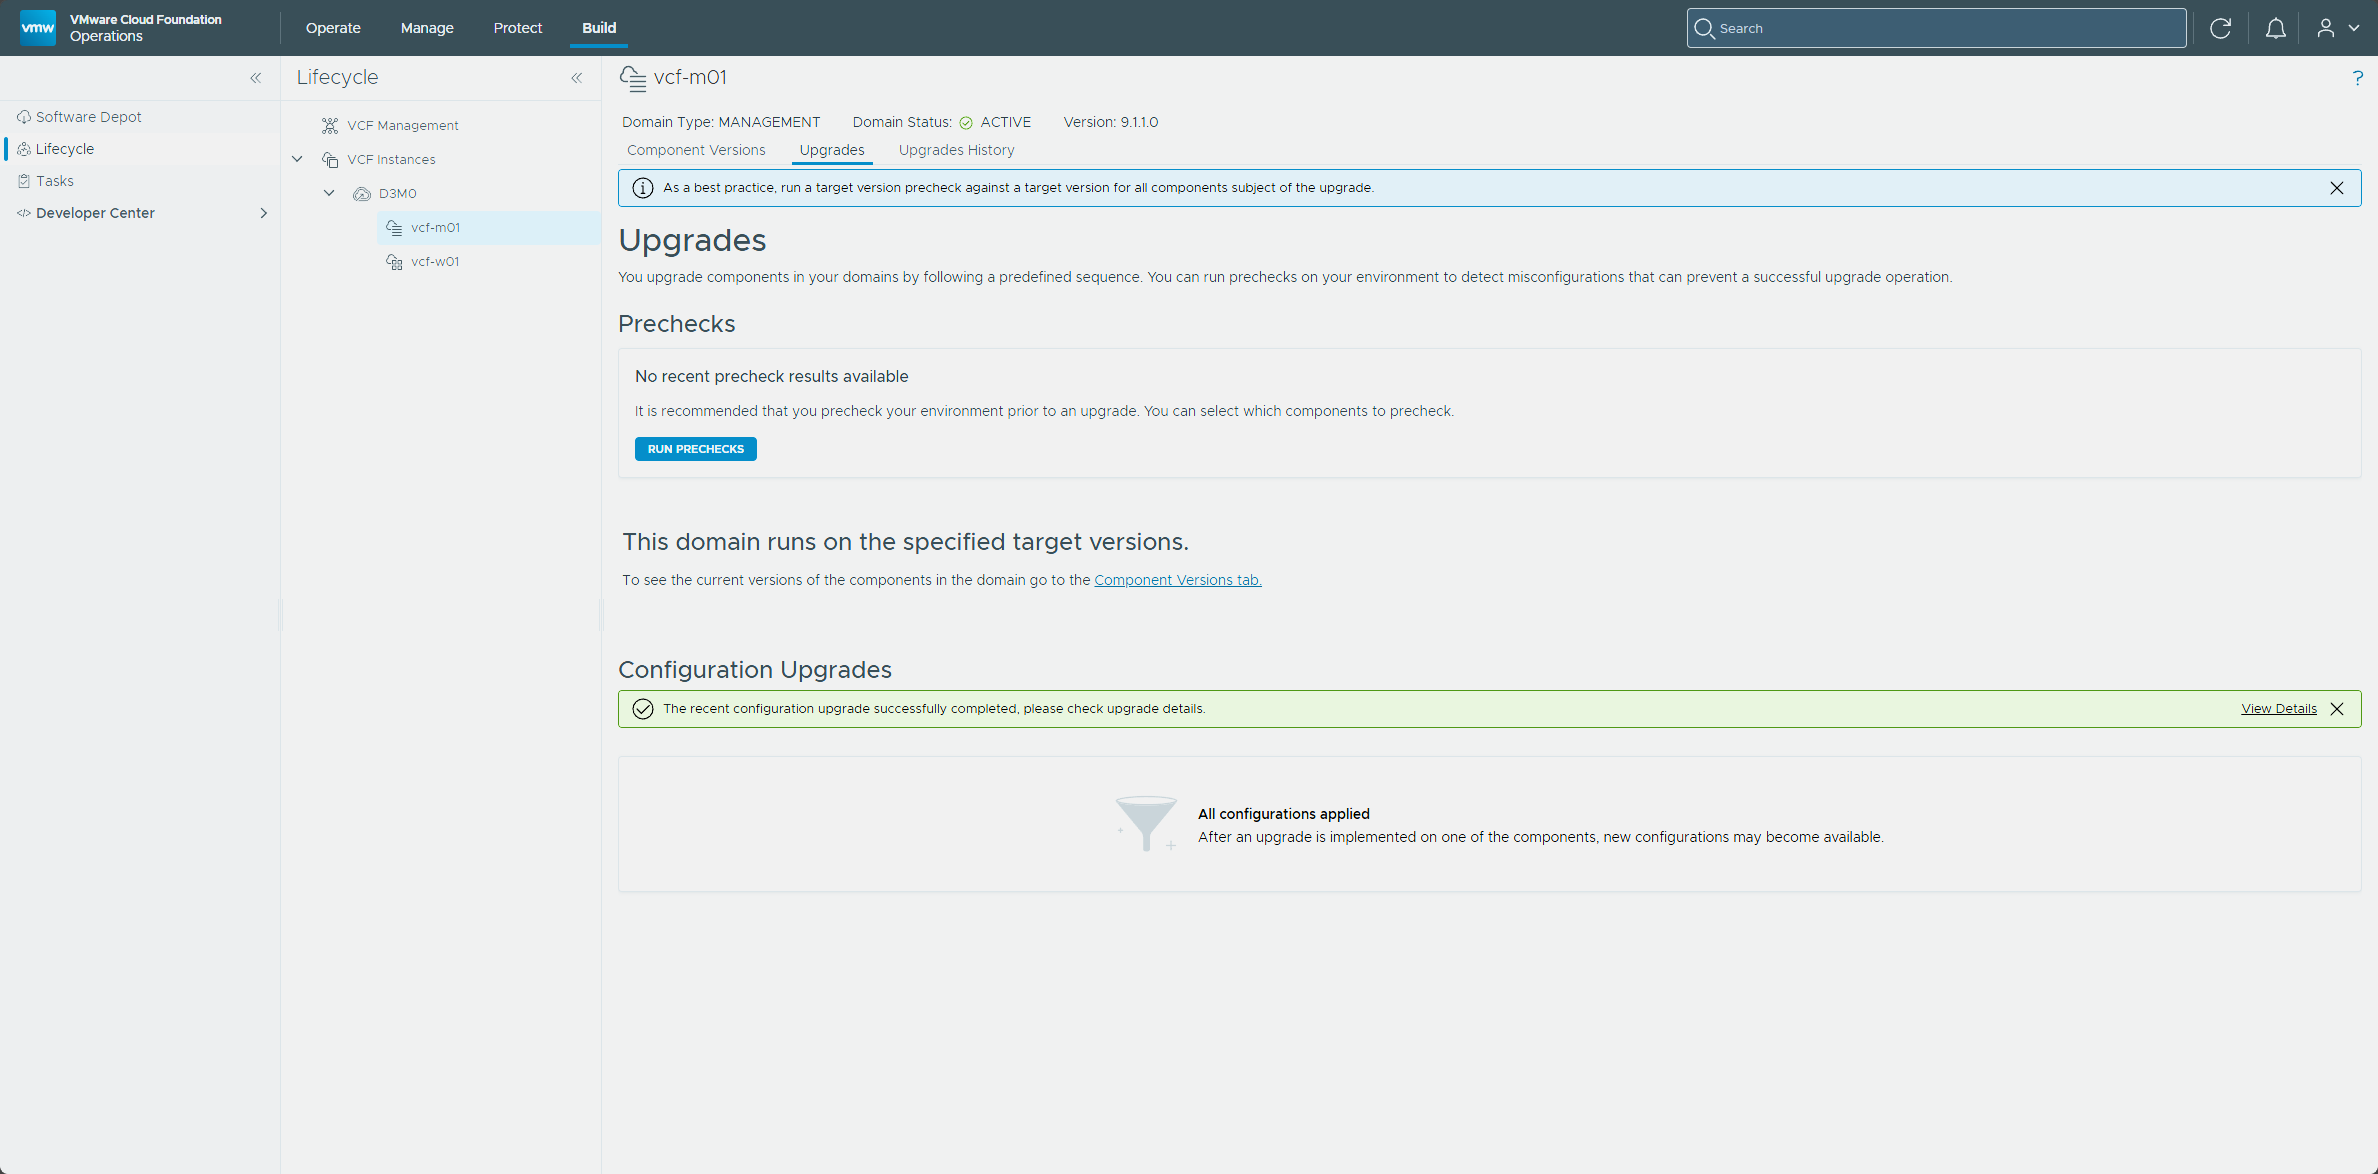
The Available Configuration Upgrades table then read “All configurations applied.”
The workload domain
Everything up to this point has been the management domain (vcf-m01). Upgrading the workload domains isn’t a mandatory part of the upgrade and can be done later as a Day-N procedure (upgrade docs), after the management domain is upgraded (workload domain upgrade docs).
The workload domain repeats the NSX, vCenter, and ESX stages I ran on the management domain, plus the Edge cluster upgrade, since the workload domain is the one in my lab with an Edge cluster.
Plan the upgrade
The workload domain needs its own upgrade plan before the component tiles do anything, same as the management domain in Part 4.
- Go to Build → Lifecycle, expand VCF Instances, and select
vcf-w01. - On the Upgrades tab, click Plan Domain Upgrade.
- Choose the target version, 9.1.1.0, and review the component versions on the Customize Target Version page.
- Choose the vCenter and NSX upgrade option, Sequential.
- Review the Plan Overview and submit the plan.
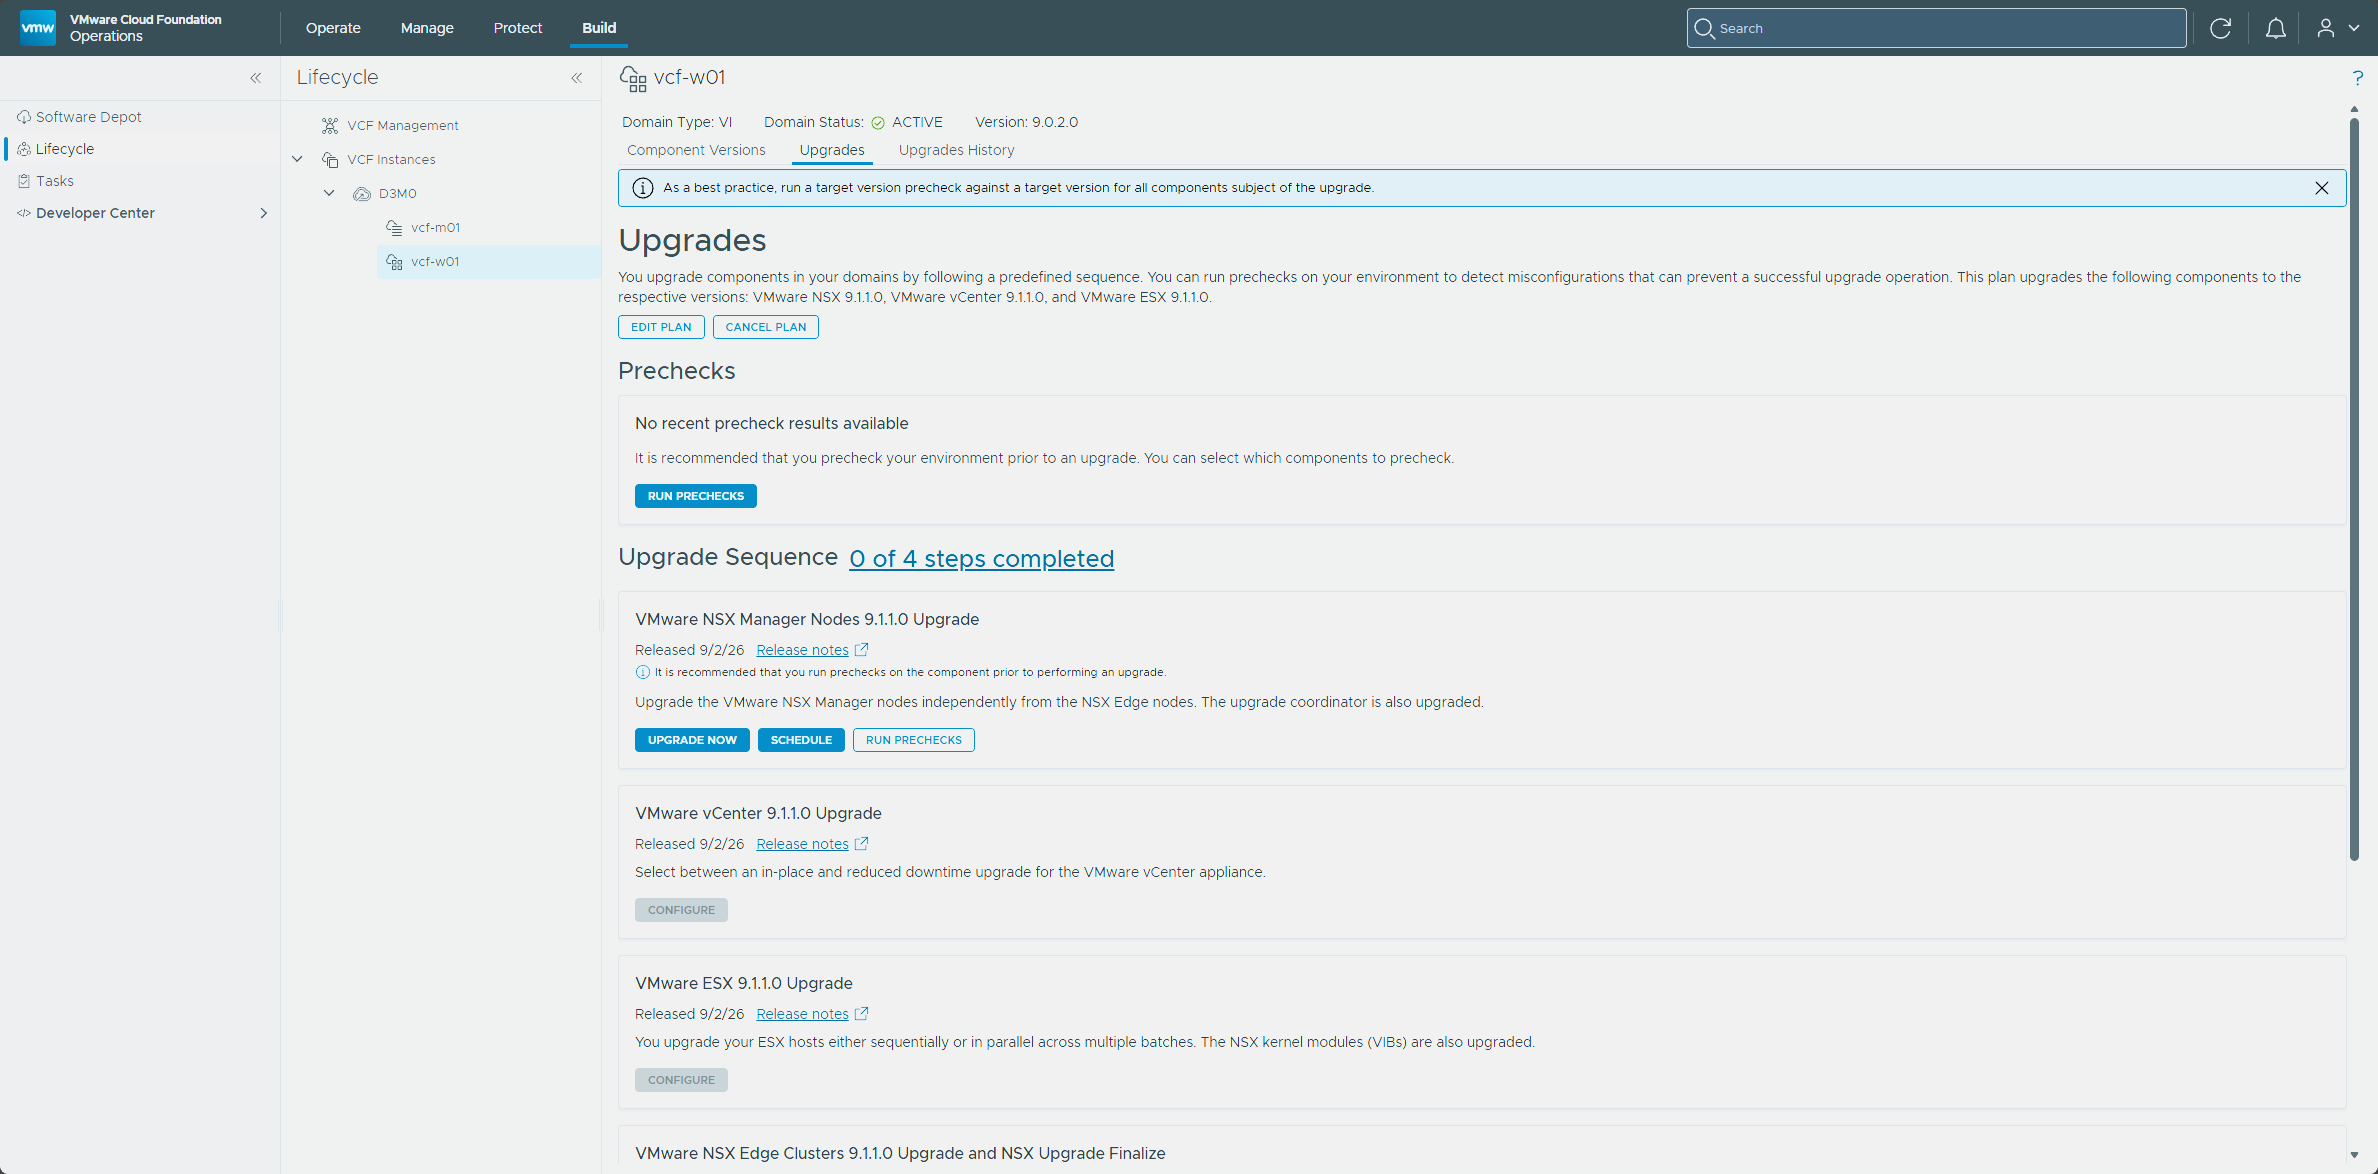
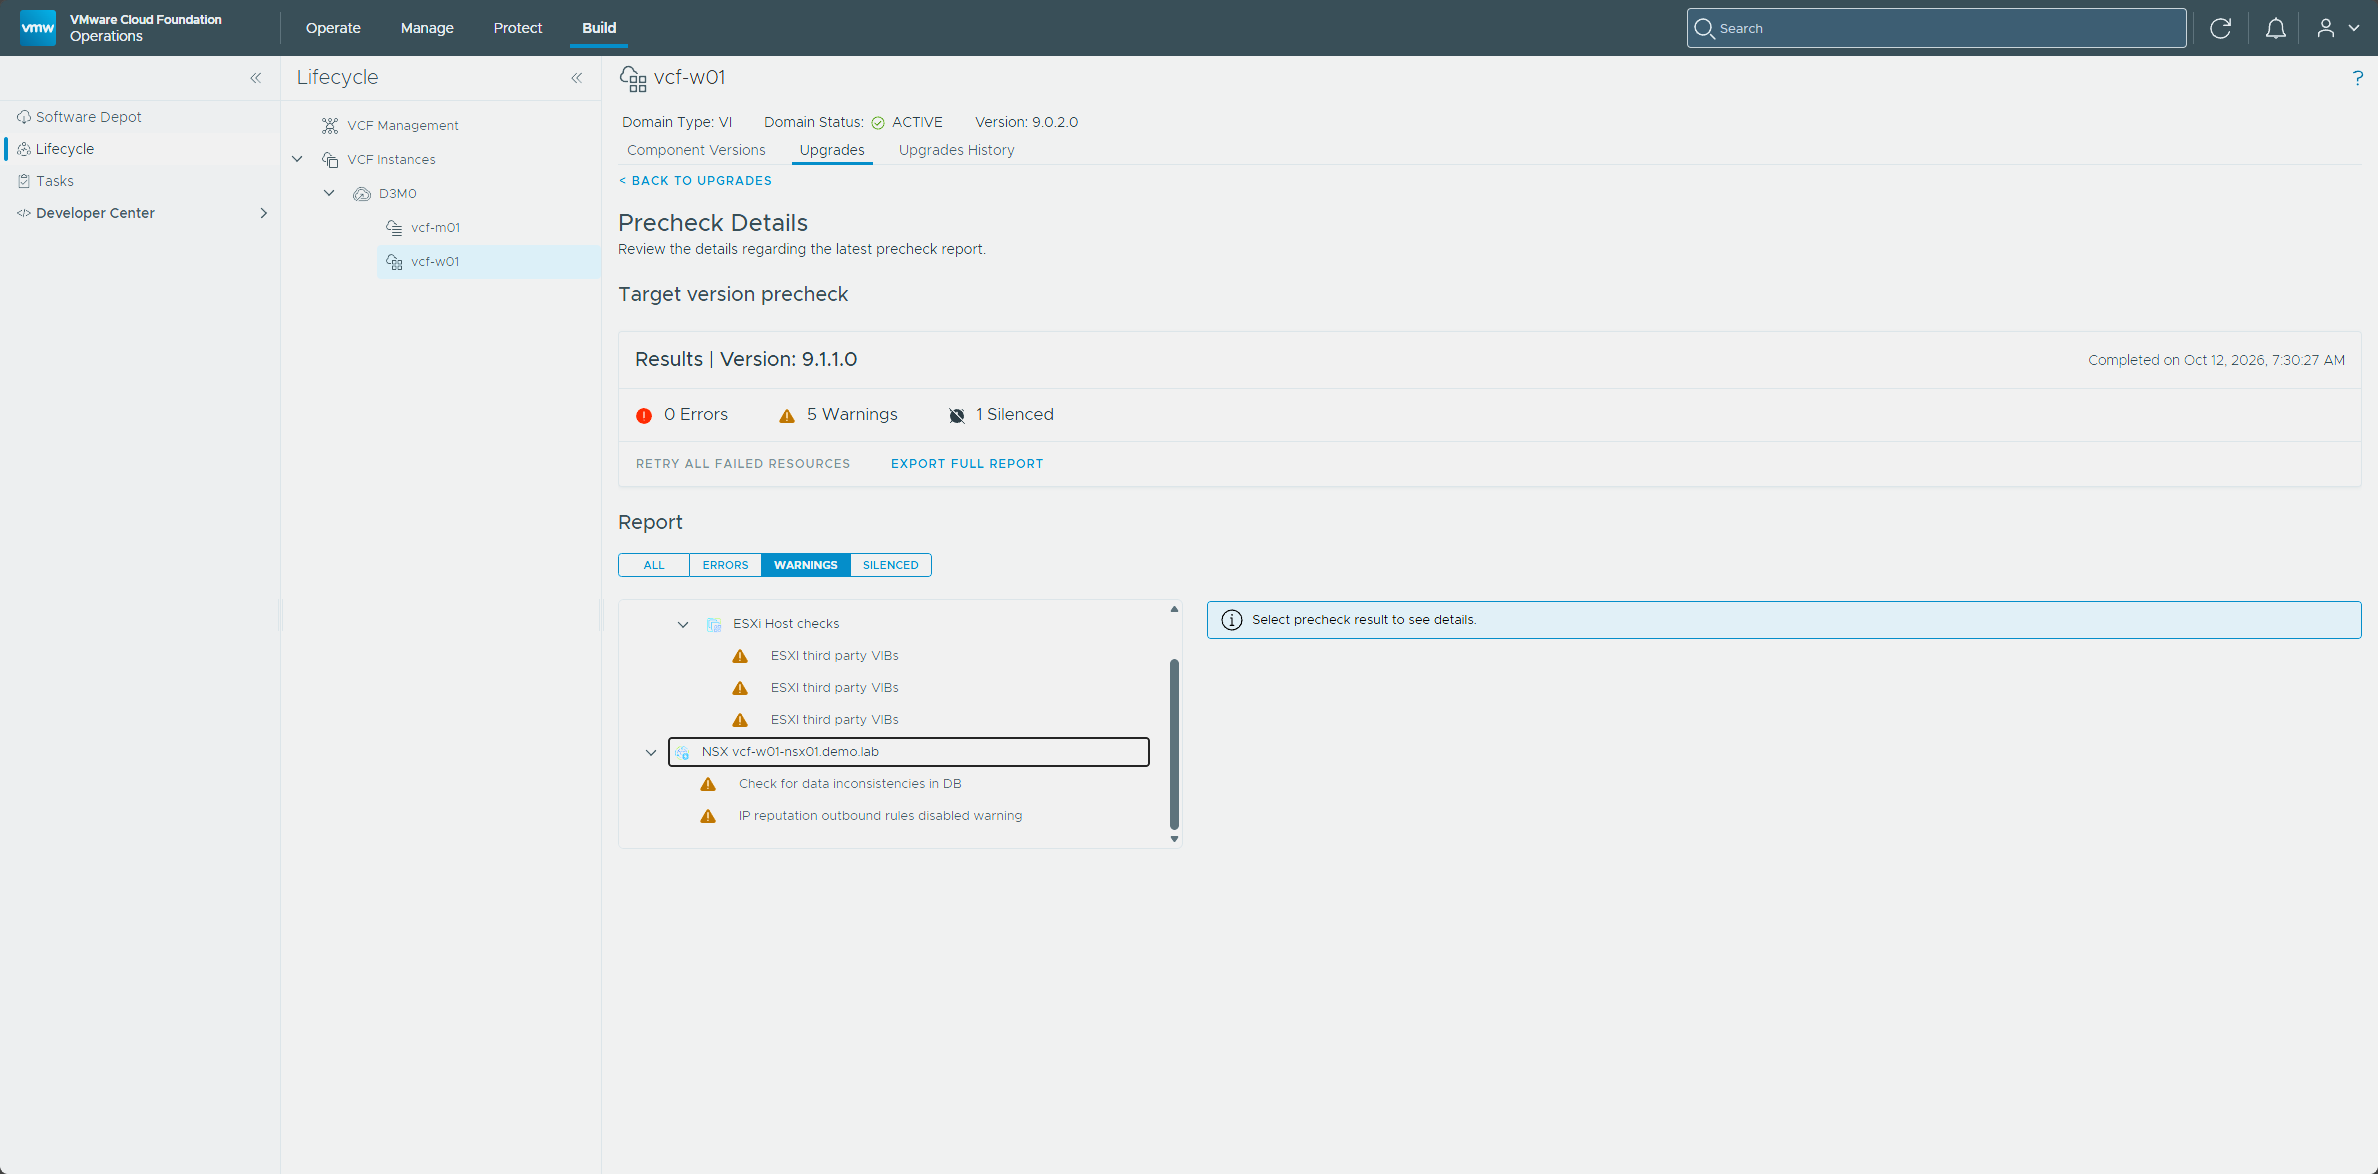
I ran the prechecks next, from the Run Prechecks button on the plan, against the workload domain’s vCenter, NSX, and the vcf-wld-cl cluster. The result came back with 0 errors, 5 warnings, and 1 silenced item. Three of the warnings were the ESXi third party VIB warning for William Lam’s mock hardware VIB, the same one I saw in Part 4. The other two were the same two NSX warnings as in Part 4, on vcf-w01-nsx01: Check for data inconsistencies in DB and IP reputation outbound rules disabled warning. I left all five as they were.
Upgrading NSX Manager
The workload domain’s NSX Manager node is vcf-w01-nsx01.
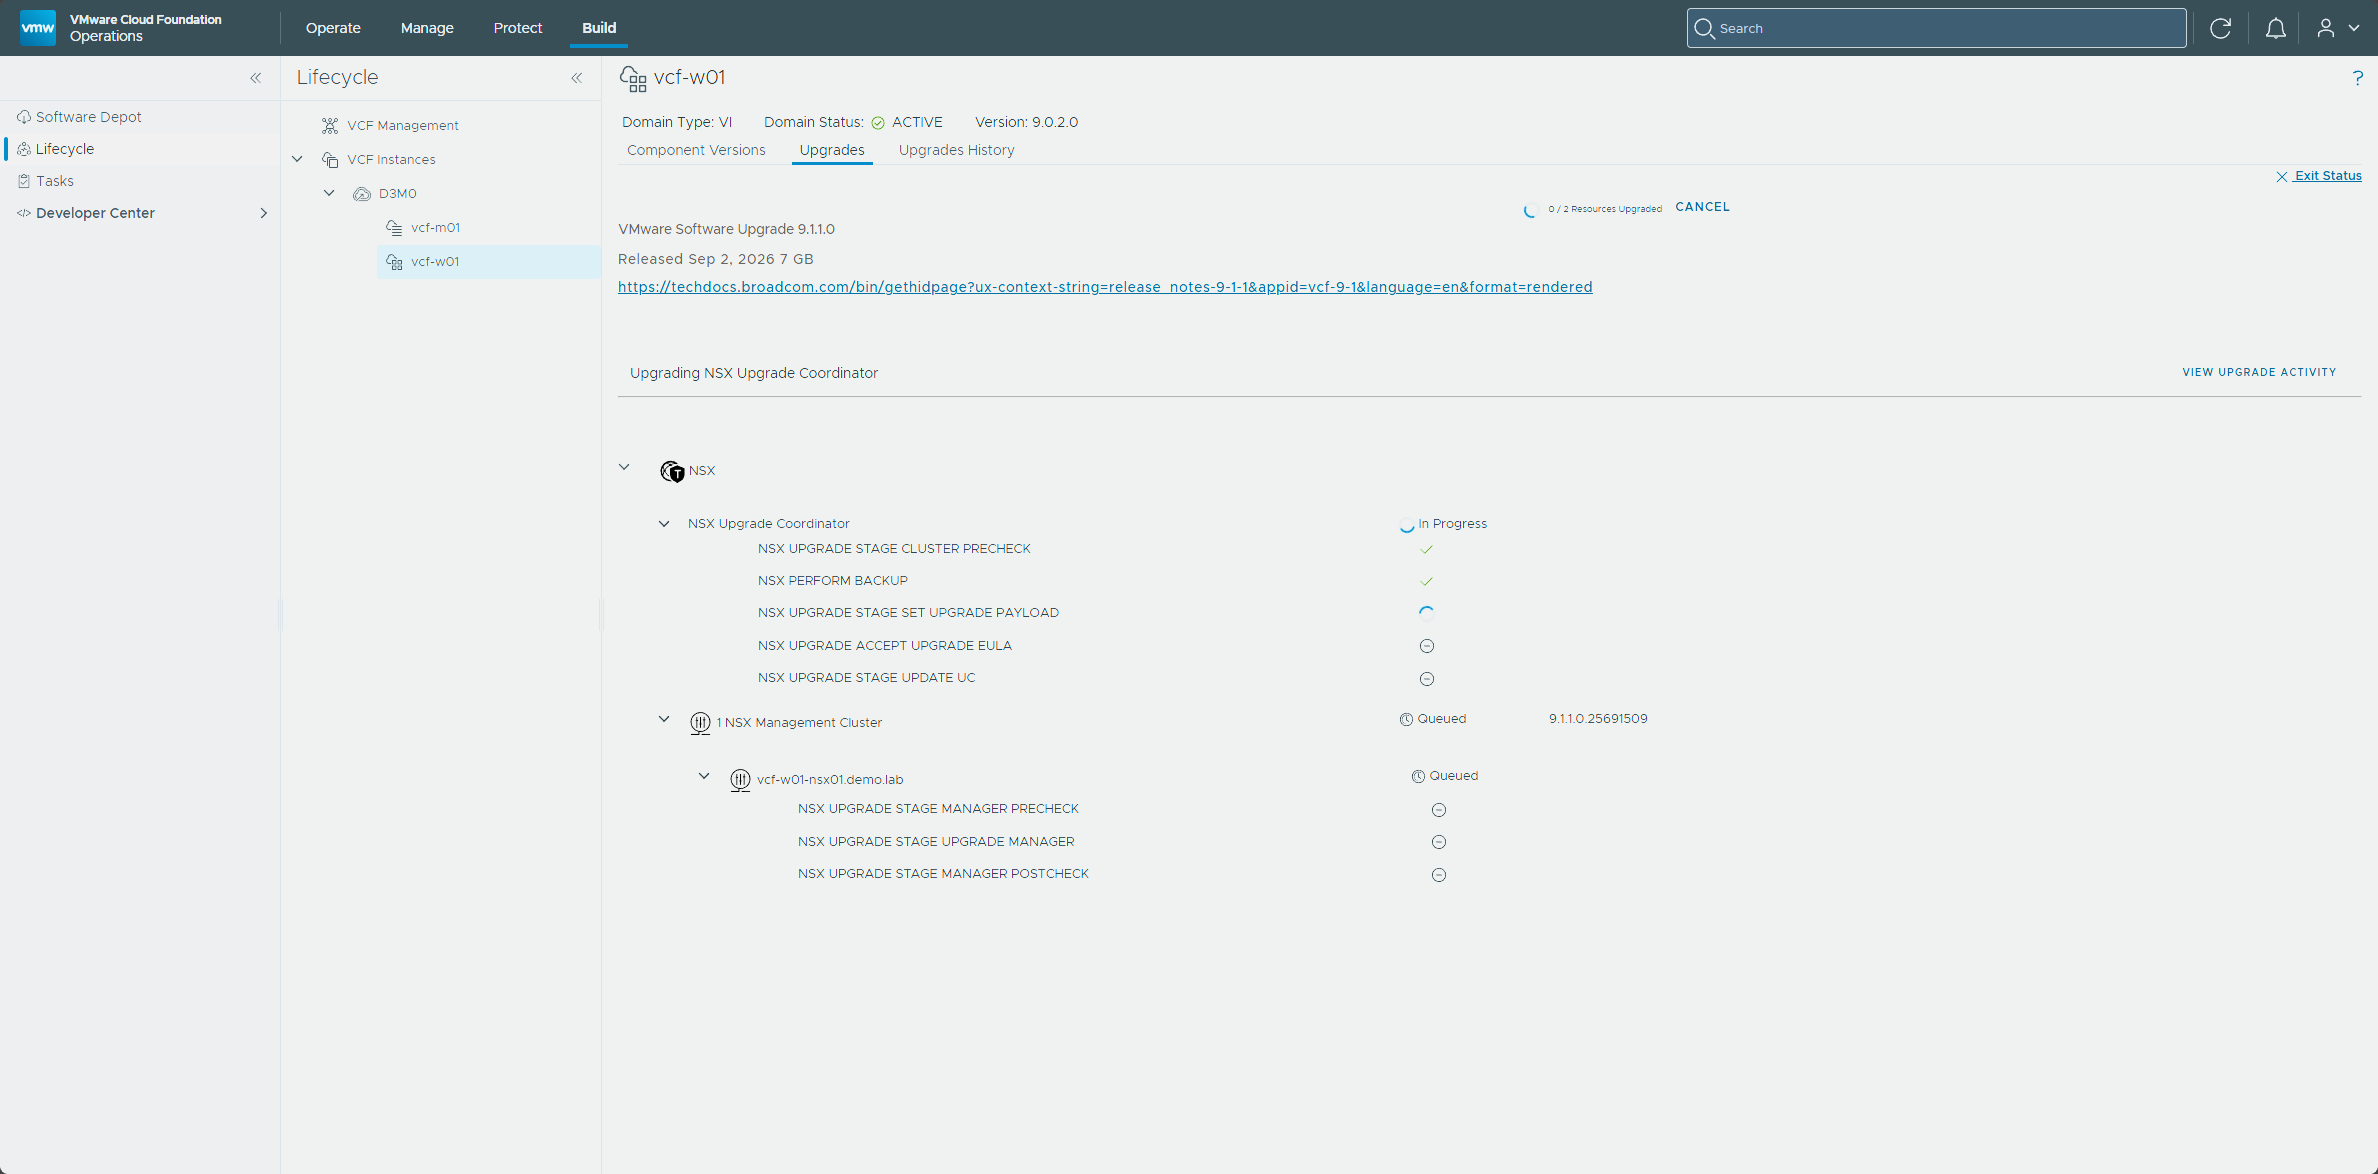
- On the VMware NSX Manager Nodes 9.1.1.0 Upgrade tile, click Upgrade Now.
- Click View Status to follow the stages.
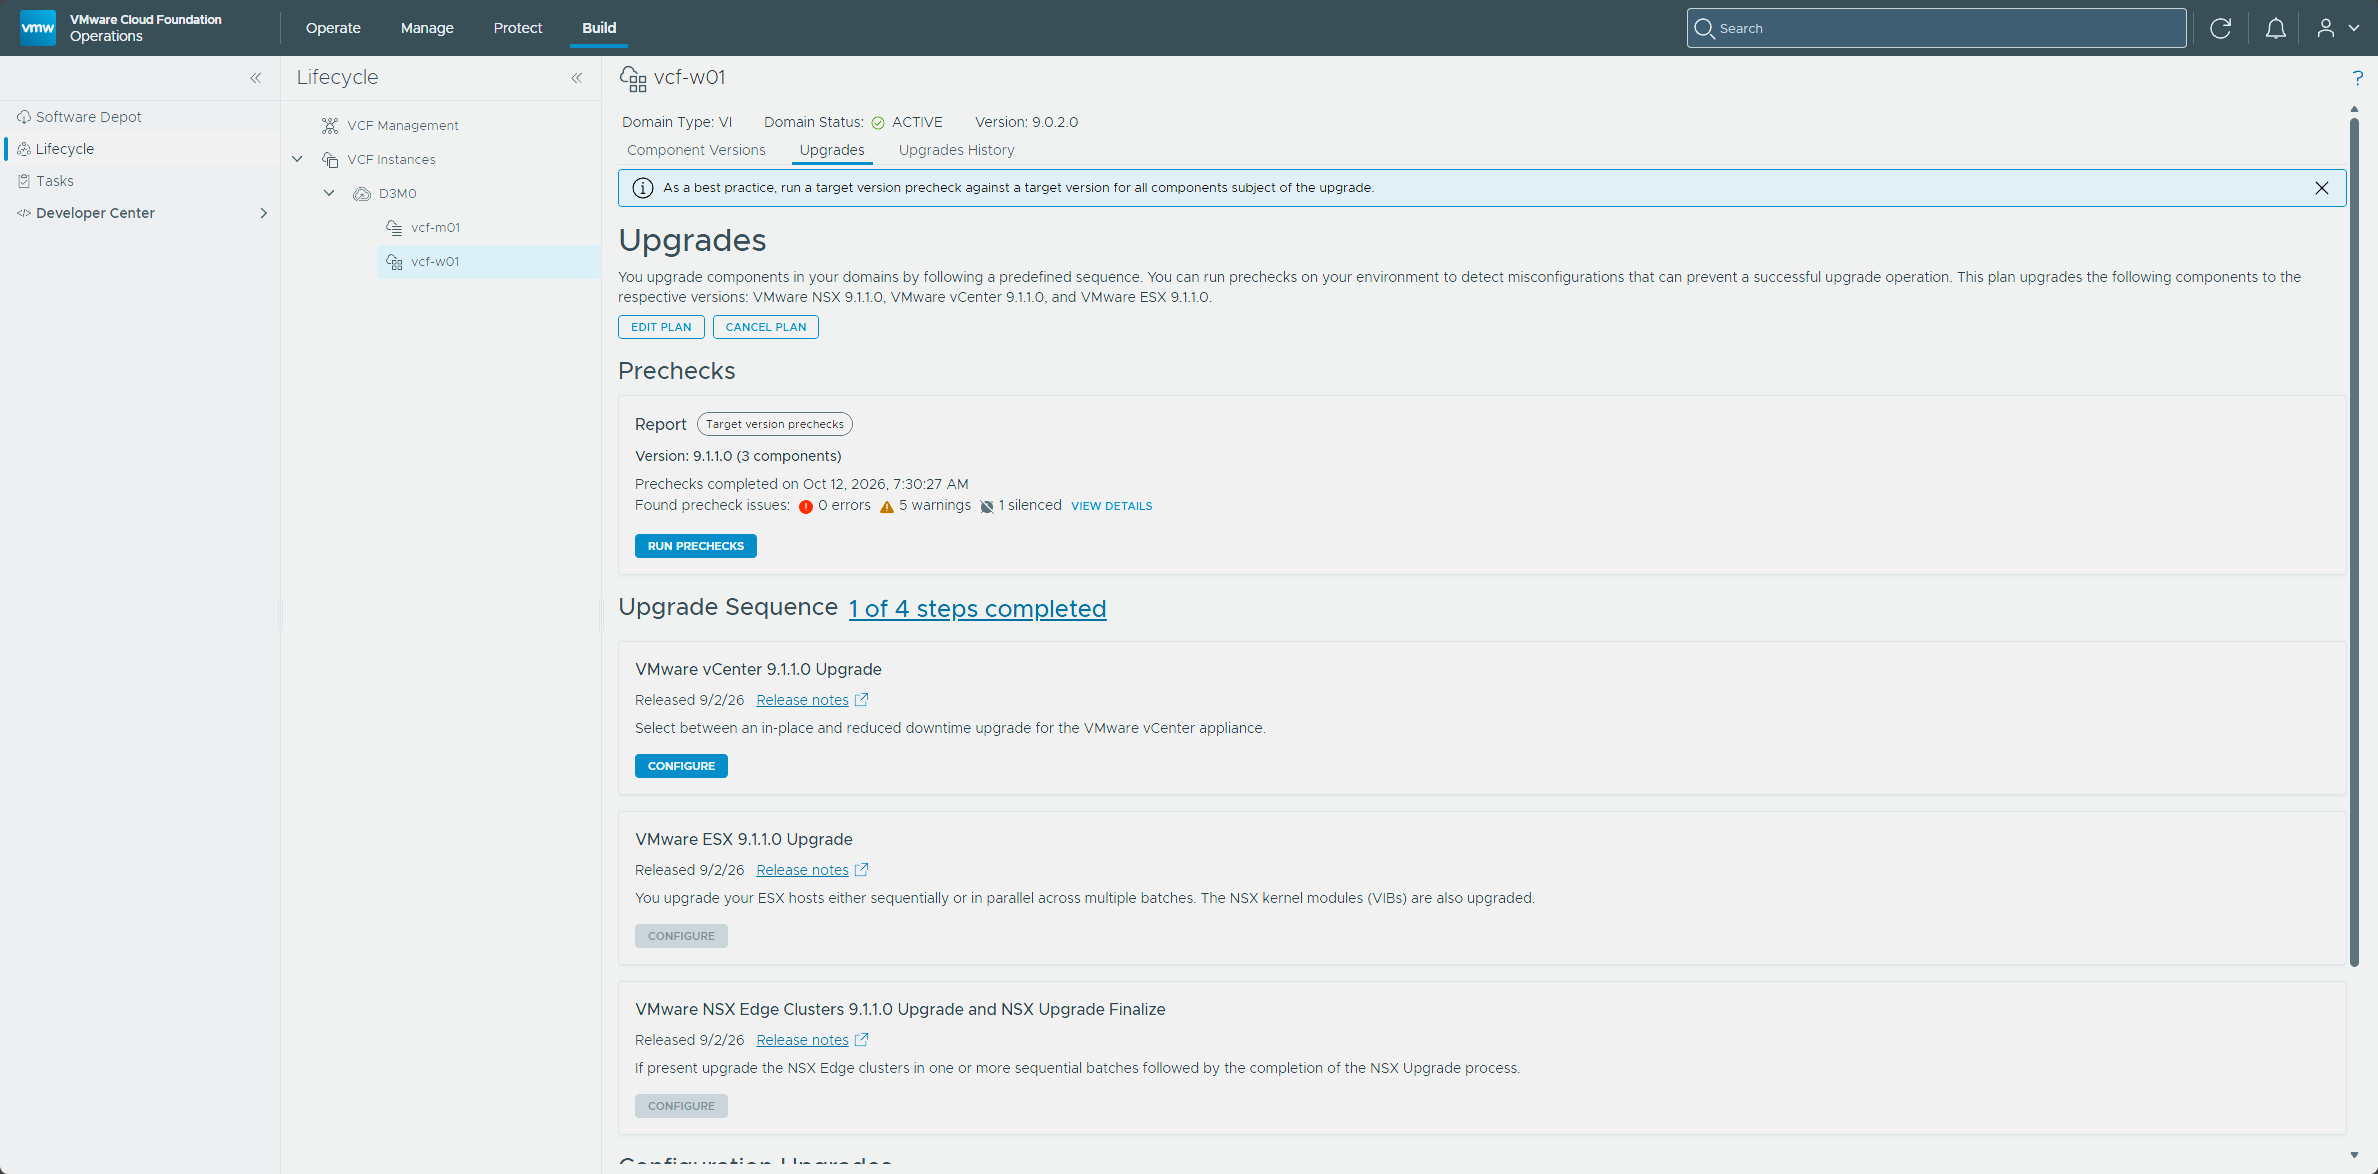
When it finished, the upgrade sequence showed 1 of 4 steps completed.
Upgrading vCenter
I took a fresh backup of the workload vCenter before starting.
- On the VMware vCenter 9.1.1.0 Upgrade tile, click Configure.
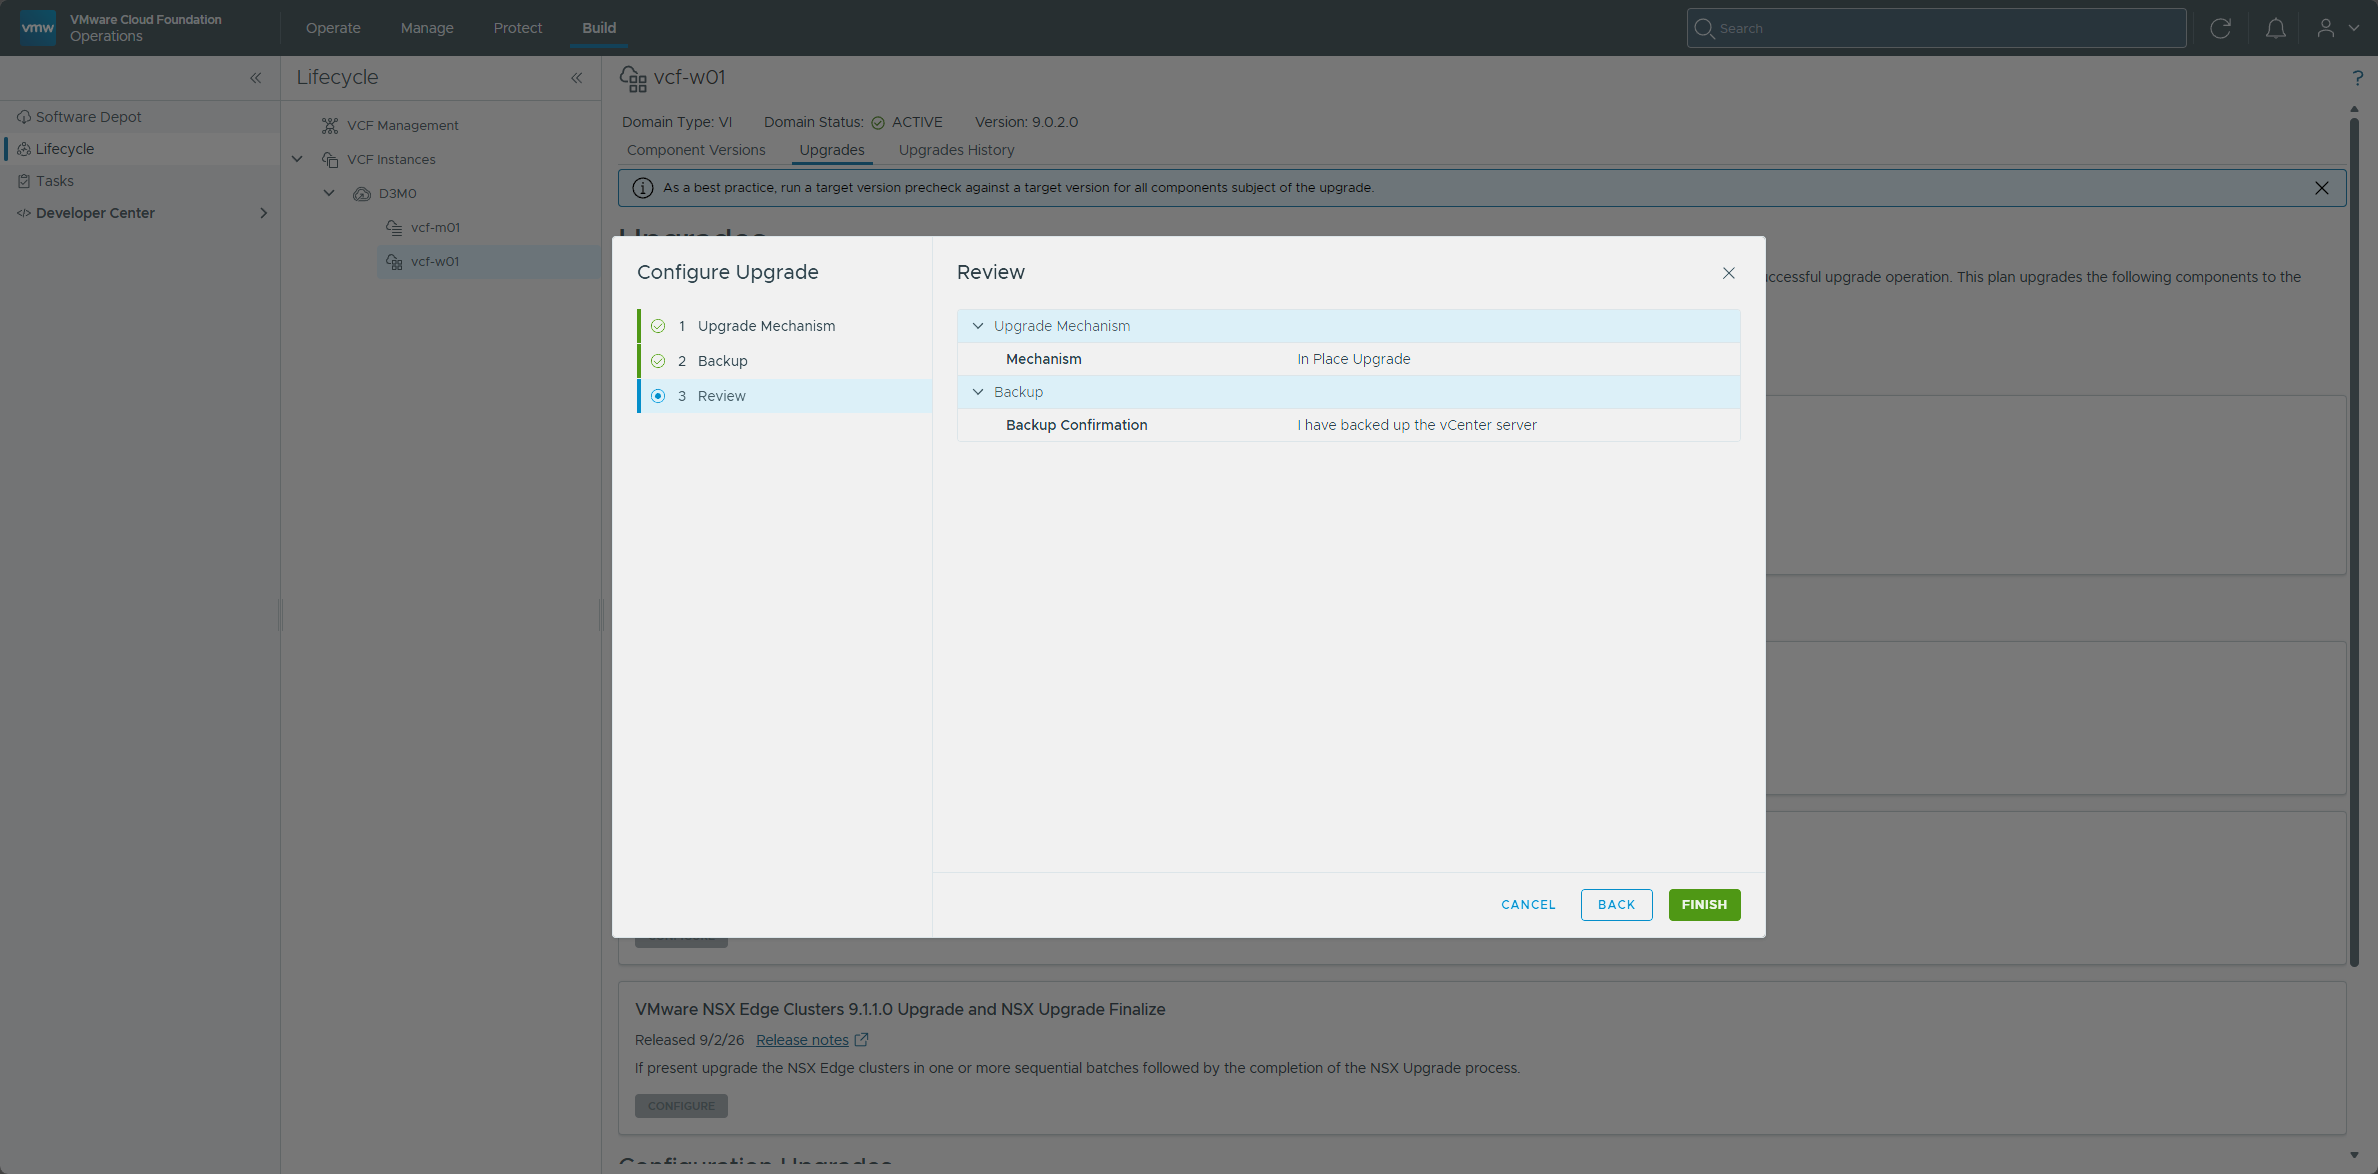
- Choose vCenter Regular Upgrade, the same mechanism I used on the management domain.
- Confirm the backup and review the settings.
- Click Finish.
- Click Upgrade Now.
- Follow the stages from View Status.
When it finished, the sequence showed 2 of 4 steps completed.
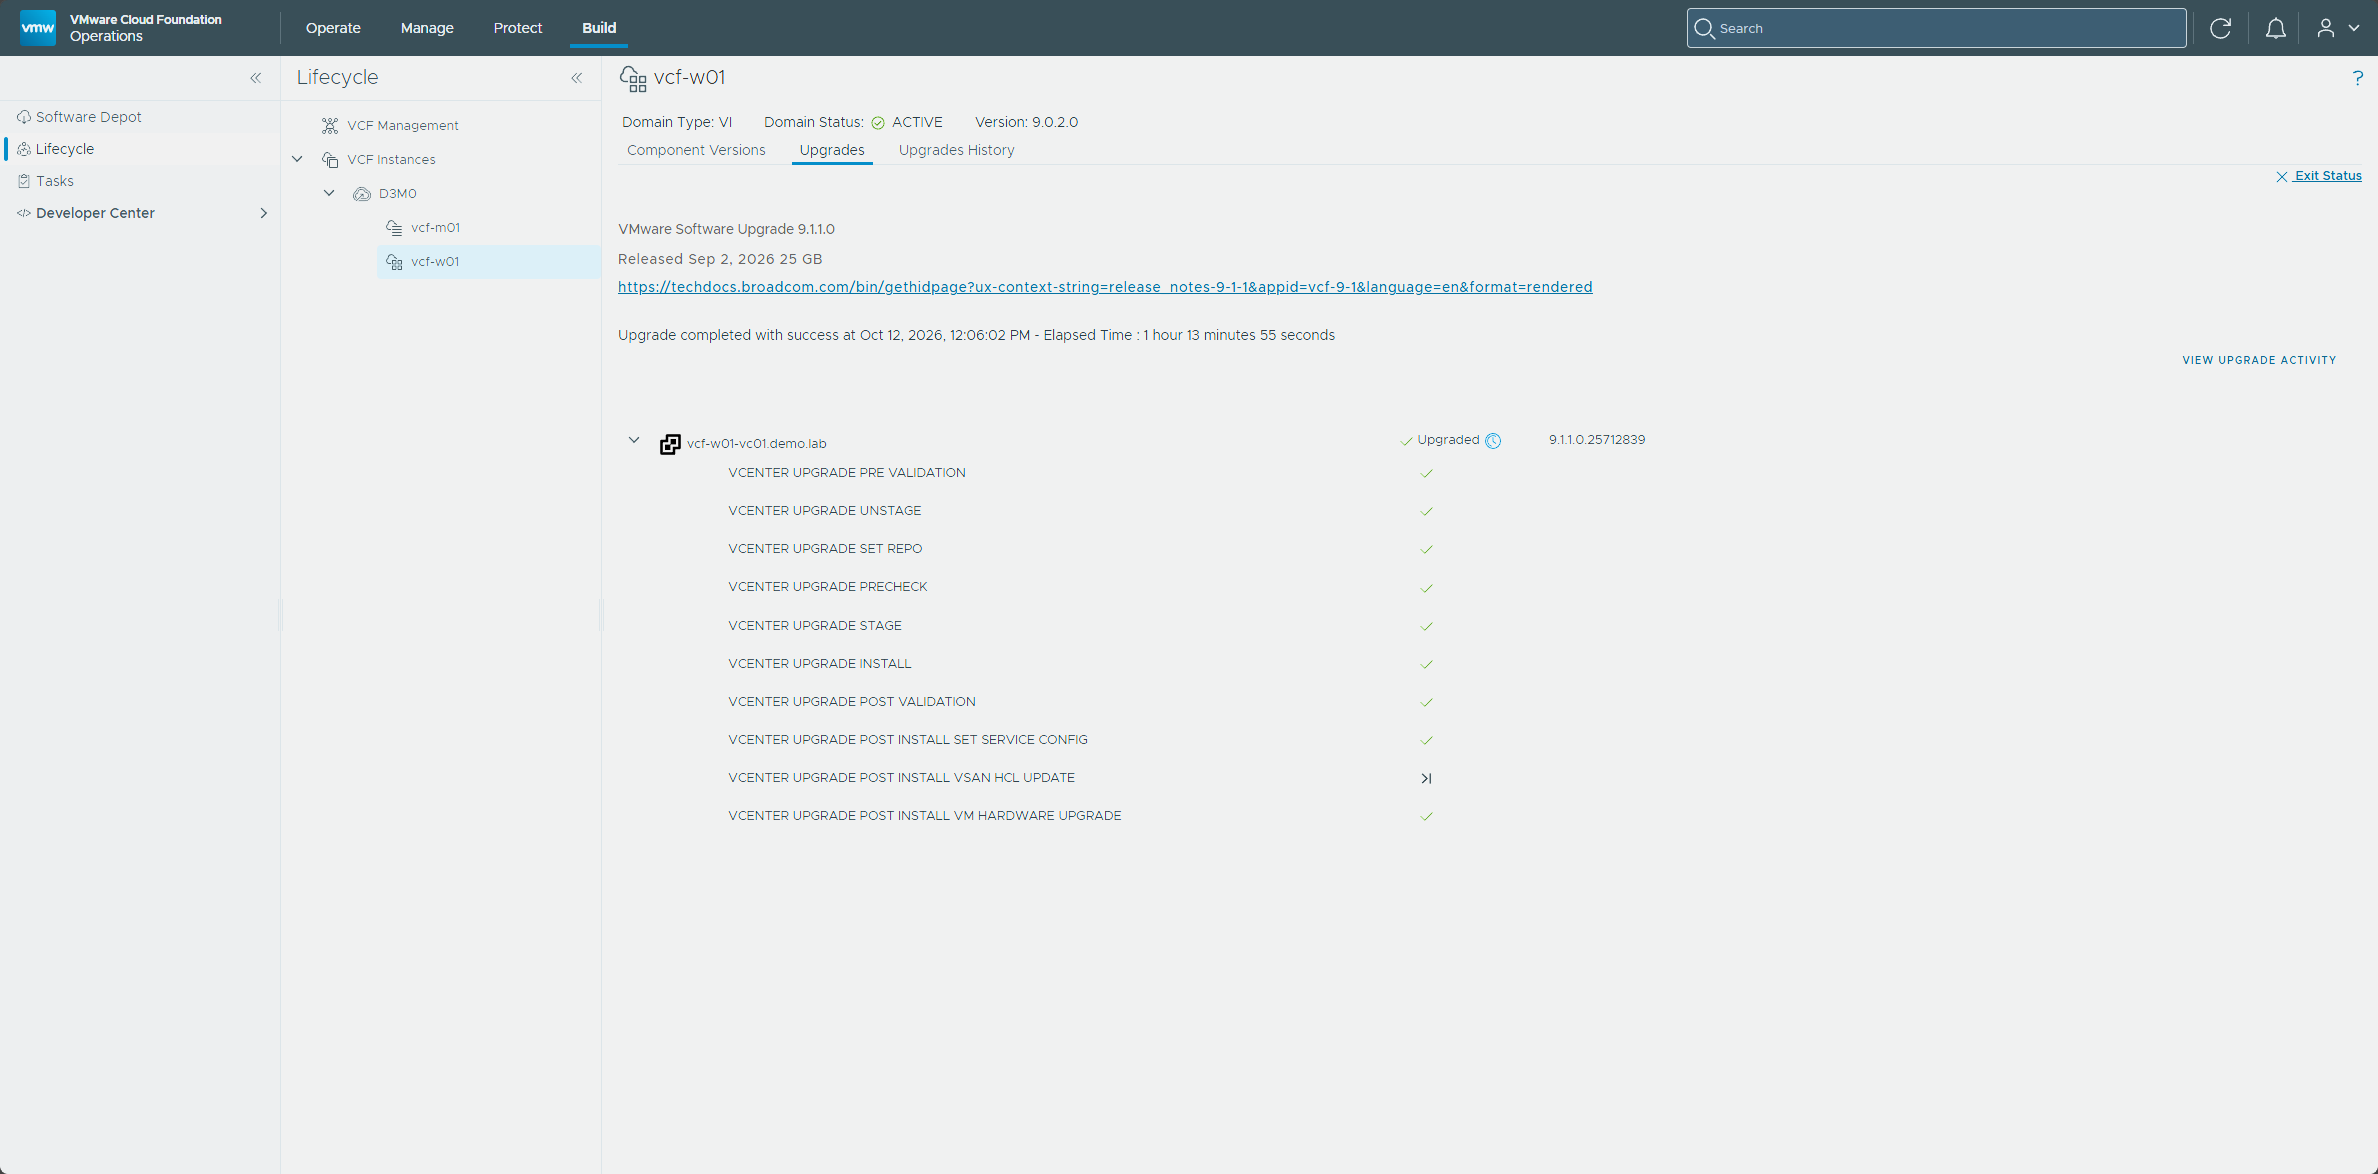
Upgrading ESX
- On the VMware ESX 9.1.1.0 Upgrade tile, click Configure.
- Leave All Clusters selected, which picks
vcf-wld-clwith all three hosts. - Click Assign Image, pick the image, click Assign Image again, and click Next.
- Set the upgrade options and click Next.
- There were no standalone hosts, so click Next, review the configuration, and click Finish.
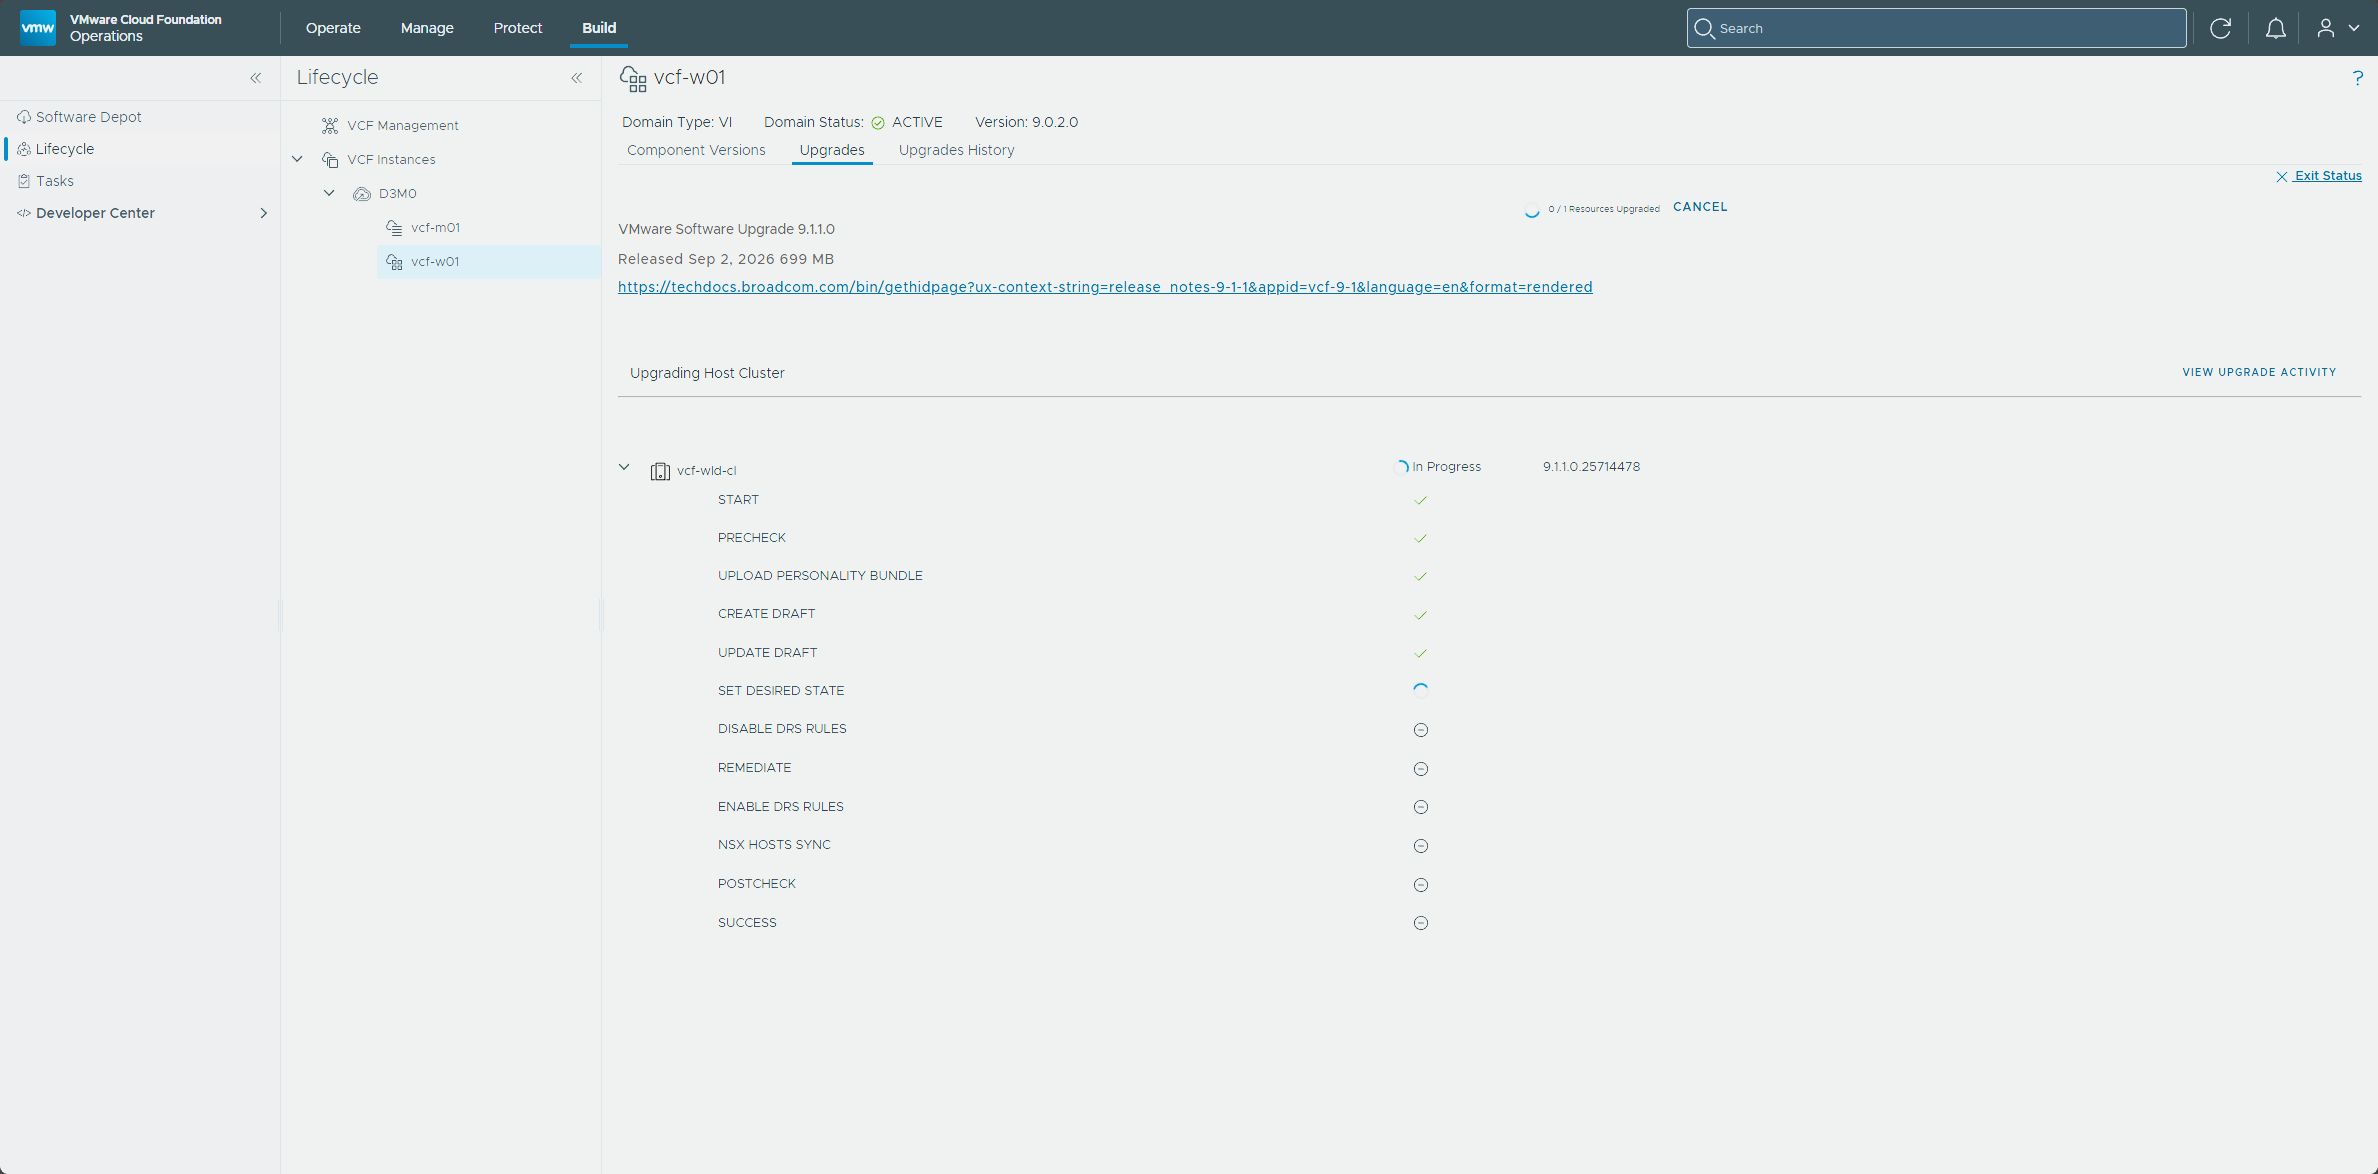
- Click Upgrade Now and follow it from View Status.
This time Assign Image listed mgmt-software-spec-9110, the image I fixed in Part 5, so there was nothing to redo.
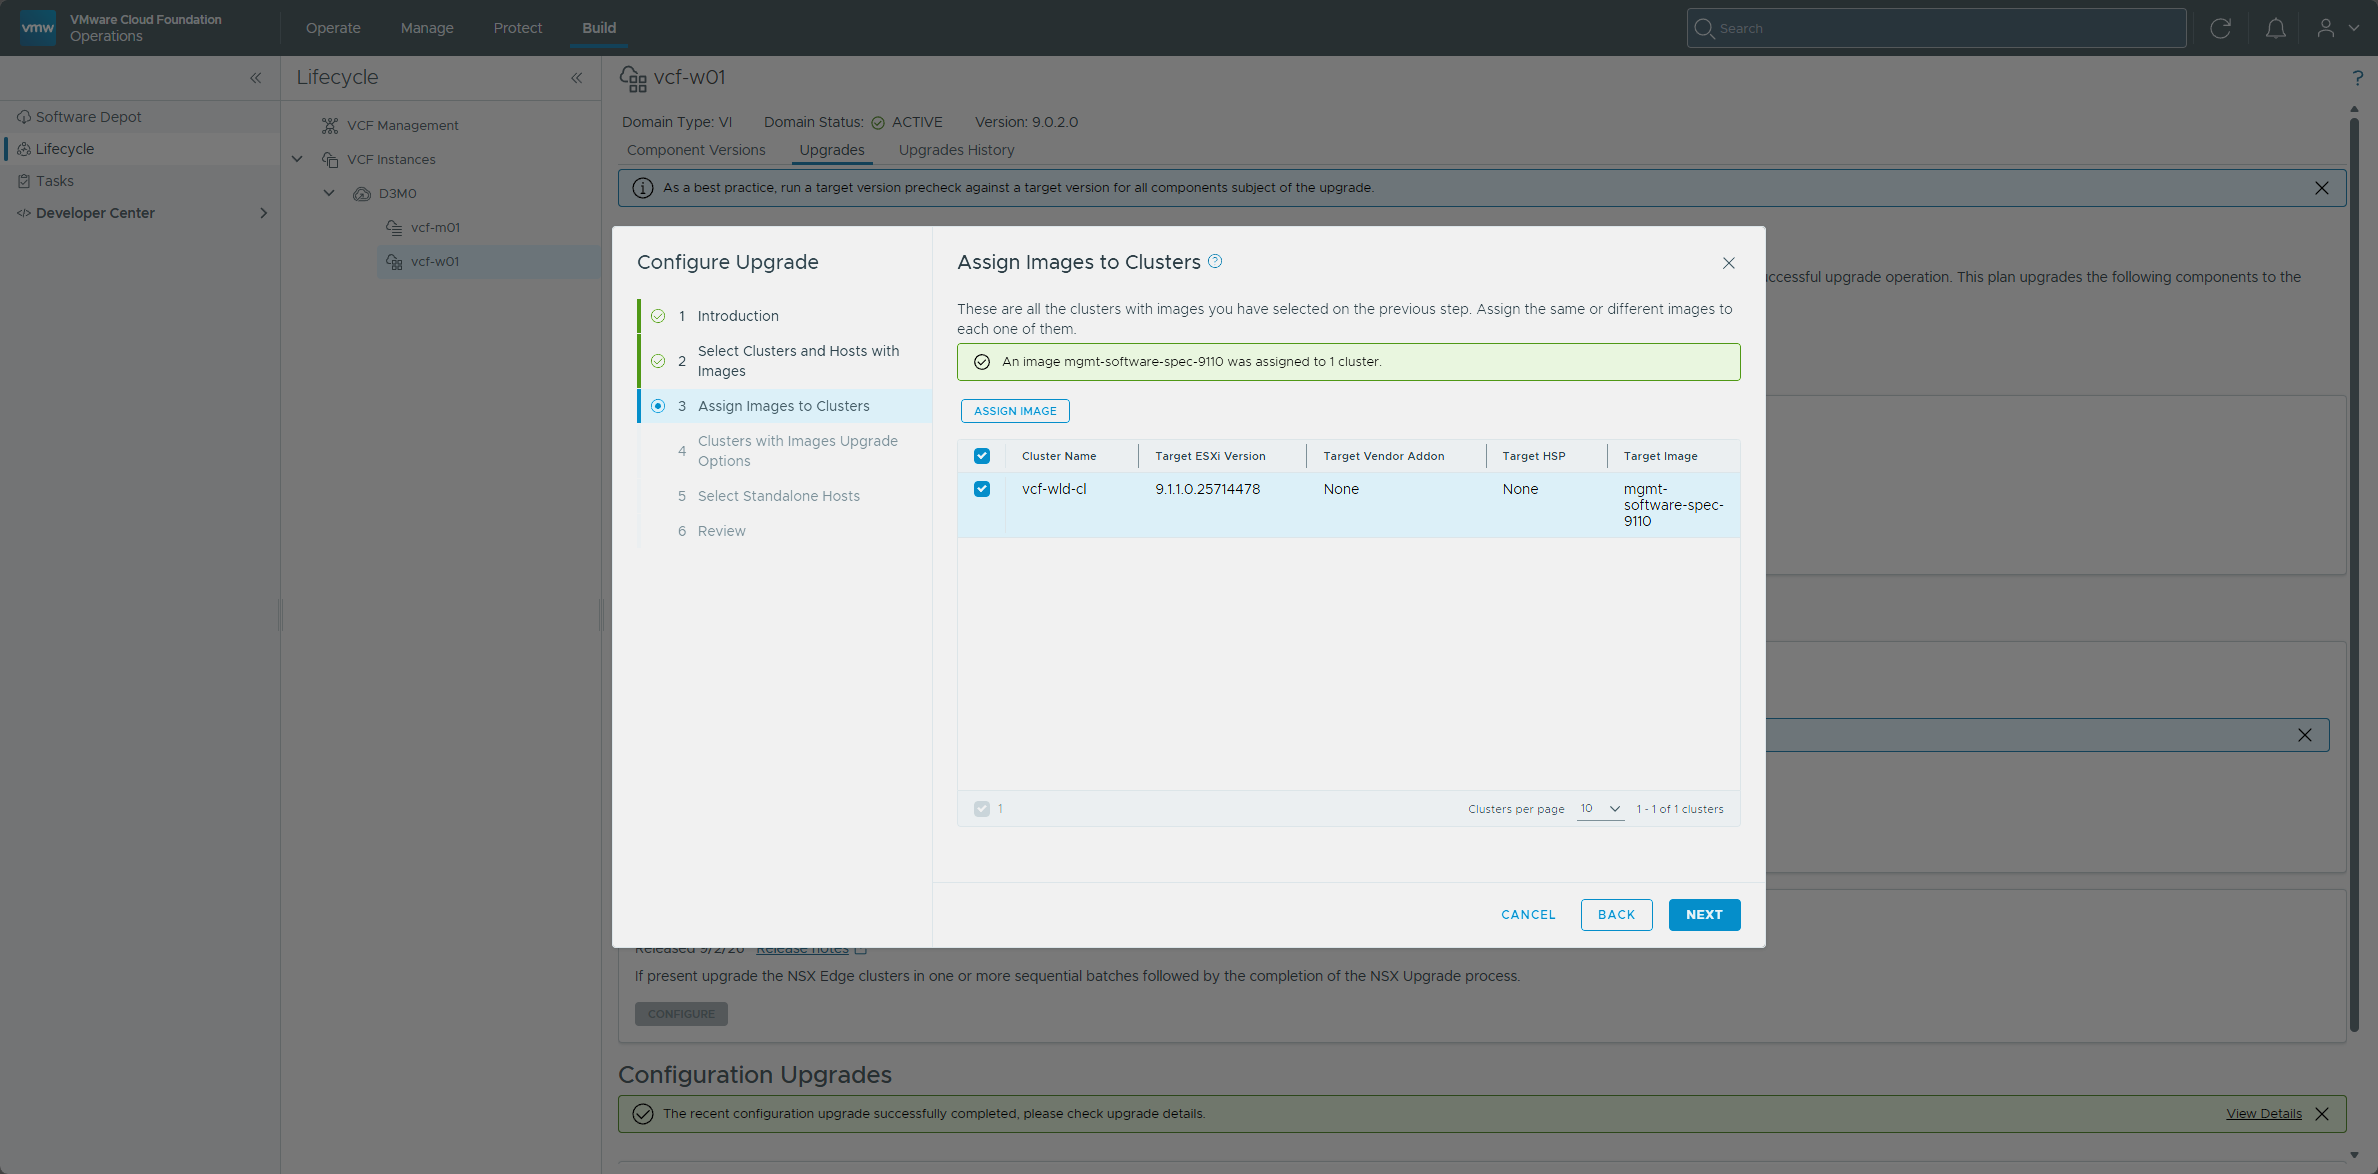
I used the same options as the management cluster, with Quick Boot enabled and the VM power state left on “Do not change power state.”
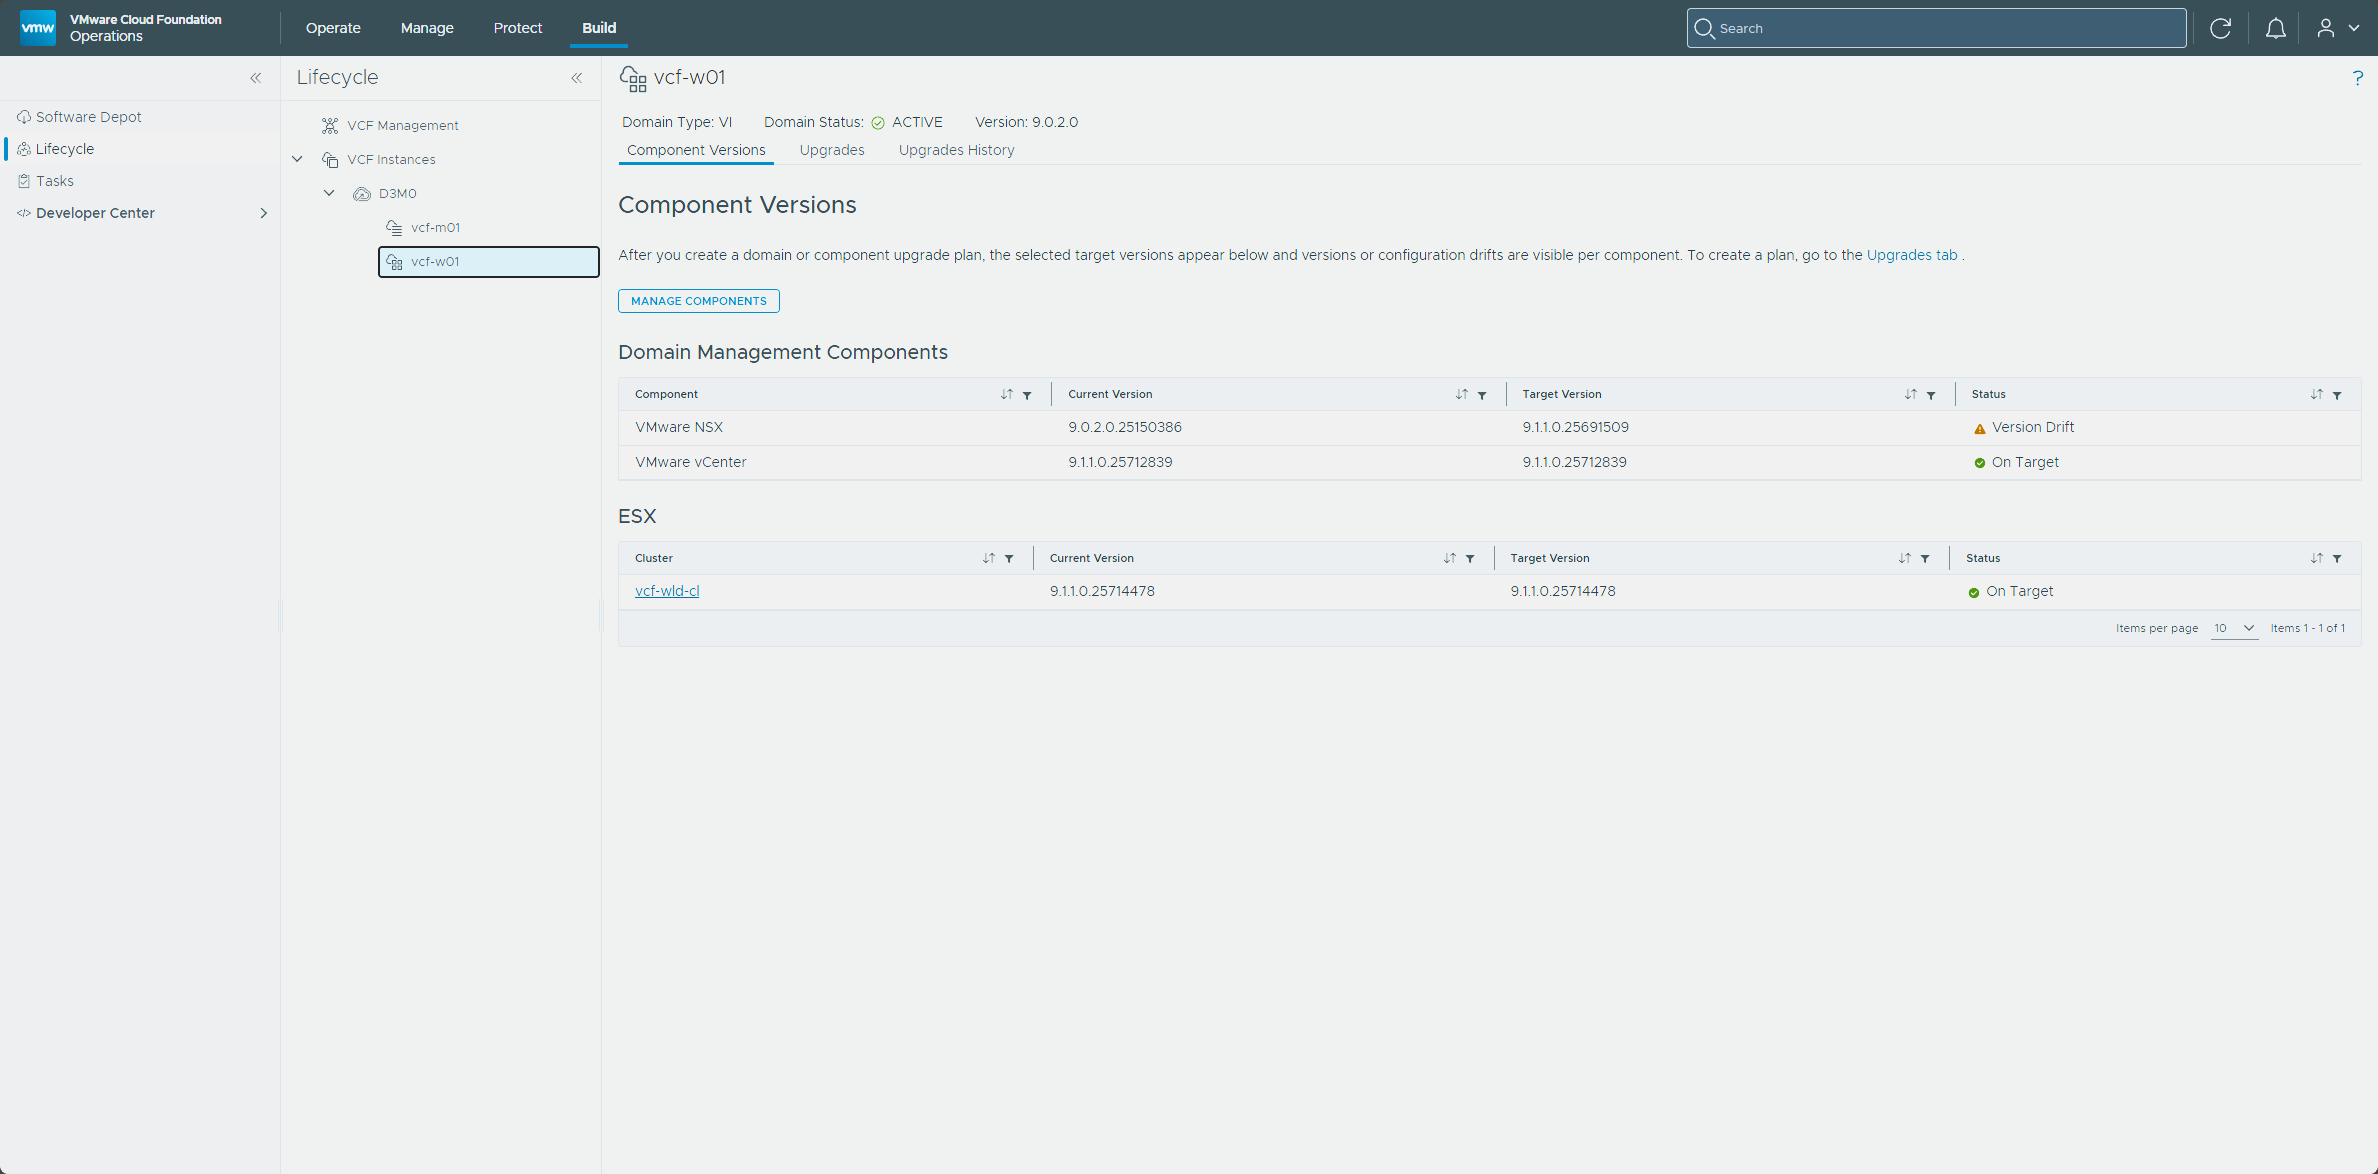
When it finished, Component Versions showed vcf-wld-cl on 9.1.1.0.25714478, on target. NSX still showed Version Drift there, which cleared after the Edge cluster upgrade and finalize below.
Upgrading the NSX Edge cluster and finalizing NSX
This domain has its own NSX instance and a two-node Edge cluster, vcf-w01-ec01, so this time the tile had an Edge cluster to upgrade before the finalize.
- On the VMware NSX Edge Clusters 9.1.1.0 Upgrade and NSX Upgrade Finalize tile, click Configure.
- Leave Enable NSX Edge cluster selection off to upgrade all NSX Edge clusters, and click Next.
- Leave Enable sequential upgrade of NSX Edge clusters cleared and click Next.
- Review the configuration and click Finish.
- Click Upgrade Now and follow it from View Status.
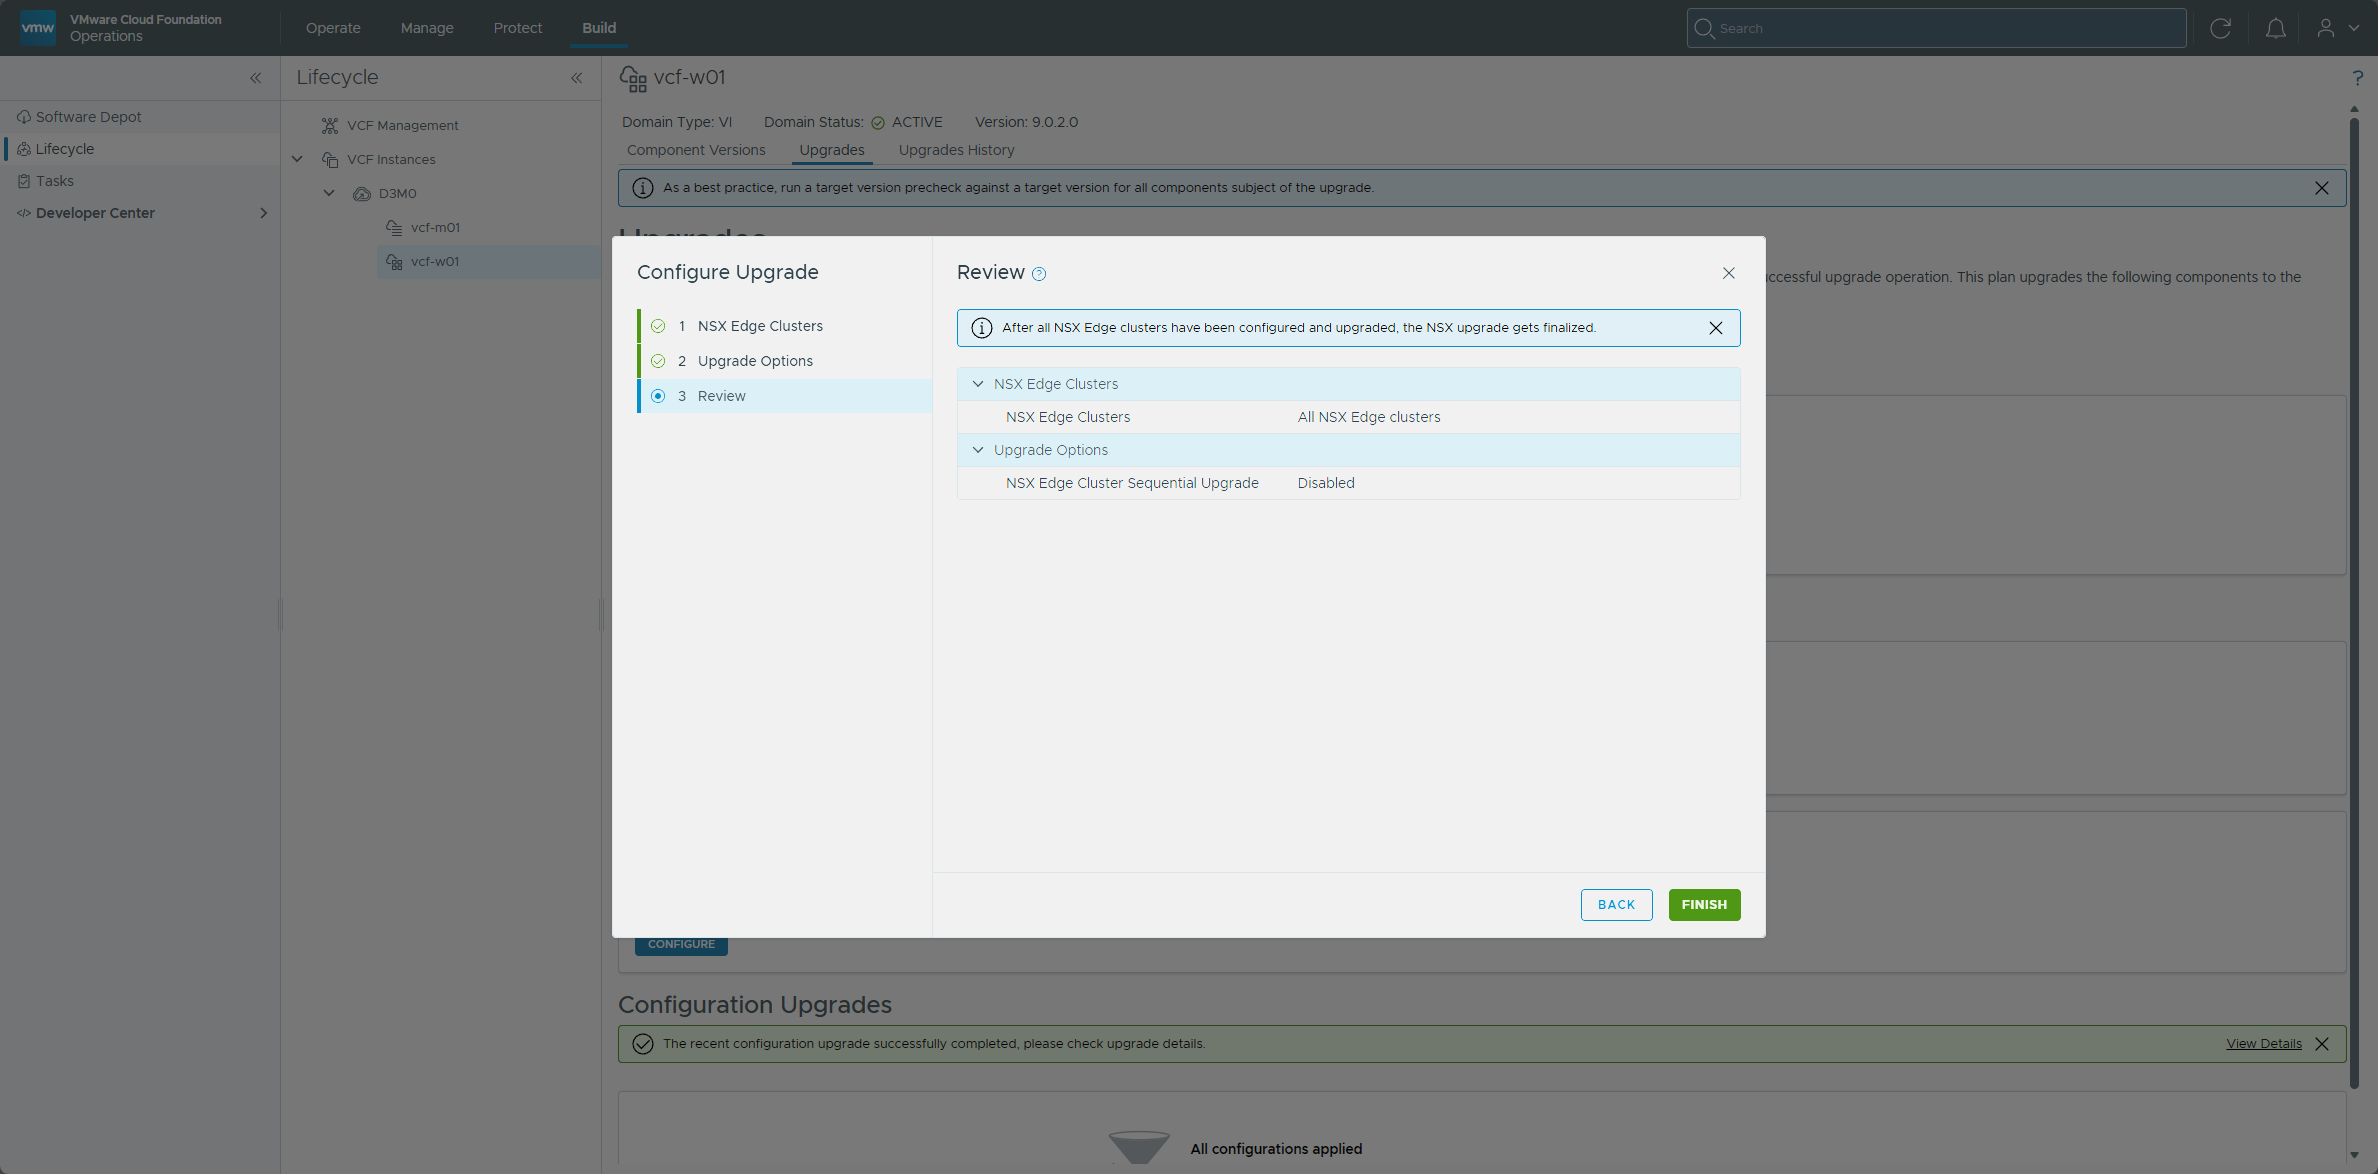
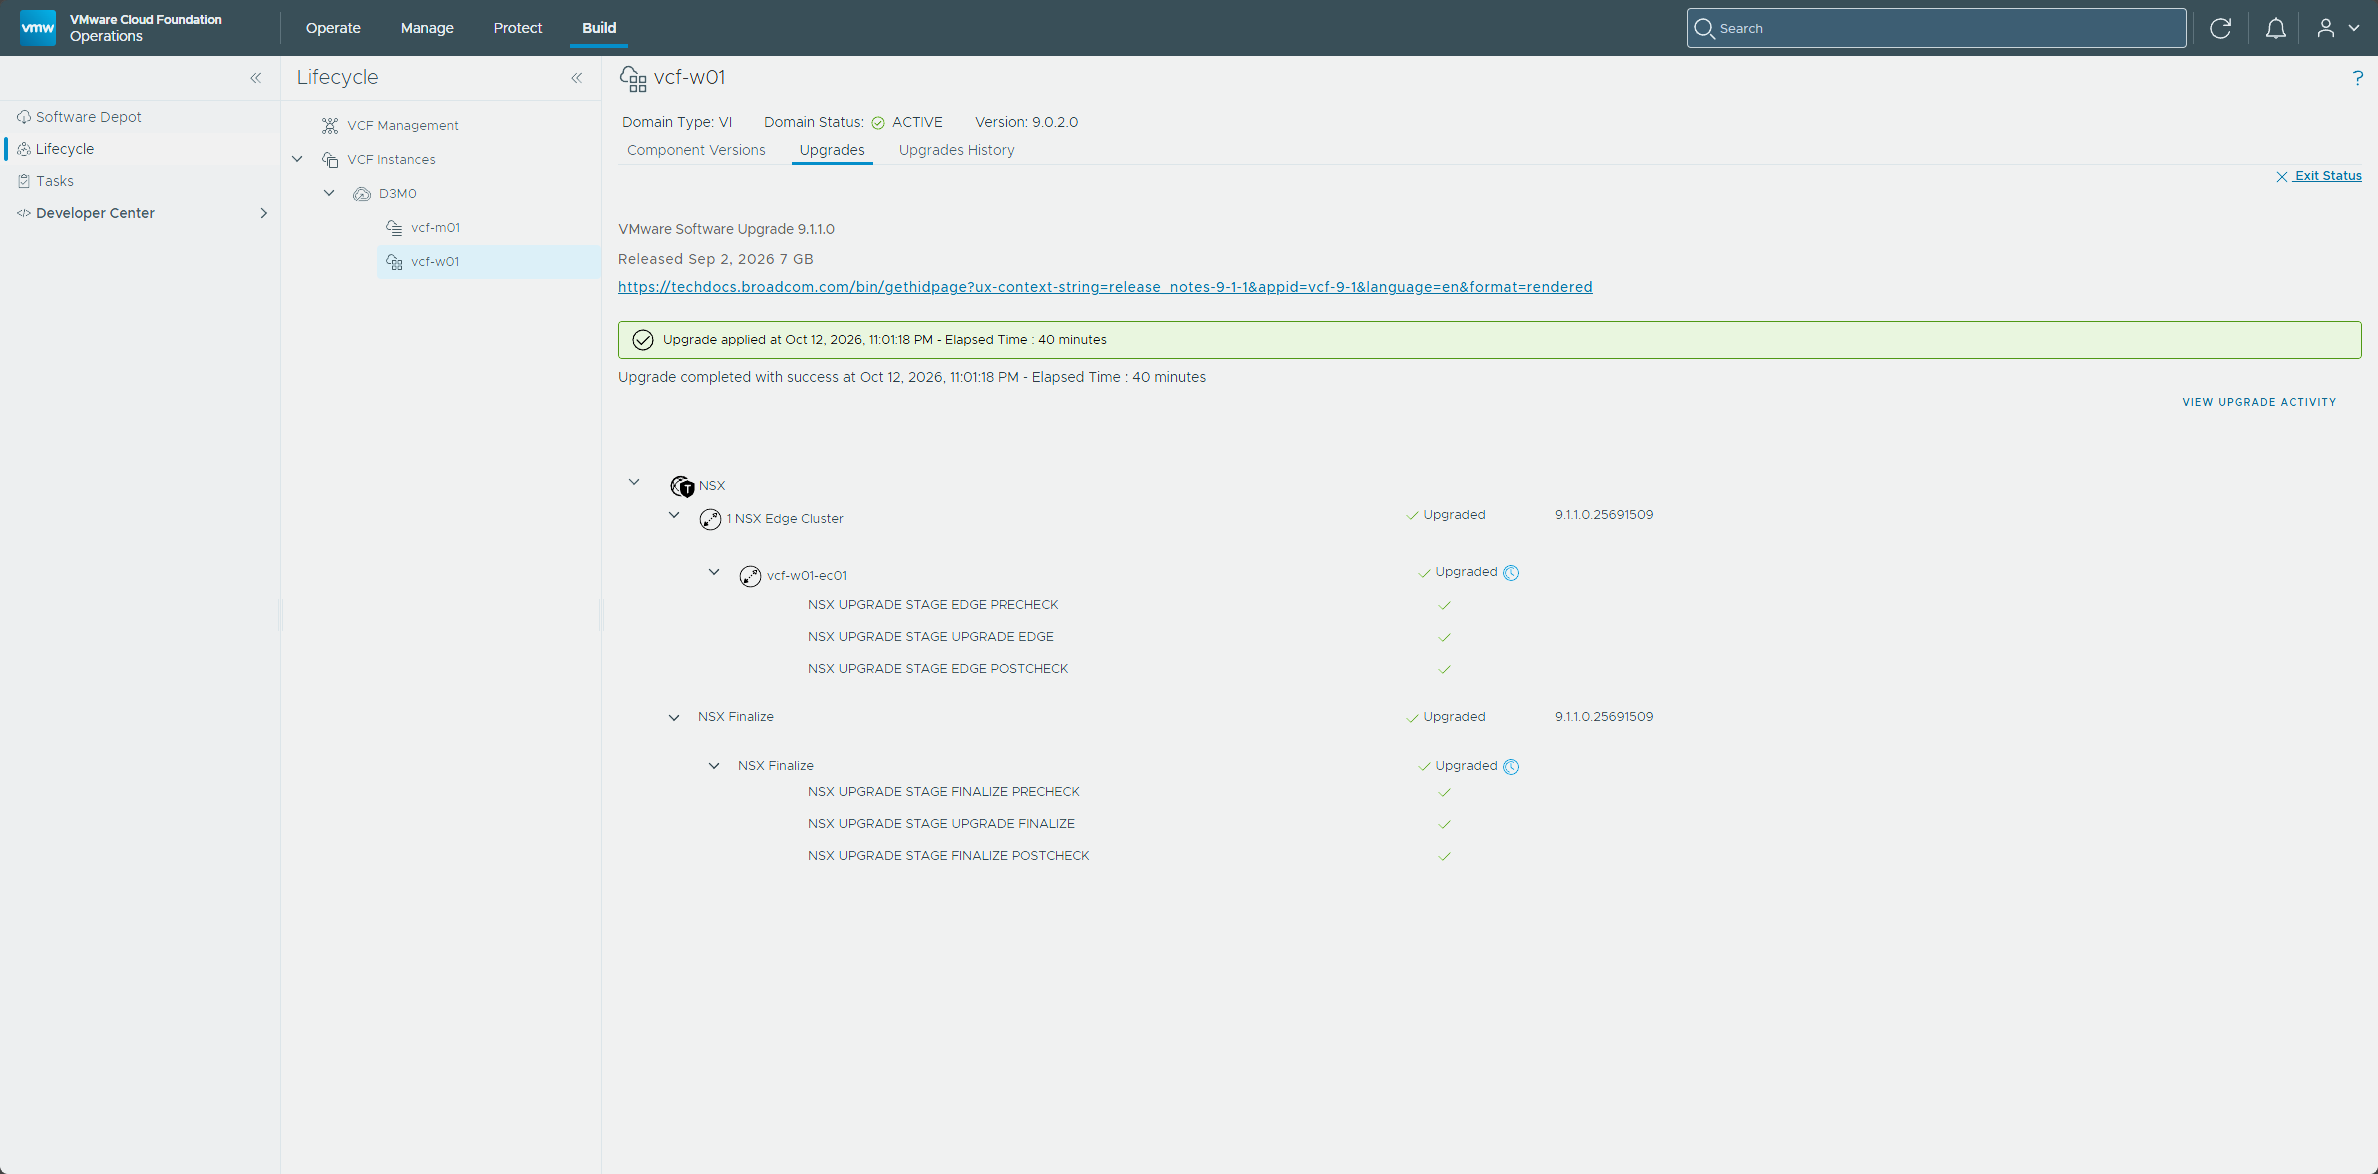
View Status showed an Edge precheck, the Edge upgrade, and an Edge postcheck for vcf-w01-ec01, followed by the same three finalize stages as the management domain.
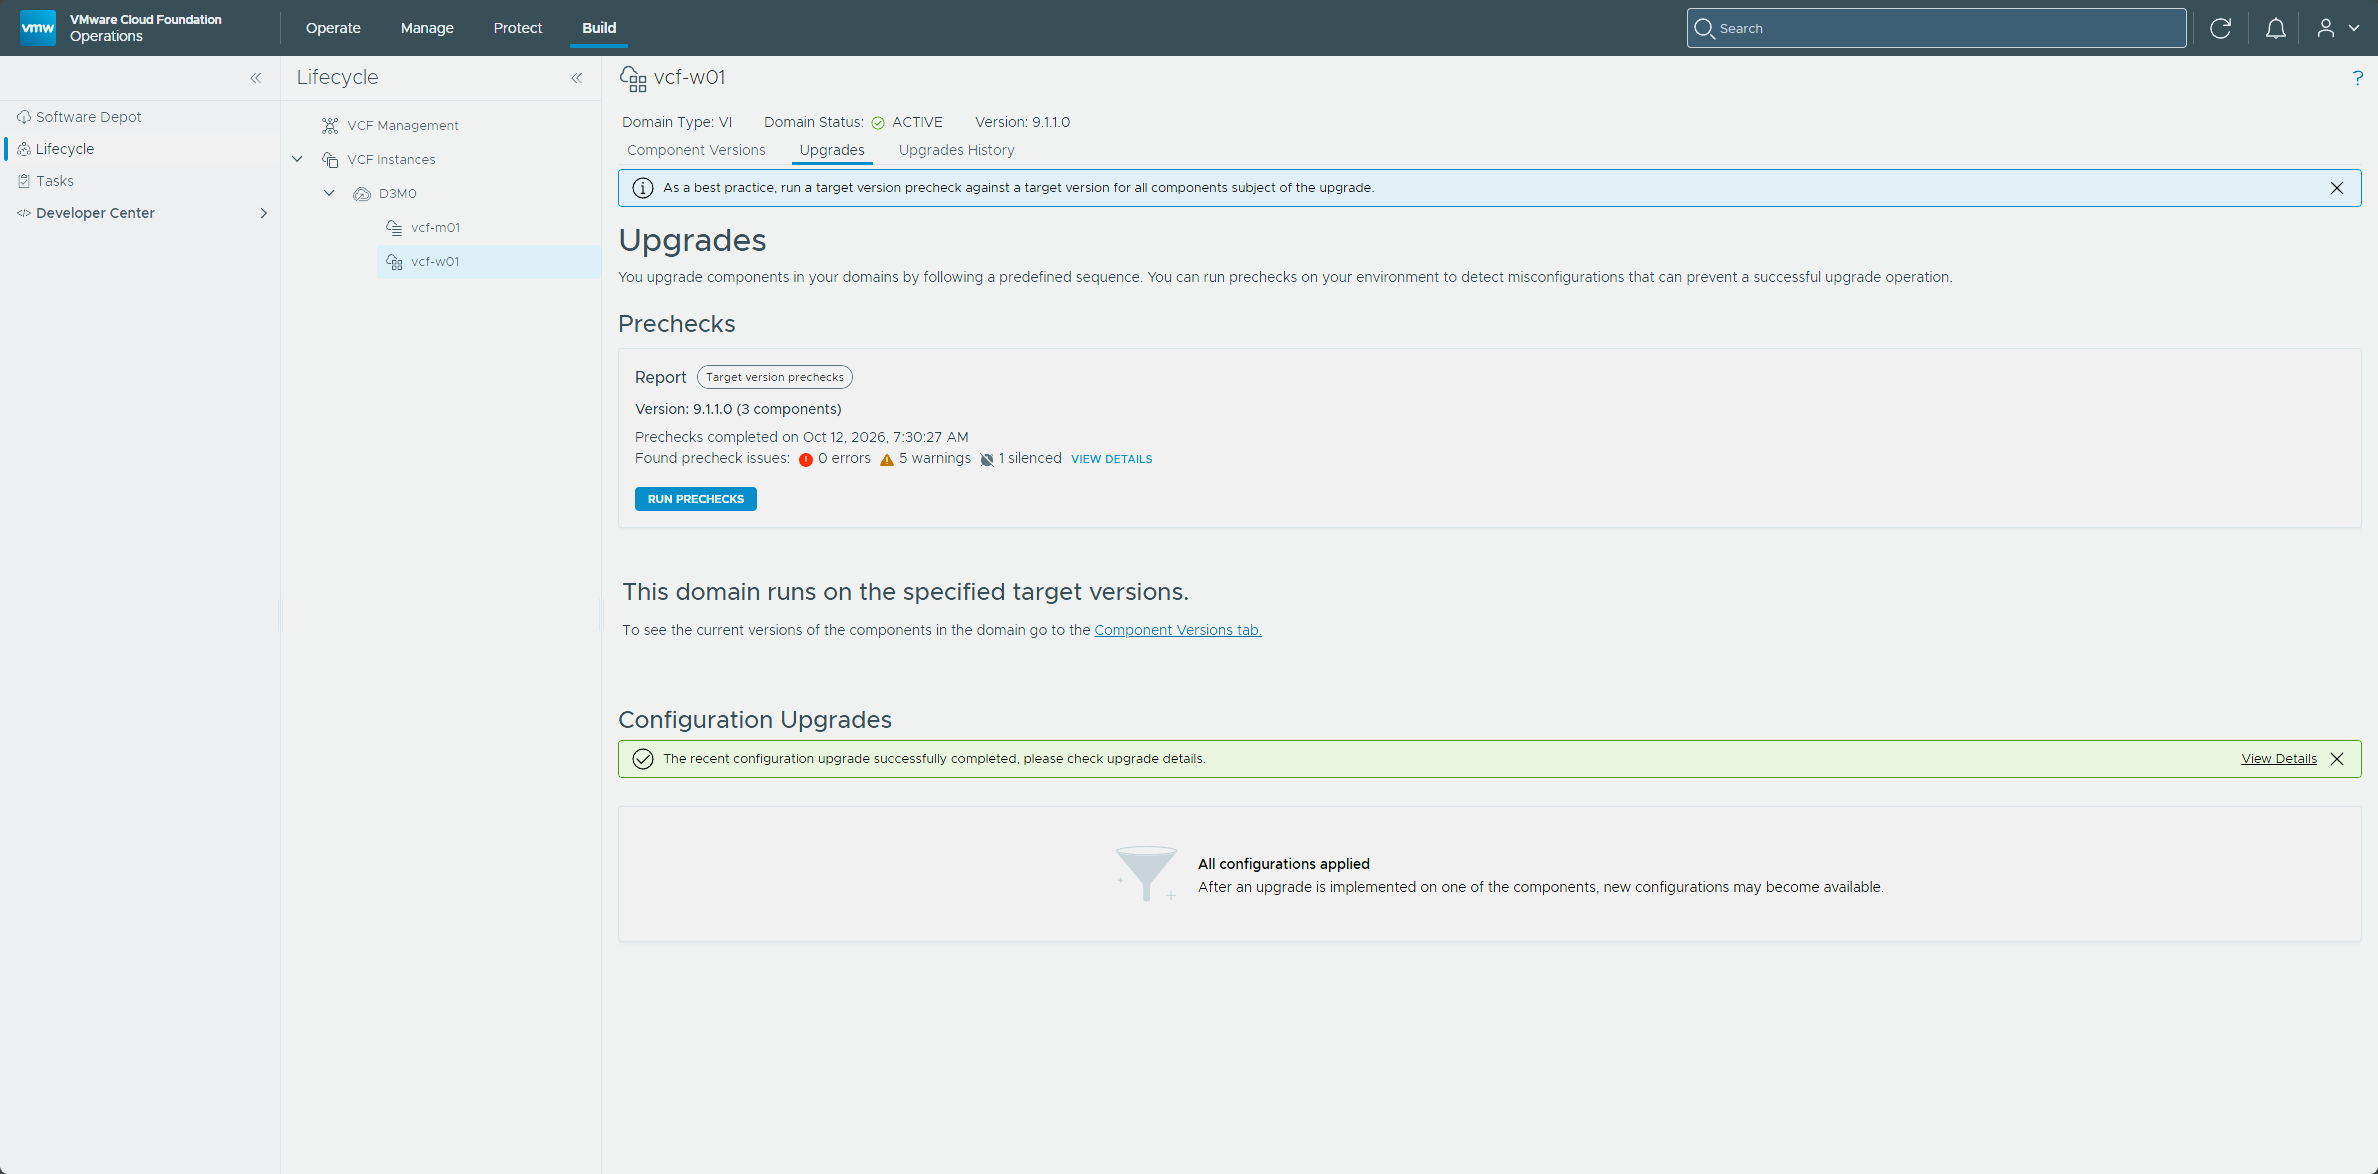
Back on the Upgrades tab, vcf-w01 read 9.1.1.0, with the message “This domain runs on the specified target versions.” The Configuration Upgrades section on the same page already read “All configurations applied,” so unlike the management domain, I had nothing to apply.
Housekeeping on the workload cluster
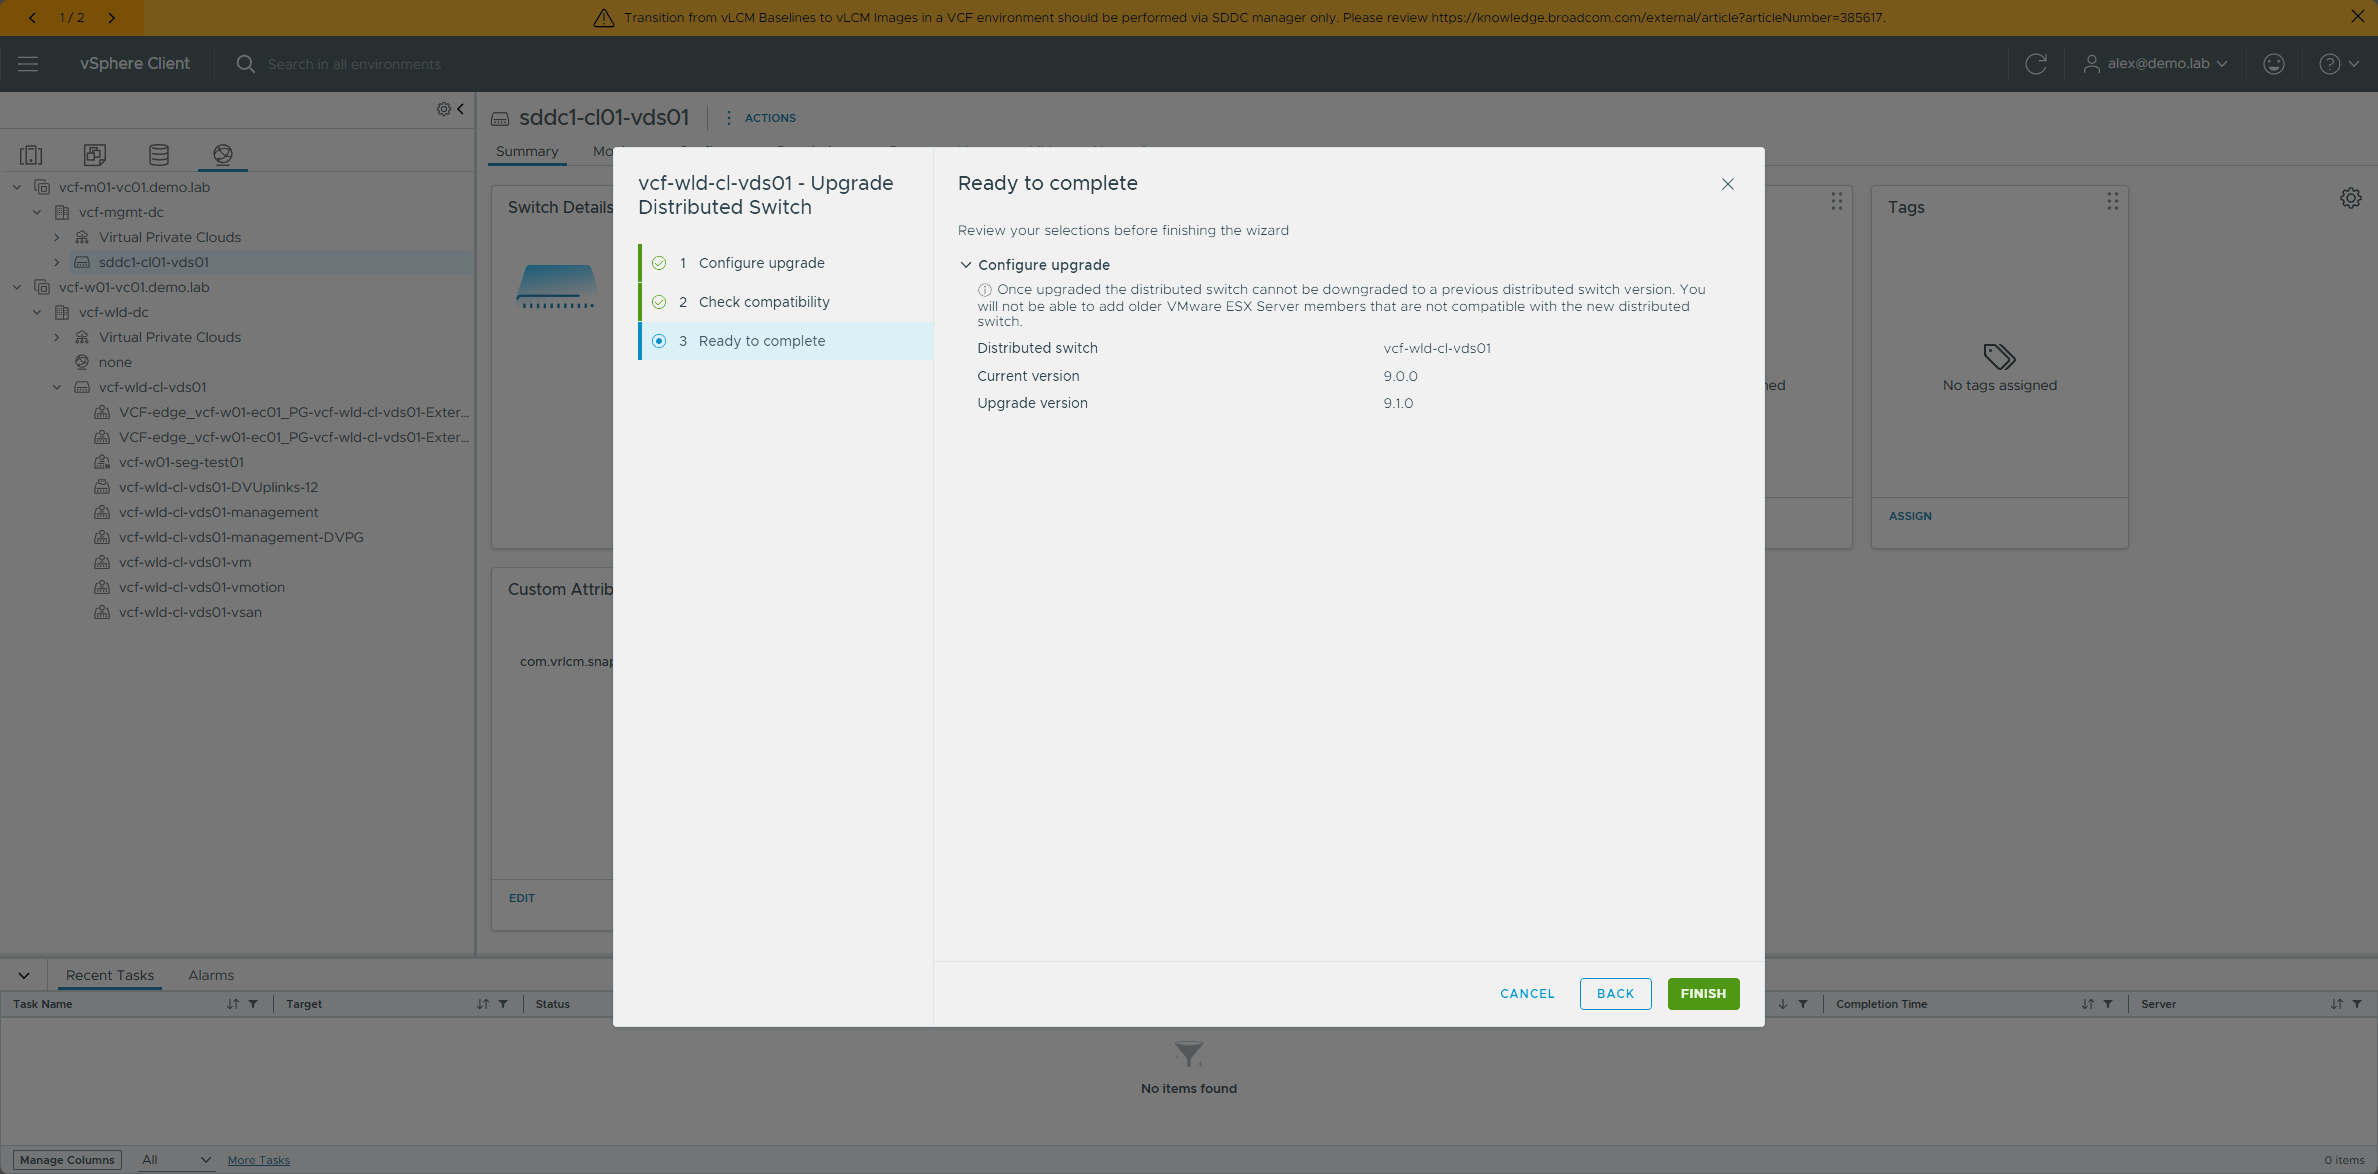
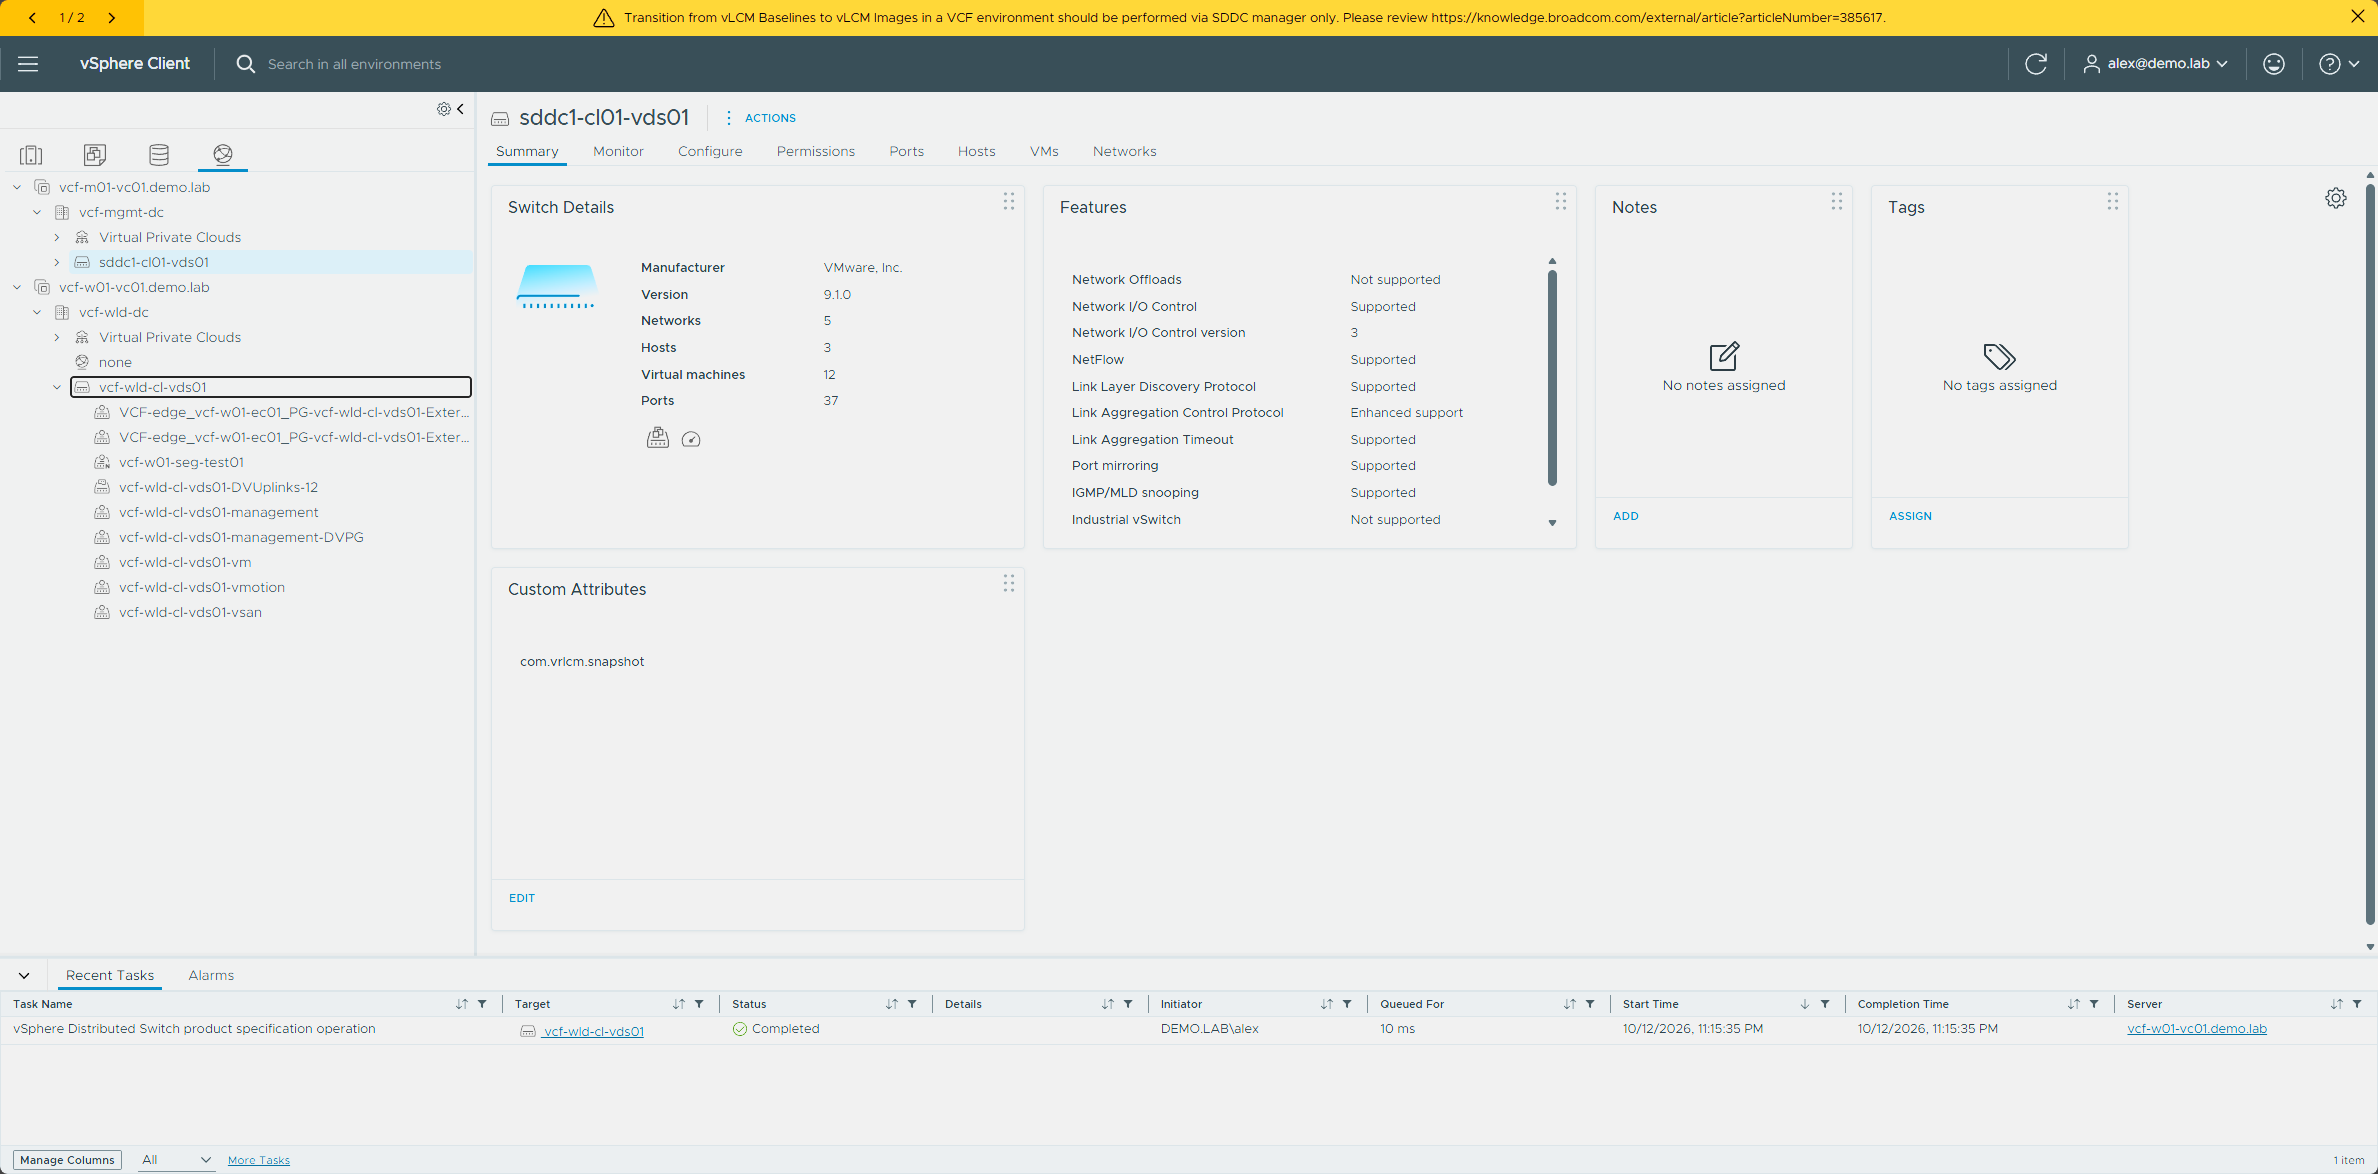
I repeated the distributed switch and vSAN on-disk format steps from earlier in this part on vcf-wld-cl. The review step for the vSphere Distributed Switch, vcf-wld-cl-vds01, showed the upgrade from 9.0.0 to 9.1.0.
Afterward, the switch’s Summary page showed version 9.1.0.
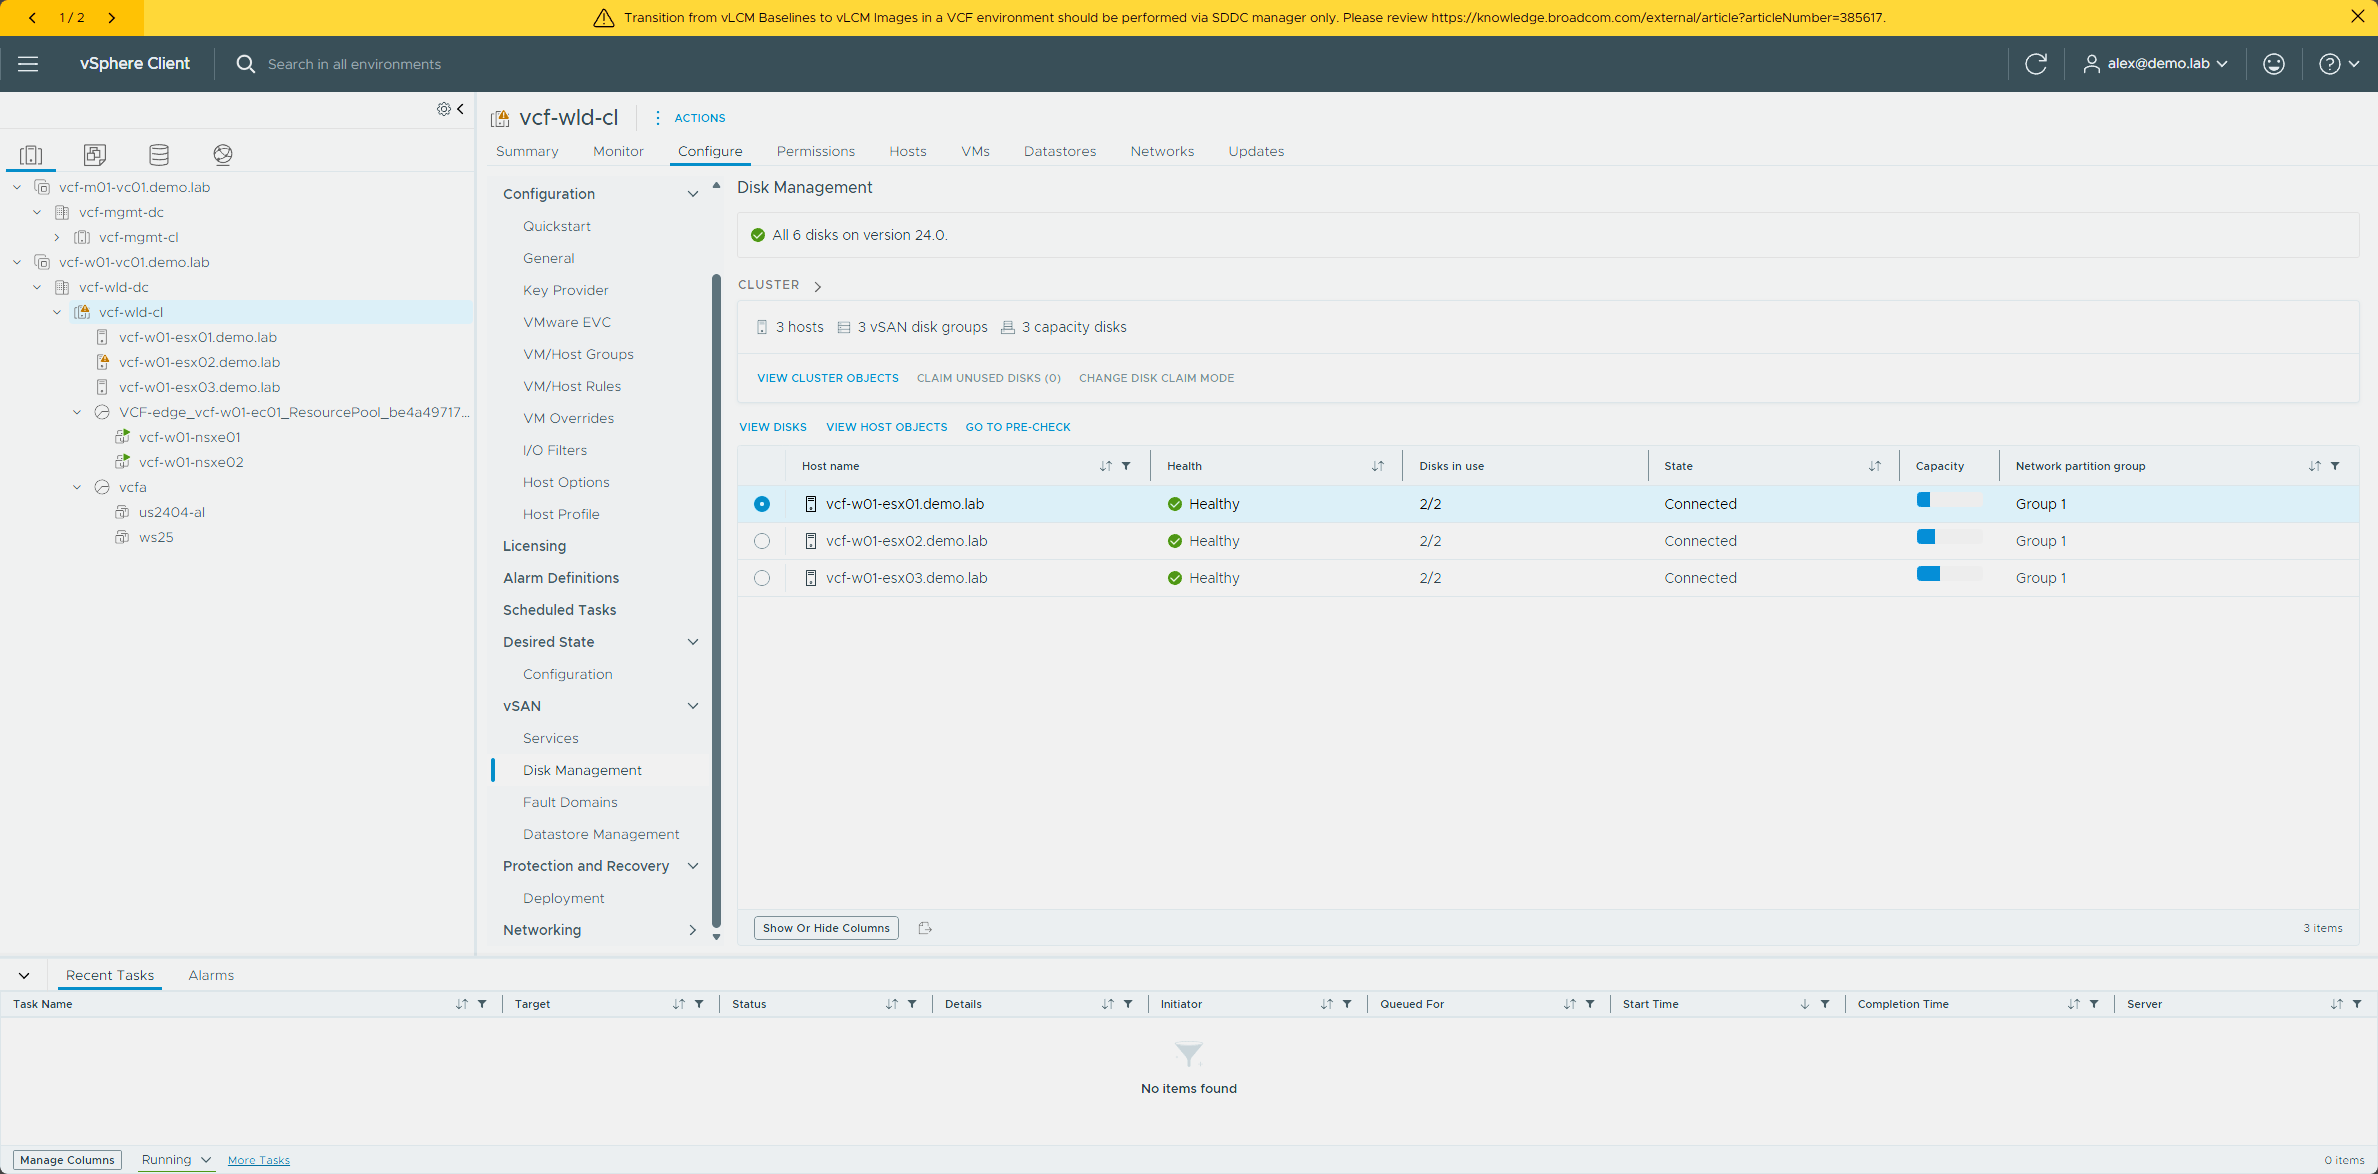
For the vSAN on-disk format, Disk Management showed all 6 disks on version 22.0. I skipped Pre-Check Upgrade this time, since it isn’t required, and clicked Upgrade, and when it finished, all 6 disks read version 24.0.
Final validation
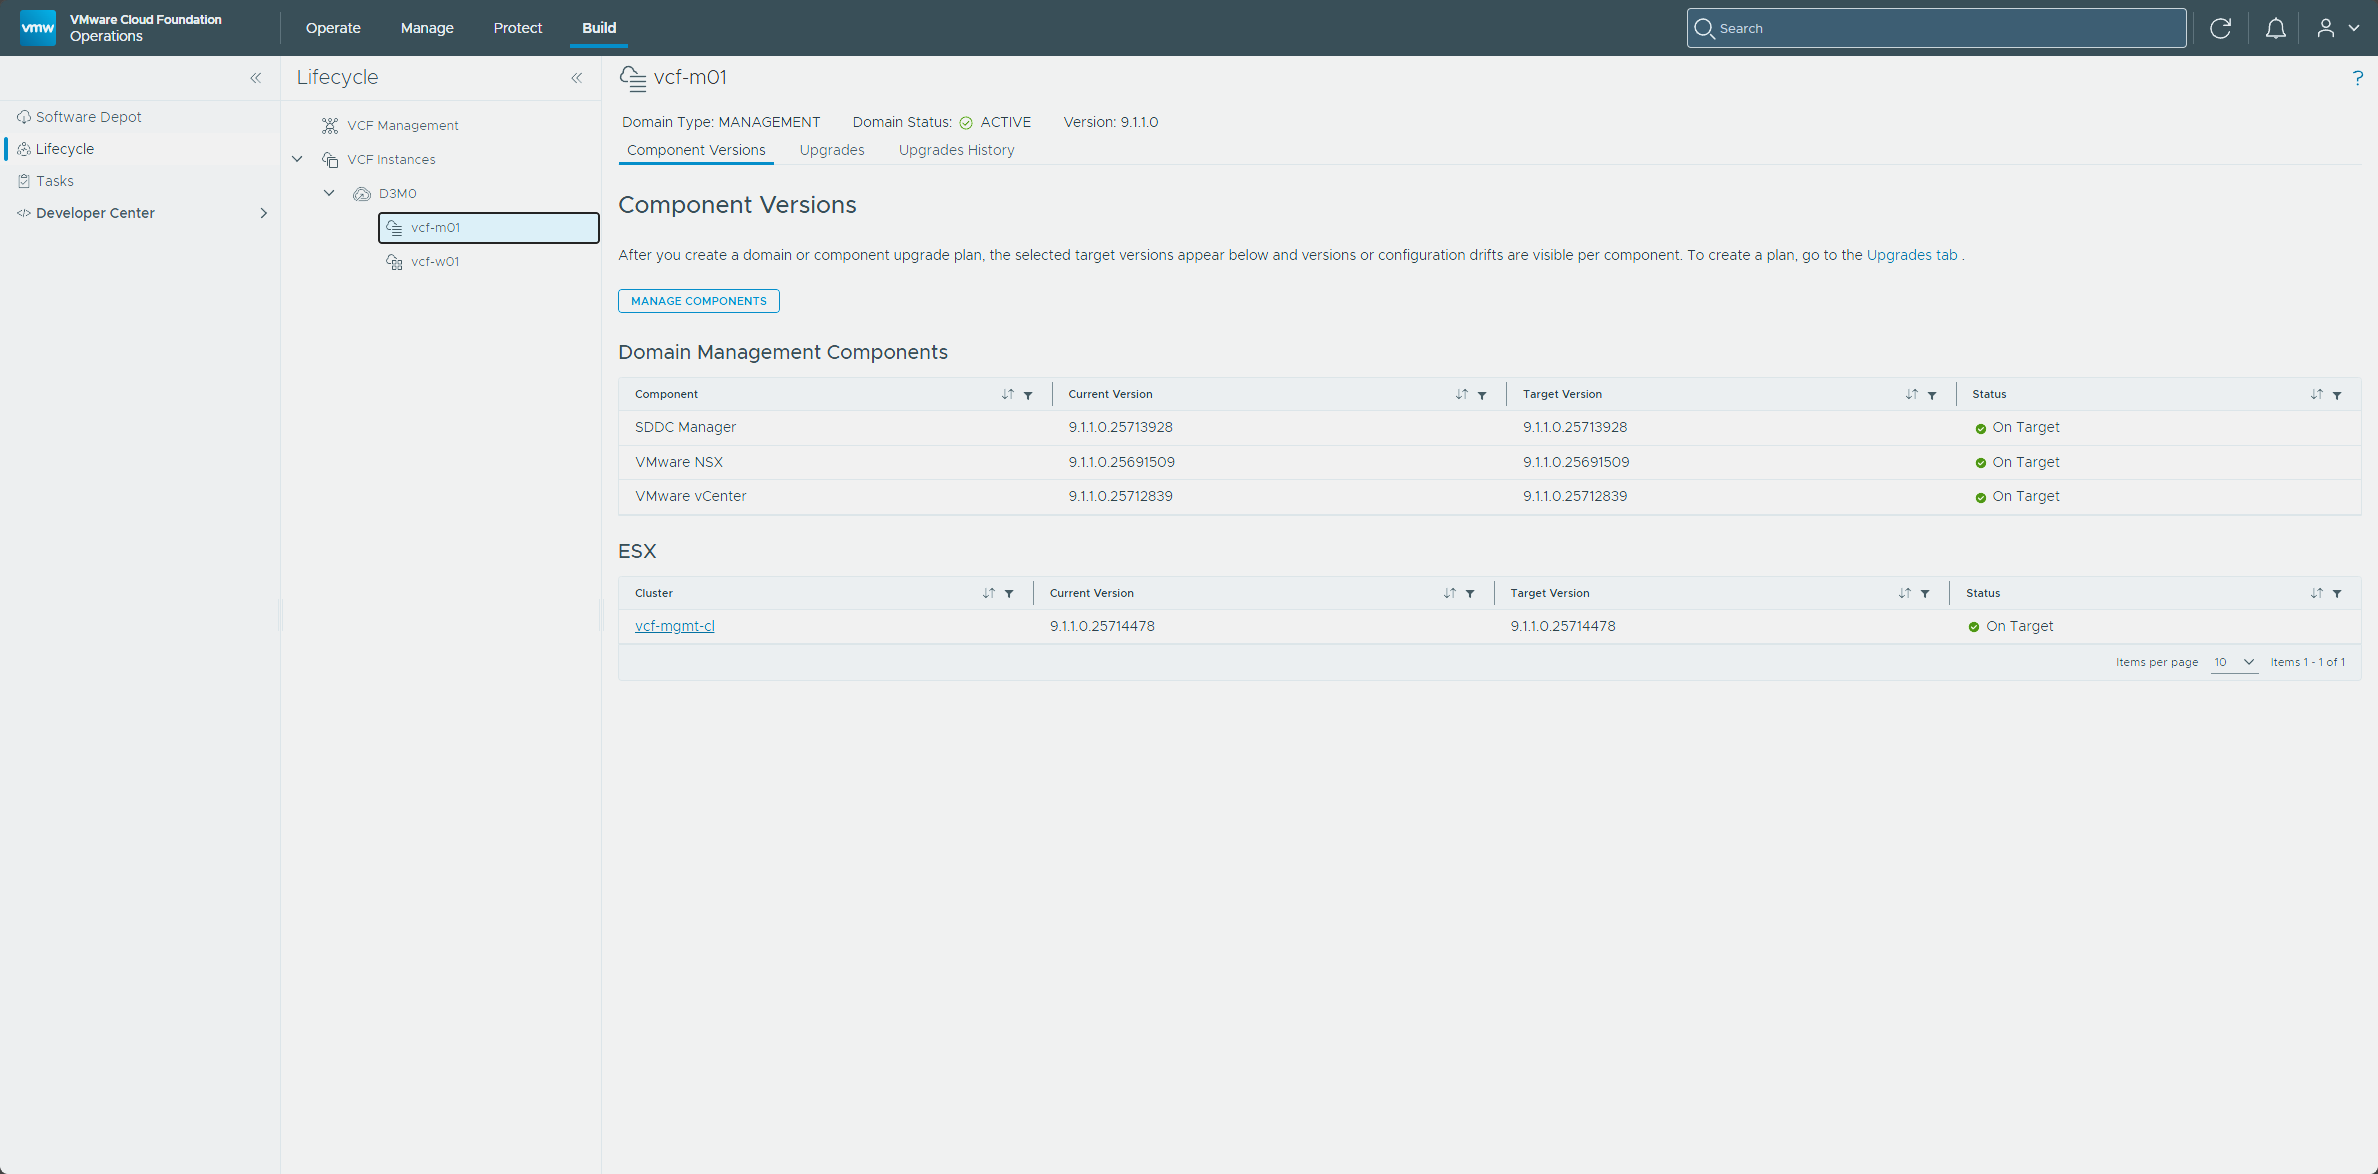
With both domains done, I did a last pass in Build → Lifecycle. Component Versions for vcf-m01 showed SDDC Manager, NSX, vCenter, and the ESX cluster all on target at 9.1.1.0 builds.
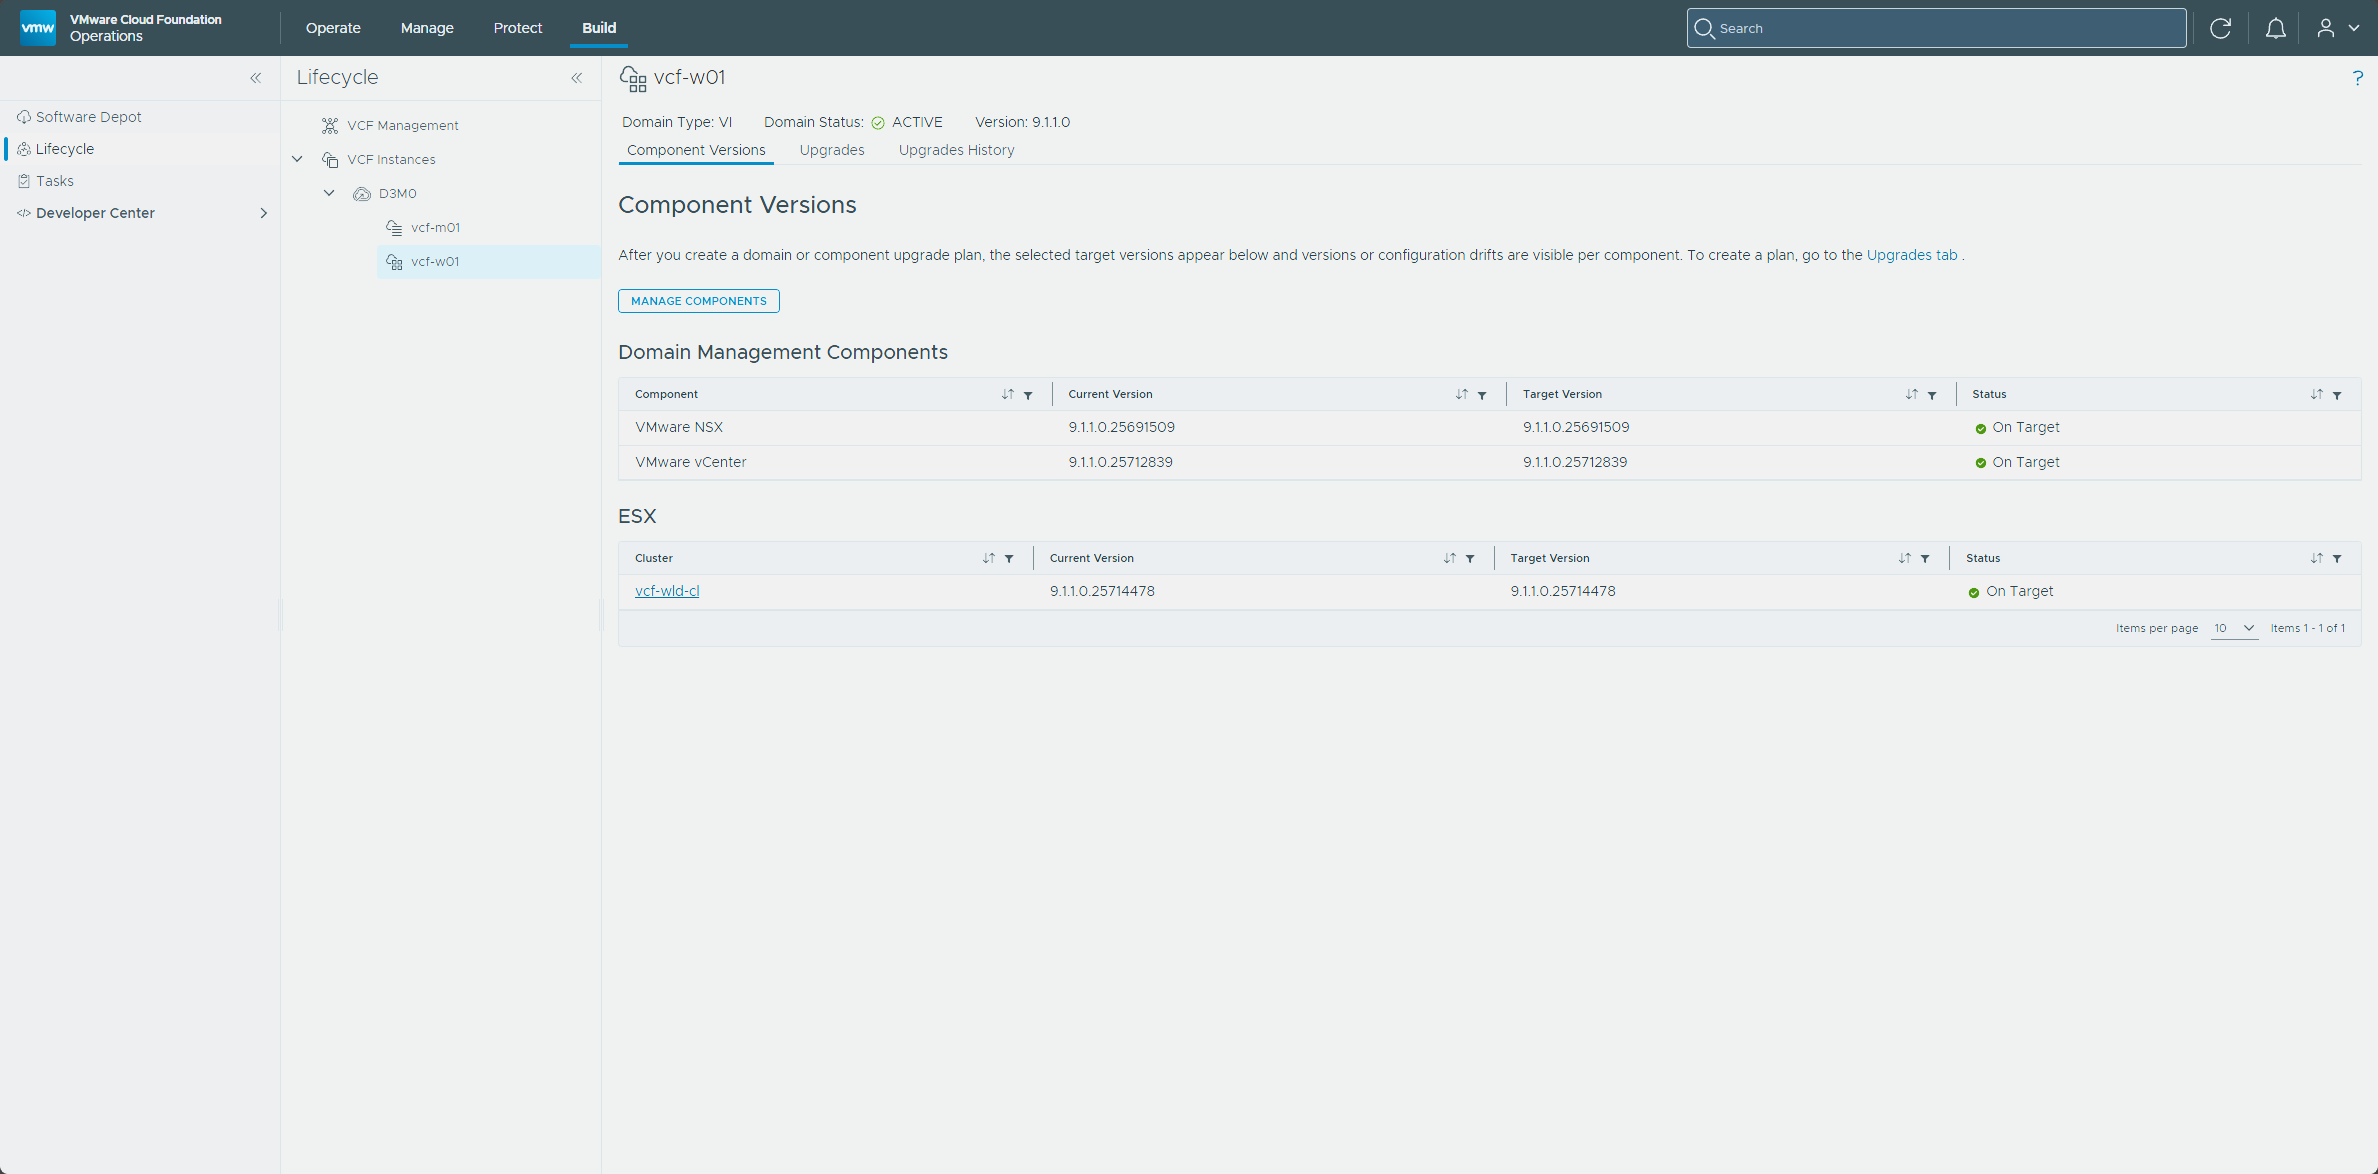
vcf-w01 showed NSX, vCenter, and its ESX cluster on target as well.
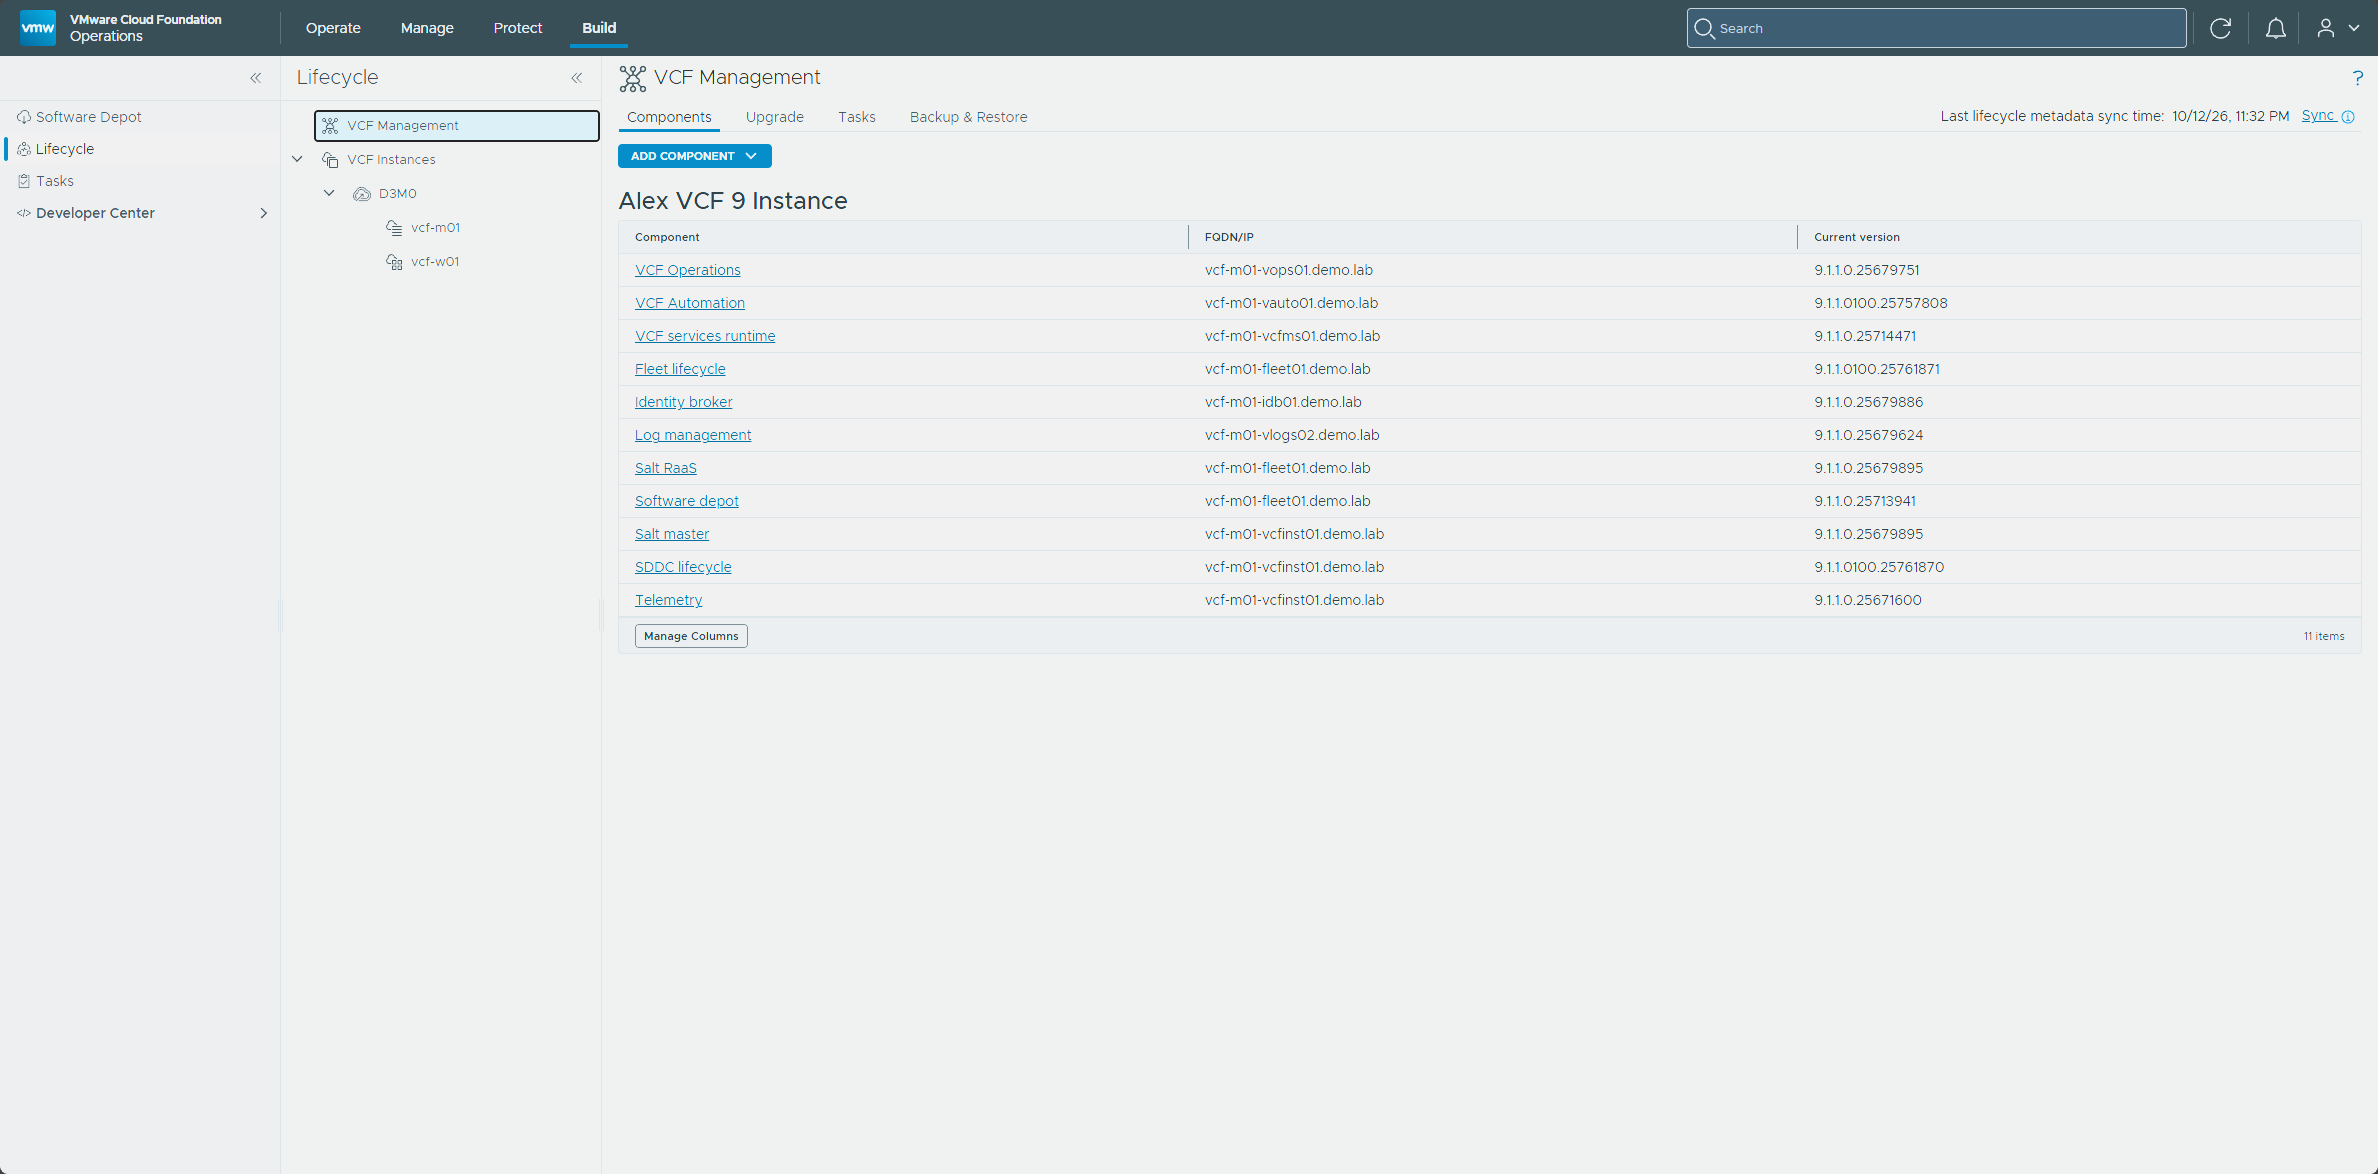
Under VCF Management, every component was on a 9.1.1.0 build, with VCF Automation, Fleet lifecycle, and SDDC lifecycle on 9.1.1.0100 (patch releases). Log management was there too, along with the rest of VCF Management Services.
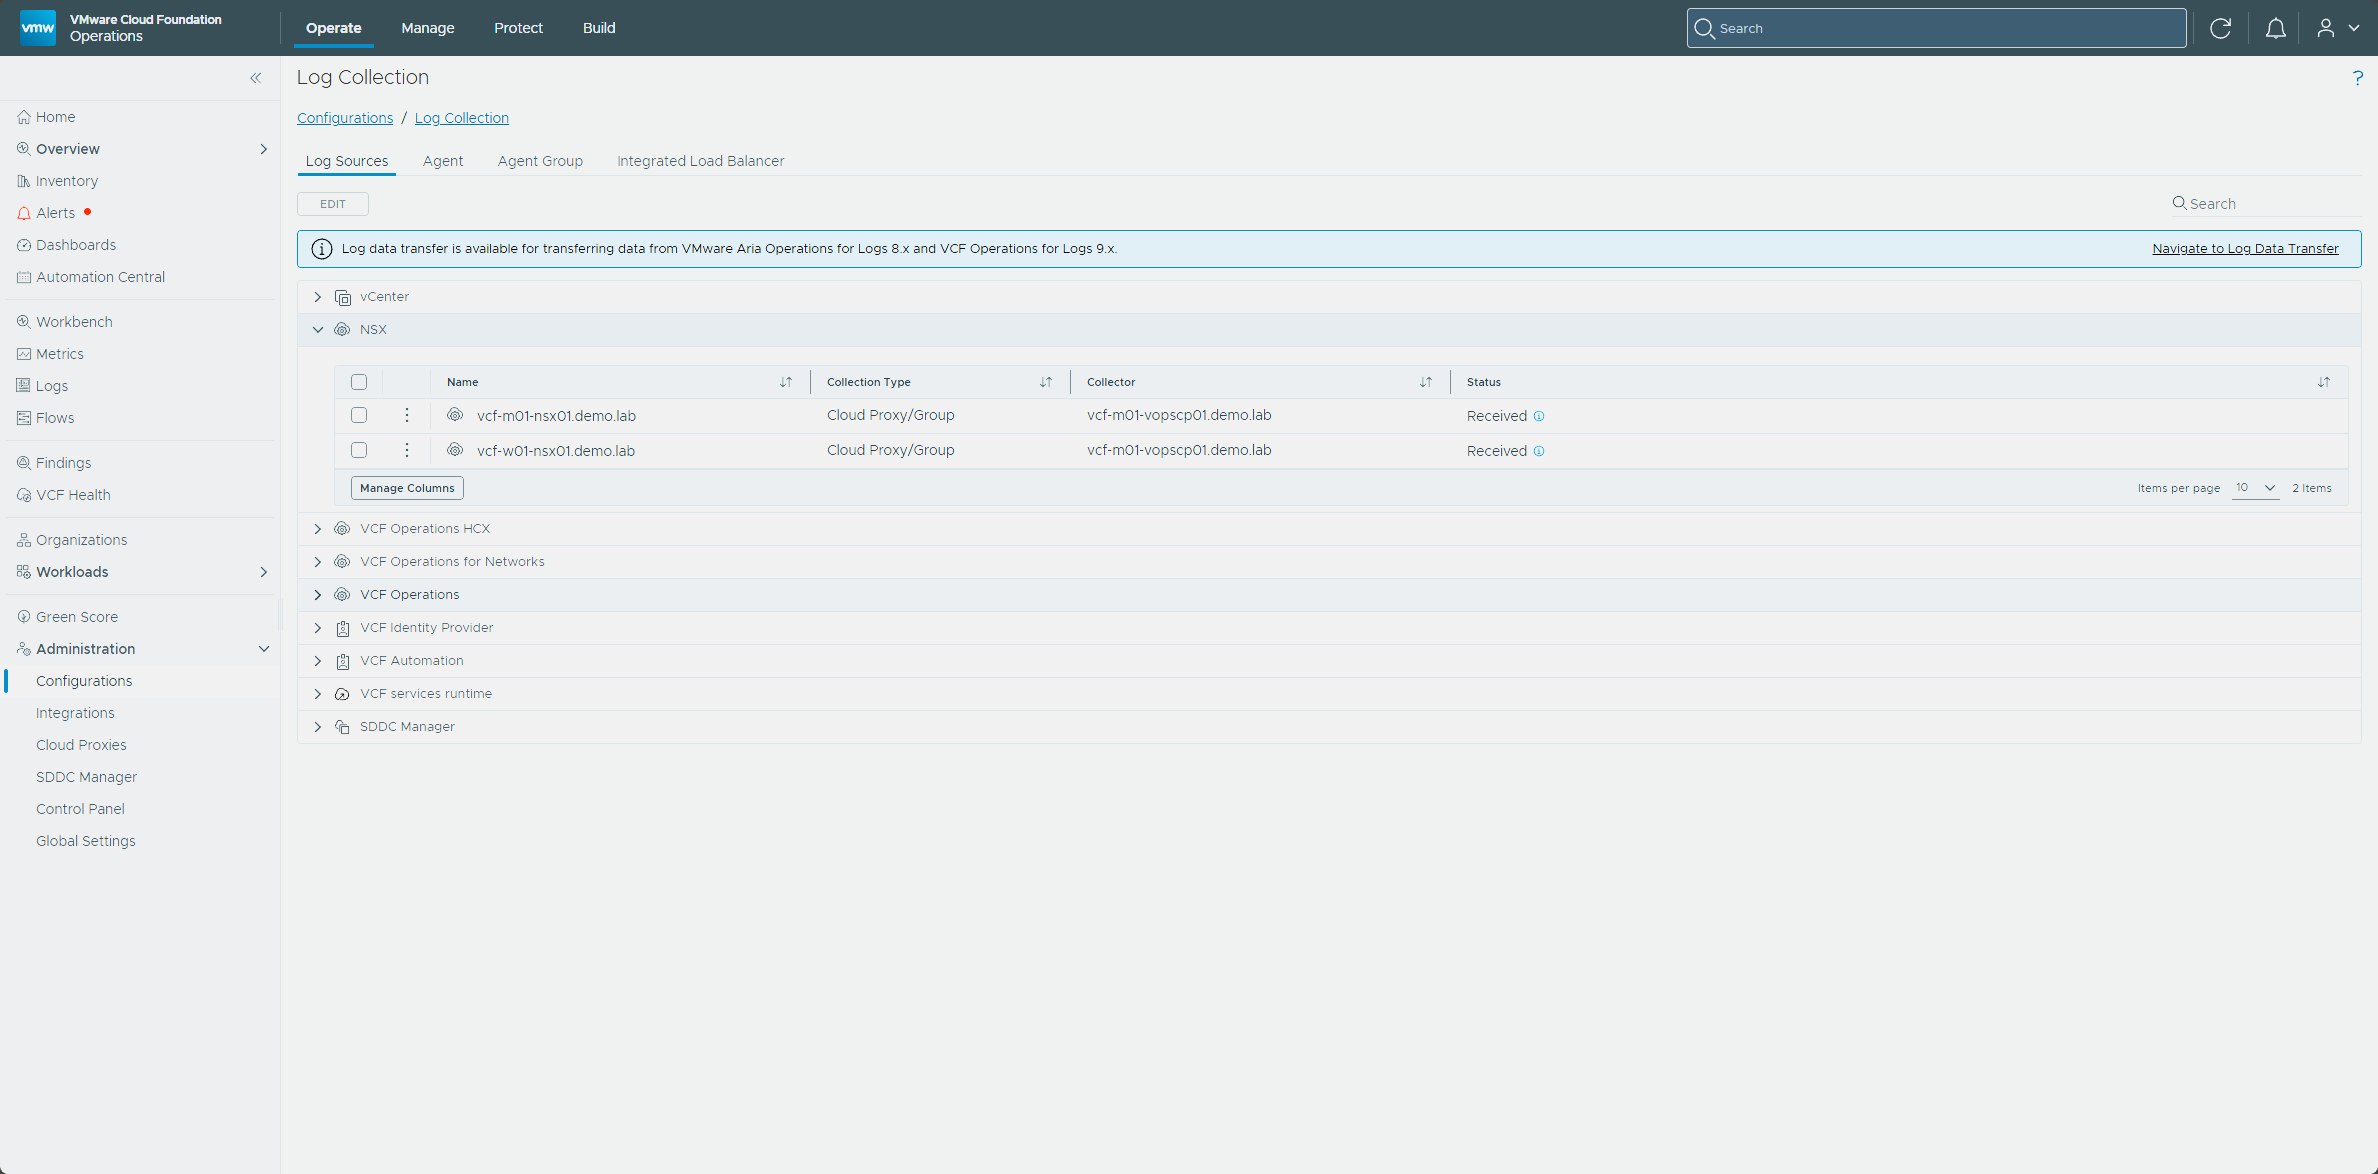
On Operate → Administration → Configurations → Log Collection, both NSX sources, vcf-m01-nsx01 and vcf-w01-nsx01, showed Received. They had shown Failed back in Part 3.
Wrapping up the series
That’s a full VMware Cloud Foundation 9.0.2 to 9.1 upgrade, start to finish.
A few parting thoughts. Read the precheck results before you upgrade, because reviewing the errors and warnings first saves you from surprises later. And plan your cert and password work around the freeze window, which runs from Part 1 until each component reaches 9.1, so Part 3 for Automation and Logs, and Part 4 for an embedded Identity Broker.
Thanks for following the whole series. If you ran your own 9.1 upgrade alongside it, I’d like to hear what went smoothly and what tripped you up, so drop a comment and let me know.
-virtualex-
Comments