VMware Cloud Foundation 9.1 Upgrade - Part 5: ESX Hosts and Completing the NSX Upgrade
With NSX Manager and vCenter upgraded in Part 4, it’s time for the hosts. Part 5 covers the ESX host upgrade with vLCM image-based remediation, and then completing the NSX upgrade. My management domain doesn’t have an NSX Edge cluster. The Edges in my lab live in the workload domain, and they get their turn in Part 6.
(New here? The series overview has the environment and prerequisites.)
A quick detour: VKS and Supervisor
Broadcom’s upgrade order has two stages between vCenter and ESX that I’m skipping in this lab: vSphere Kubernetes Service (VKS) and Supervisor. They only apply if you’ve enabled Workload Management. The order is VKS 3.6.0 or later first, then Supervisor, both before the ESX hosts. My lab has no Supervisor enabled, so both stages skip.
Upgrading the ESX hosts
VCF 9.x is image-based only, and baselines aren’t supported in 9.x (How to Upgrade to VMware Cloud Foundation 9.1). The hosts needed an image for the 9.1 ESX release before they could be remediated. Broadcom’s flow is to create it in the vSphere Client and then import it into VCF Operations, either from the vCenter or from a file (Upgrade ESX).
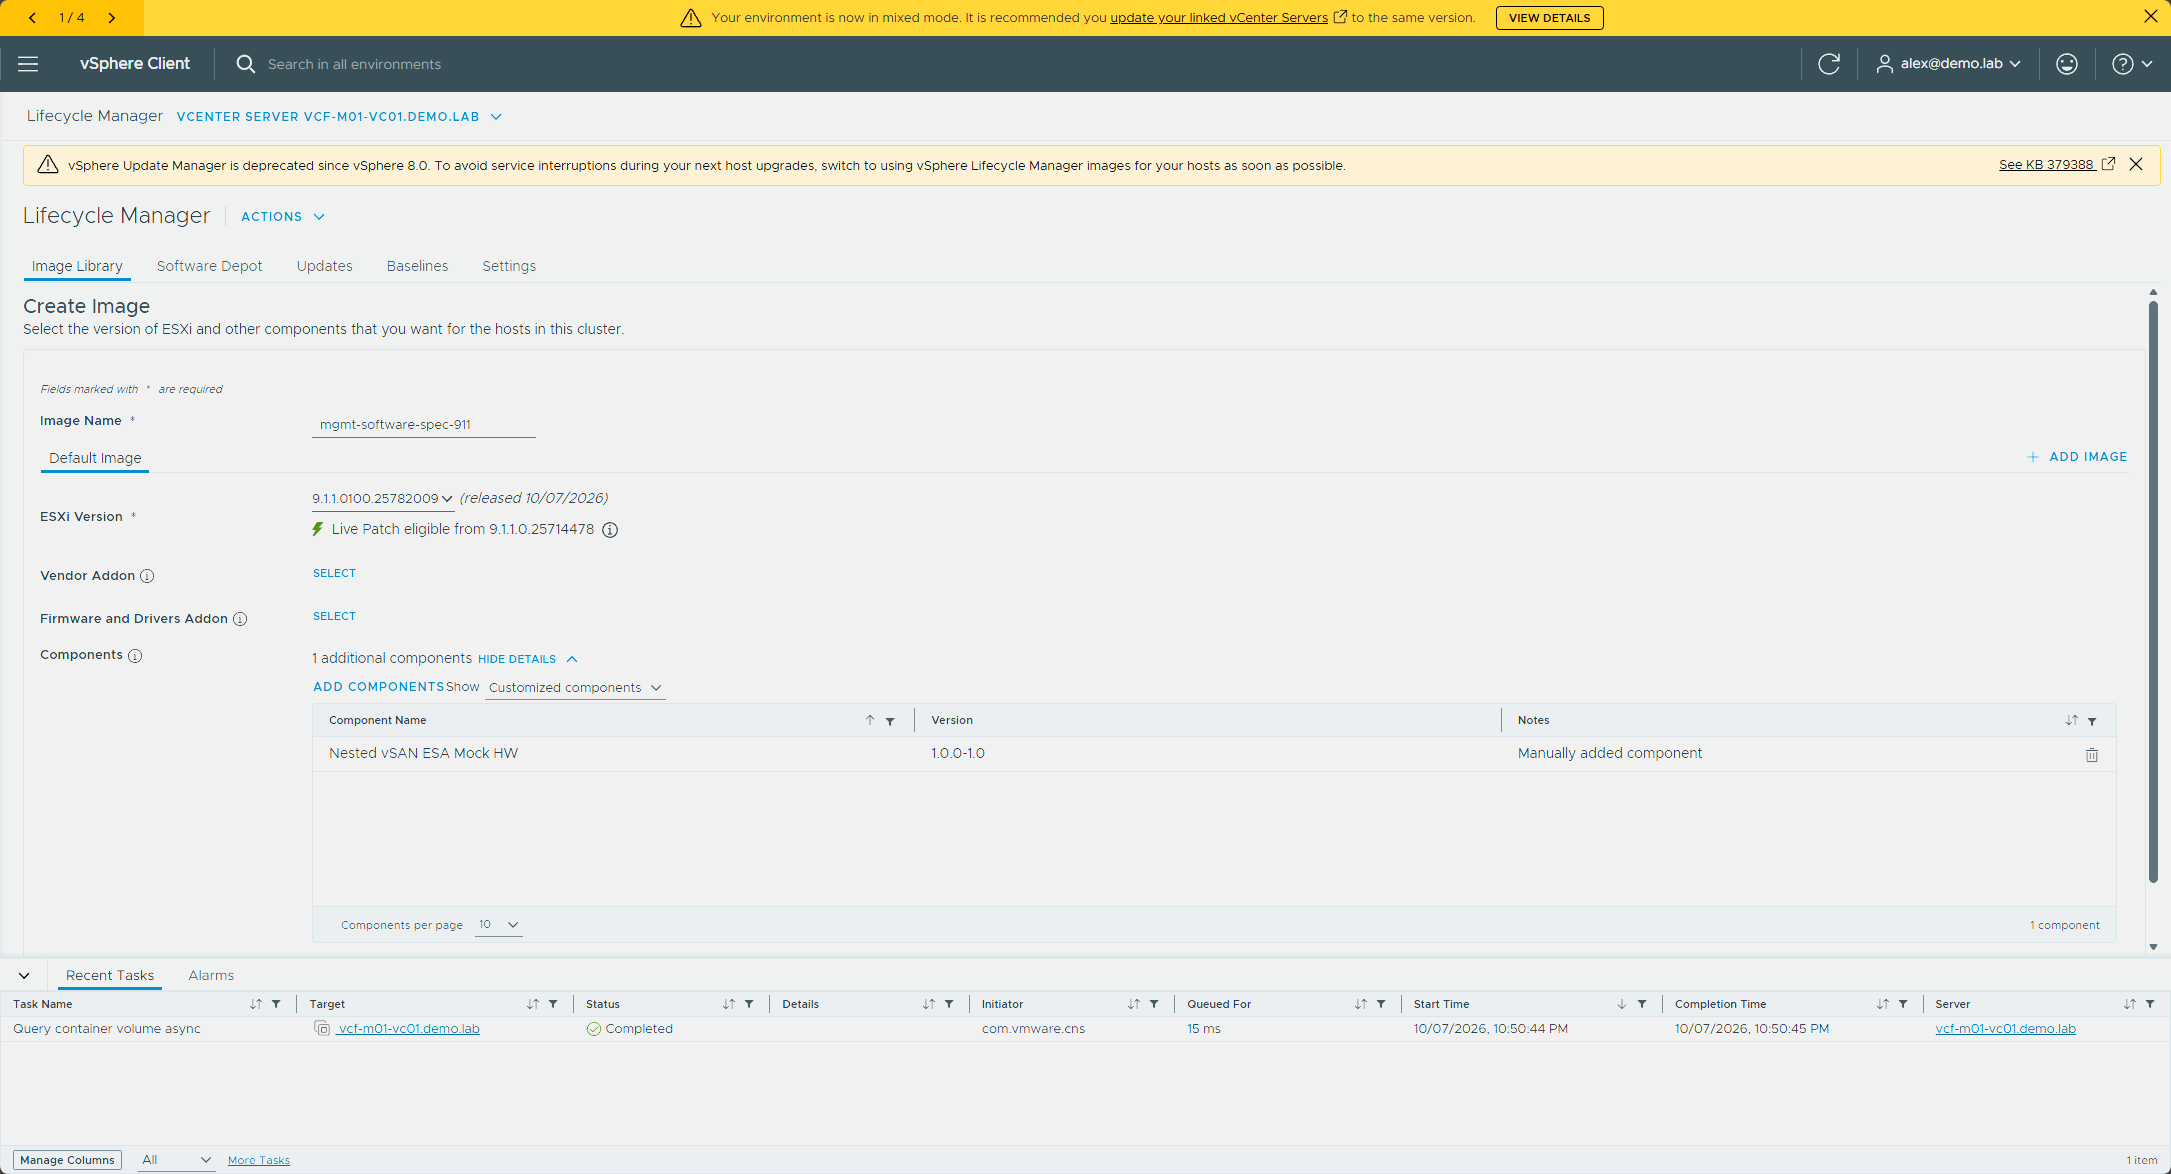
Create and import the 9.1 ESX image
- In the vSphere Client, create an image for the target ESX release: Lifecycle Manager → Image Library → Create Image.
- In VCF Operations, go to Build → Lifecycle, expand VCF Instances, select the VCF instance, open Image Management, and click Import Image.
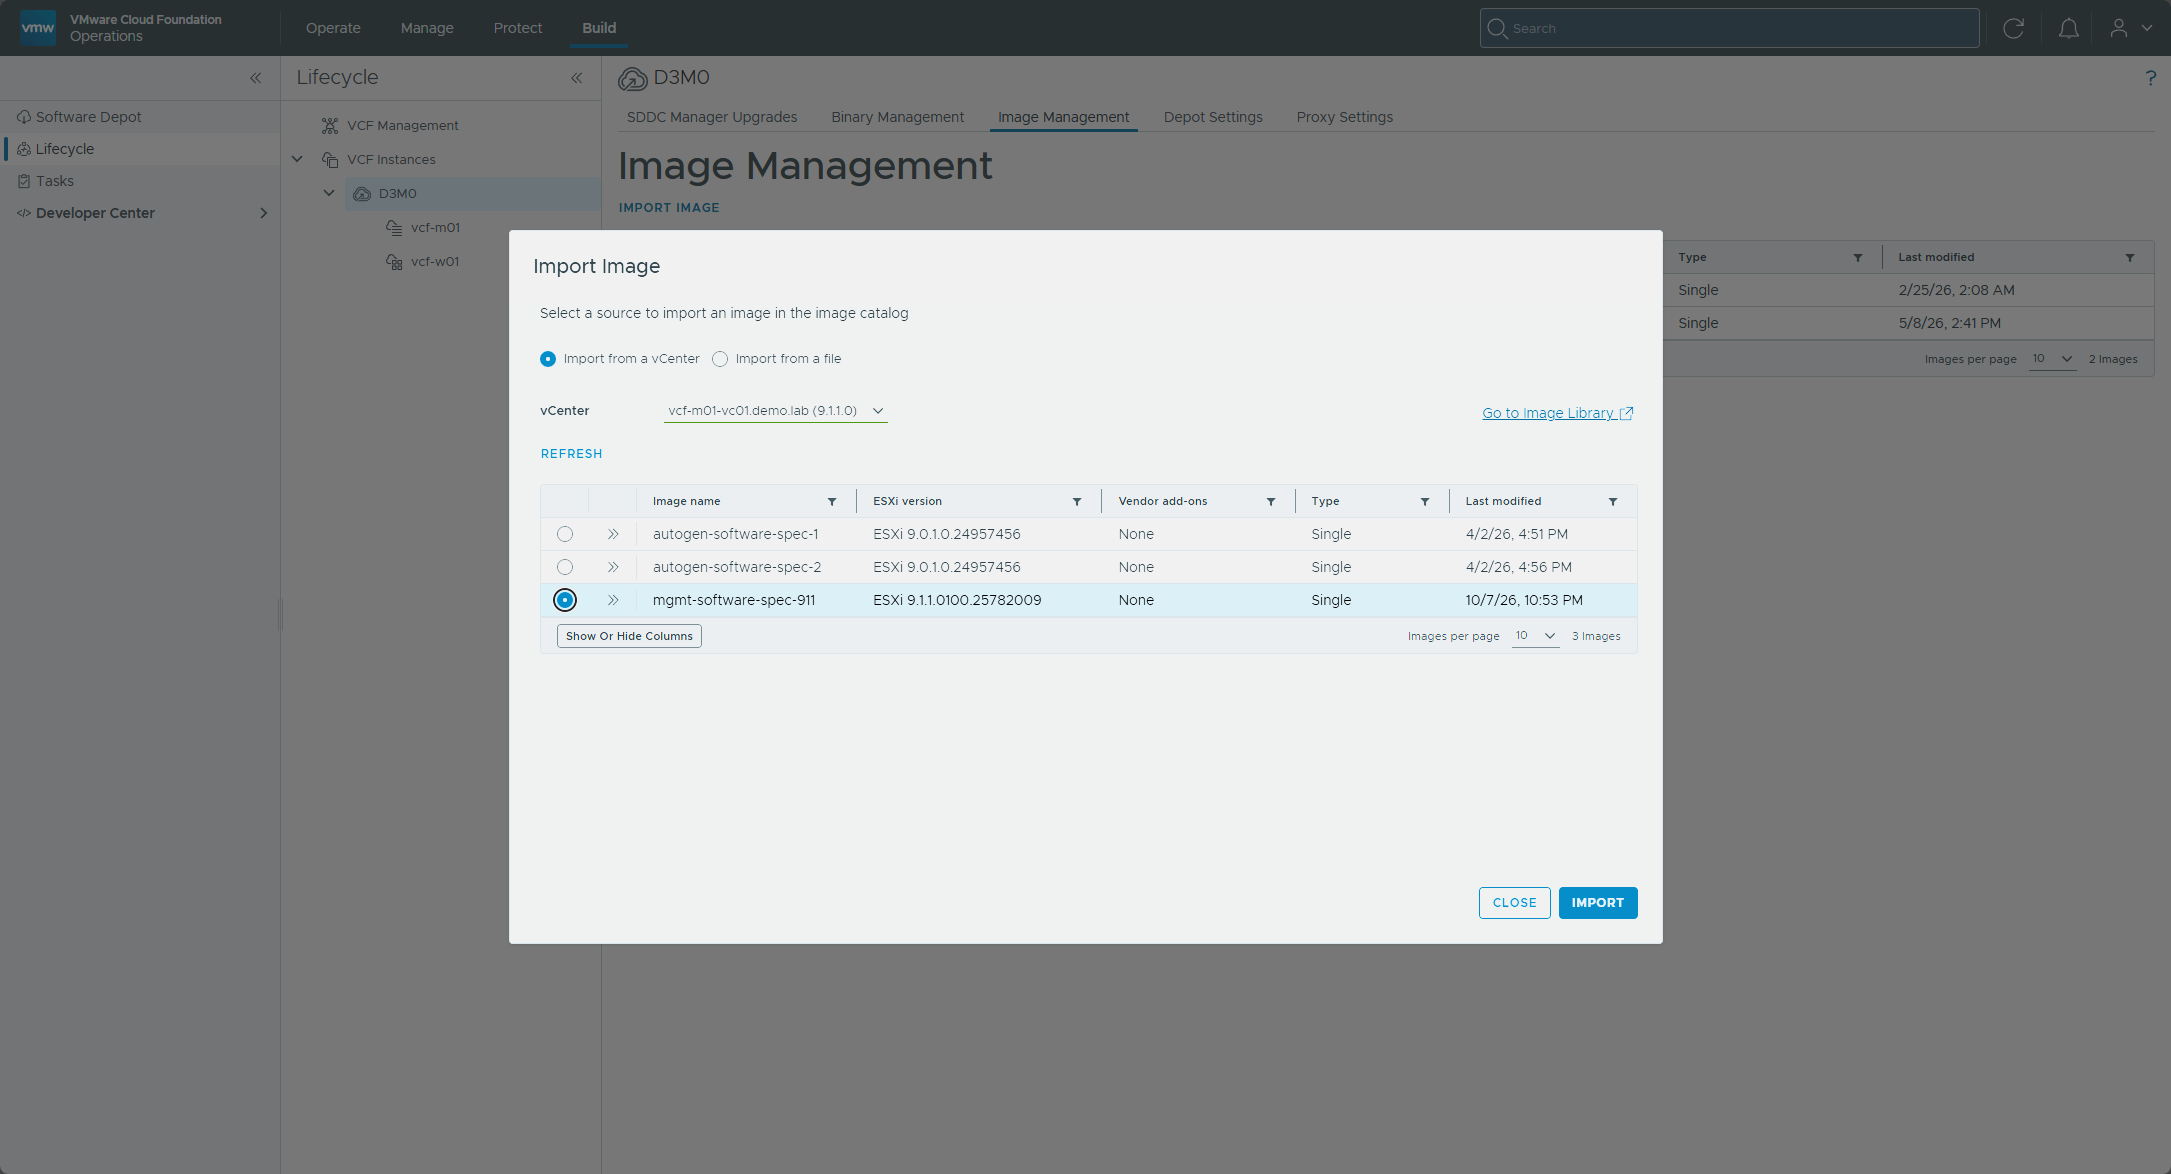
- Choose Import from a vCenter and pick the vCenter and the image, or choose Import from a file and provide a name plus the JSON, ZIP, and optional ISO files exported from the vSphere Client. Click Import.
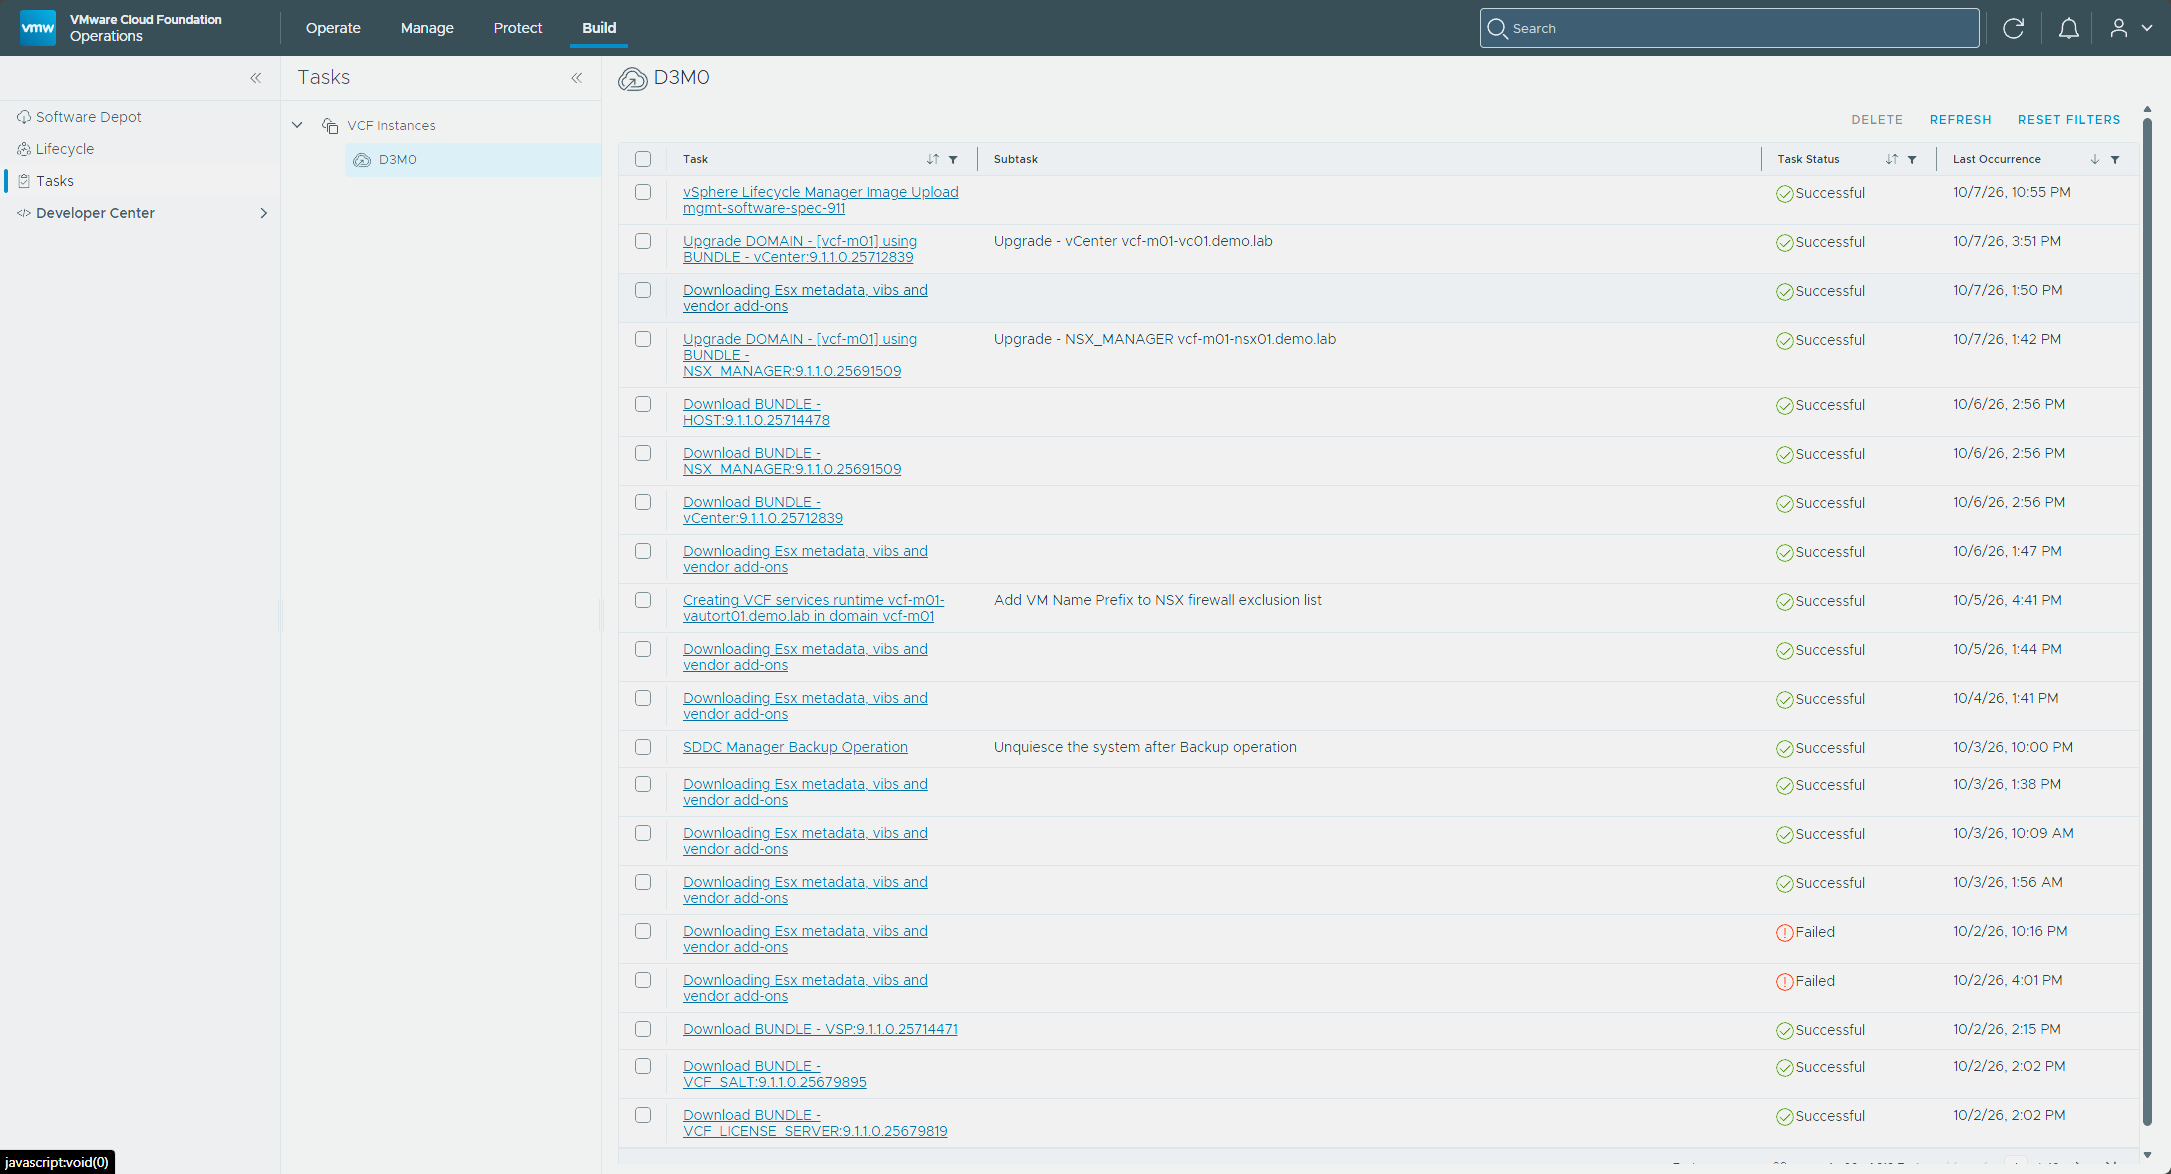
- Track the import in the Tasks panel.
I named the image mgmt-software-spec-911 and picked ESXi version 9.1.1.0100.25782009 (Create an Image in Image Library Manually). I also added Nested vSAN ESA Mock HW, the component from William Lam’s mock VIB that the precheck warned about on every host, then validated the image and saved it.
In VCF Operations, I imported mgmt-software-spec-911 from the management vCenter.
The import showed up in the Tasks panel as “vSphere Lifecycle Manager Image Upload mgmt-software-spec-911” and finished successfully.
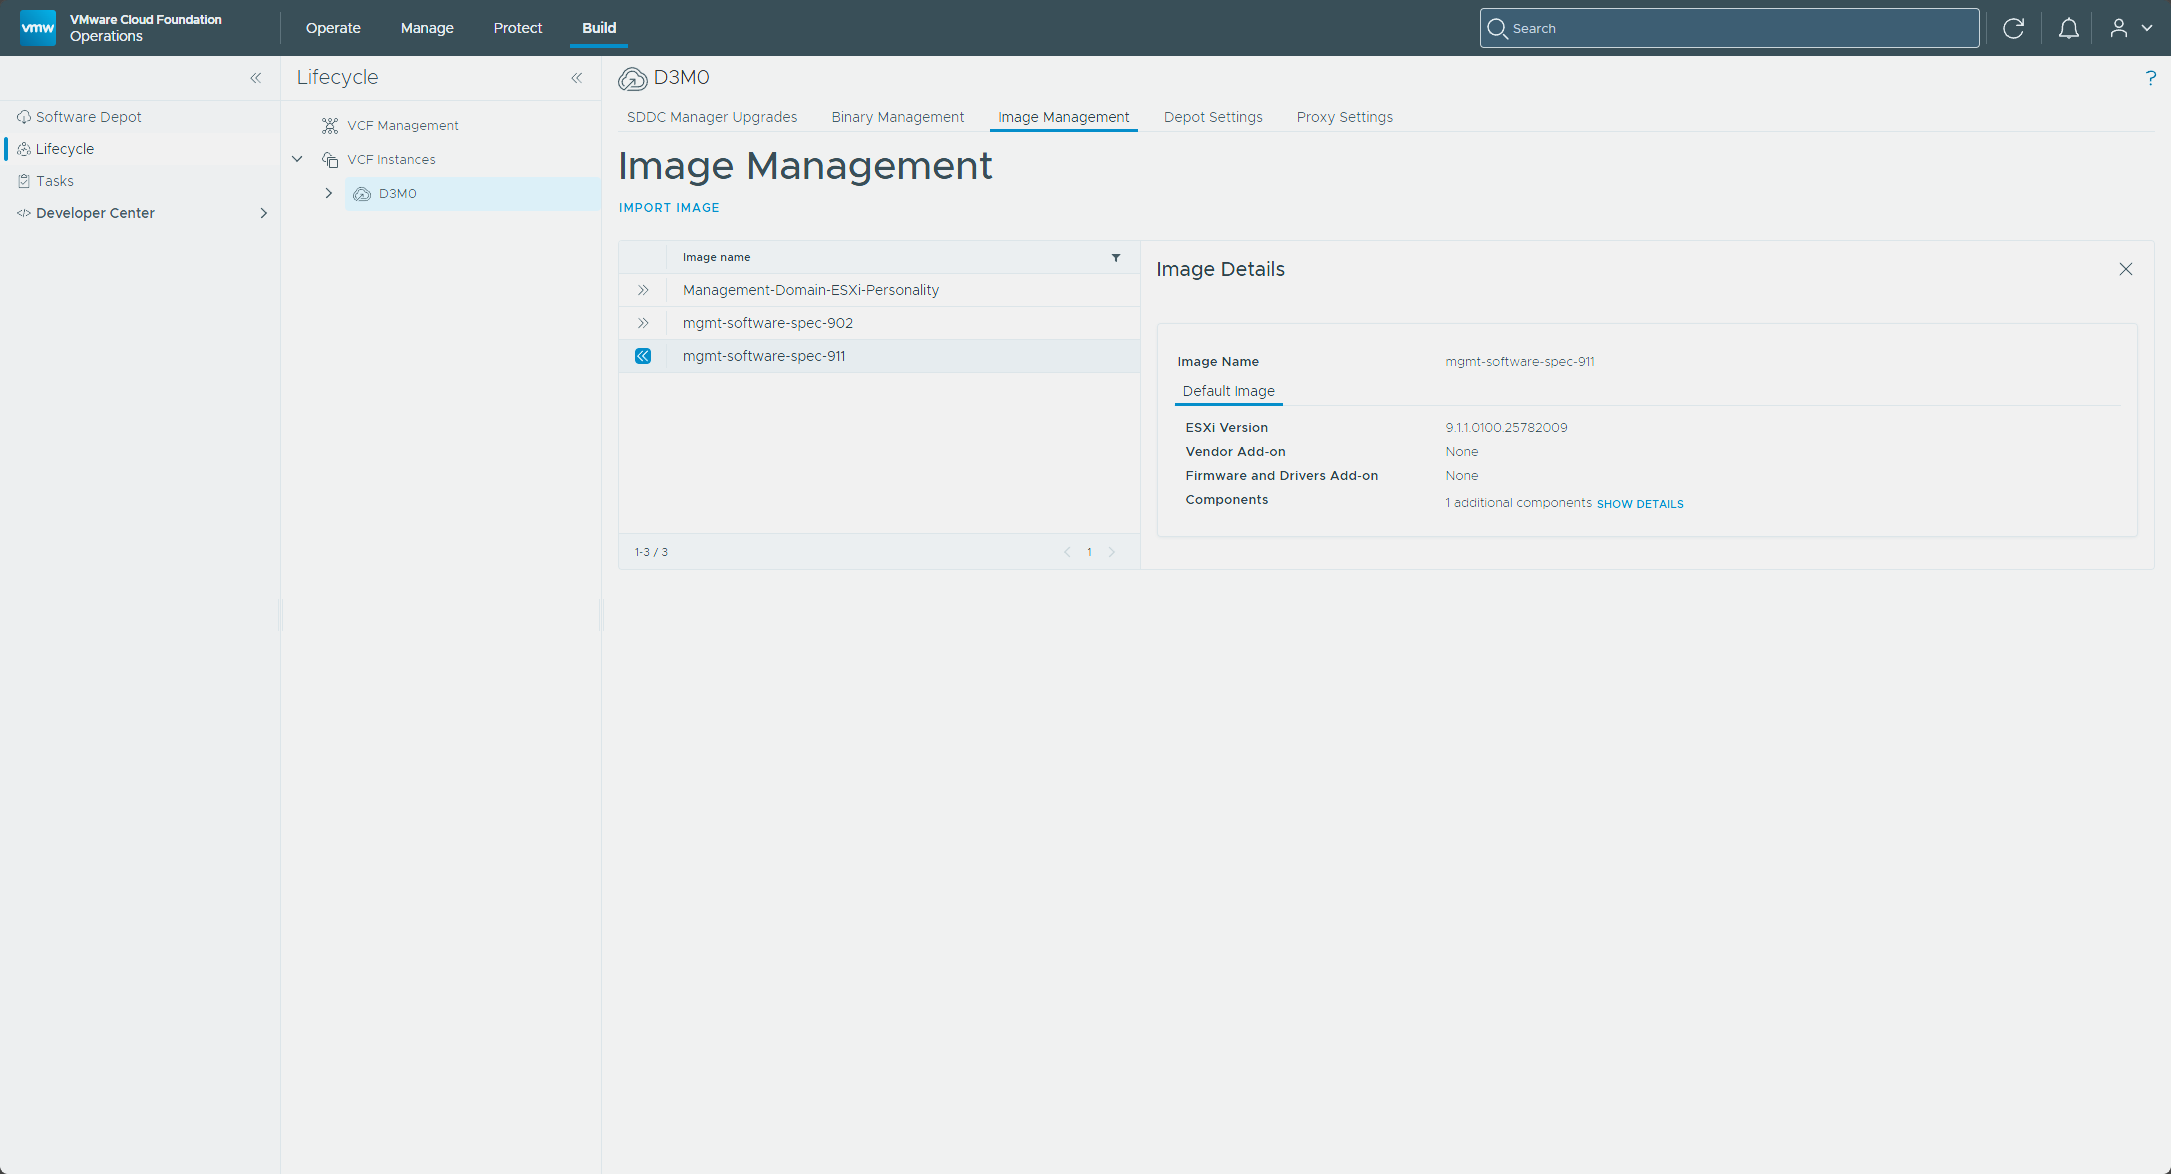
The image then appeared on the Image Management tab with ESX 9.1.1.0100.25782009, no vendor add-on, no firmware and drivers add-on, and one additional component.
Starting the ESX upgrade
- On the management domain’s Upgrades tab, click Configure under VMware ESX Upgrade.
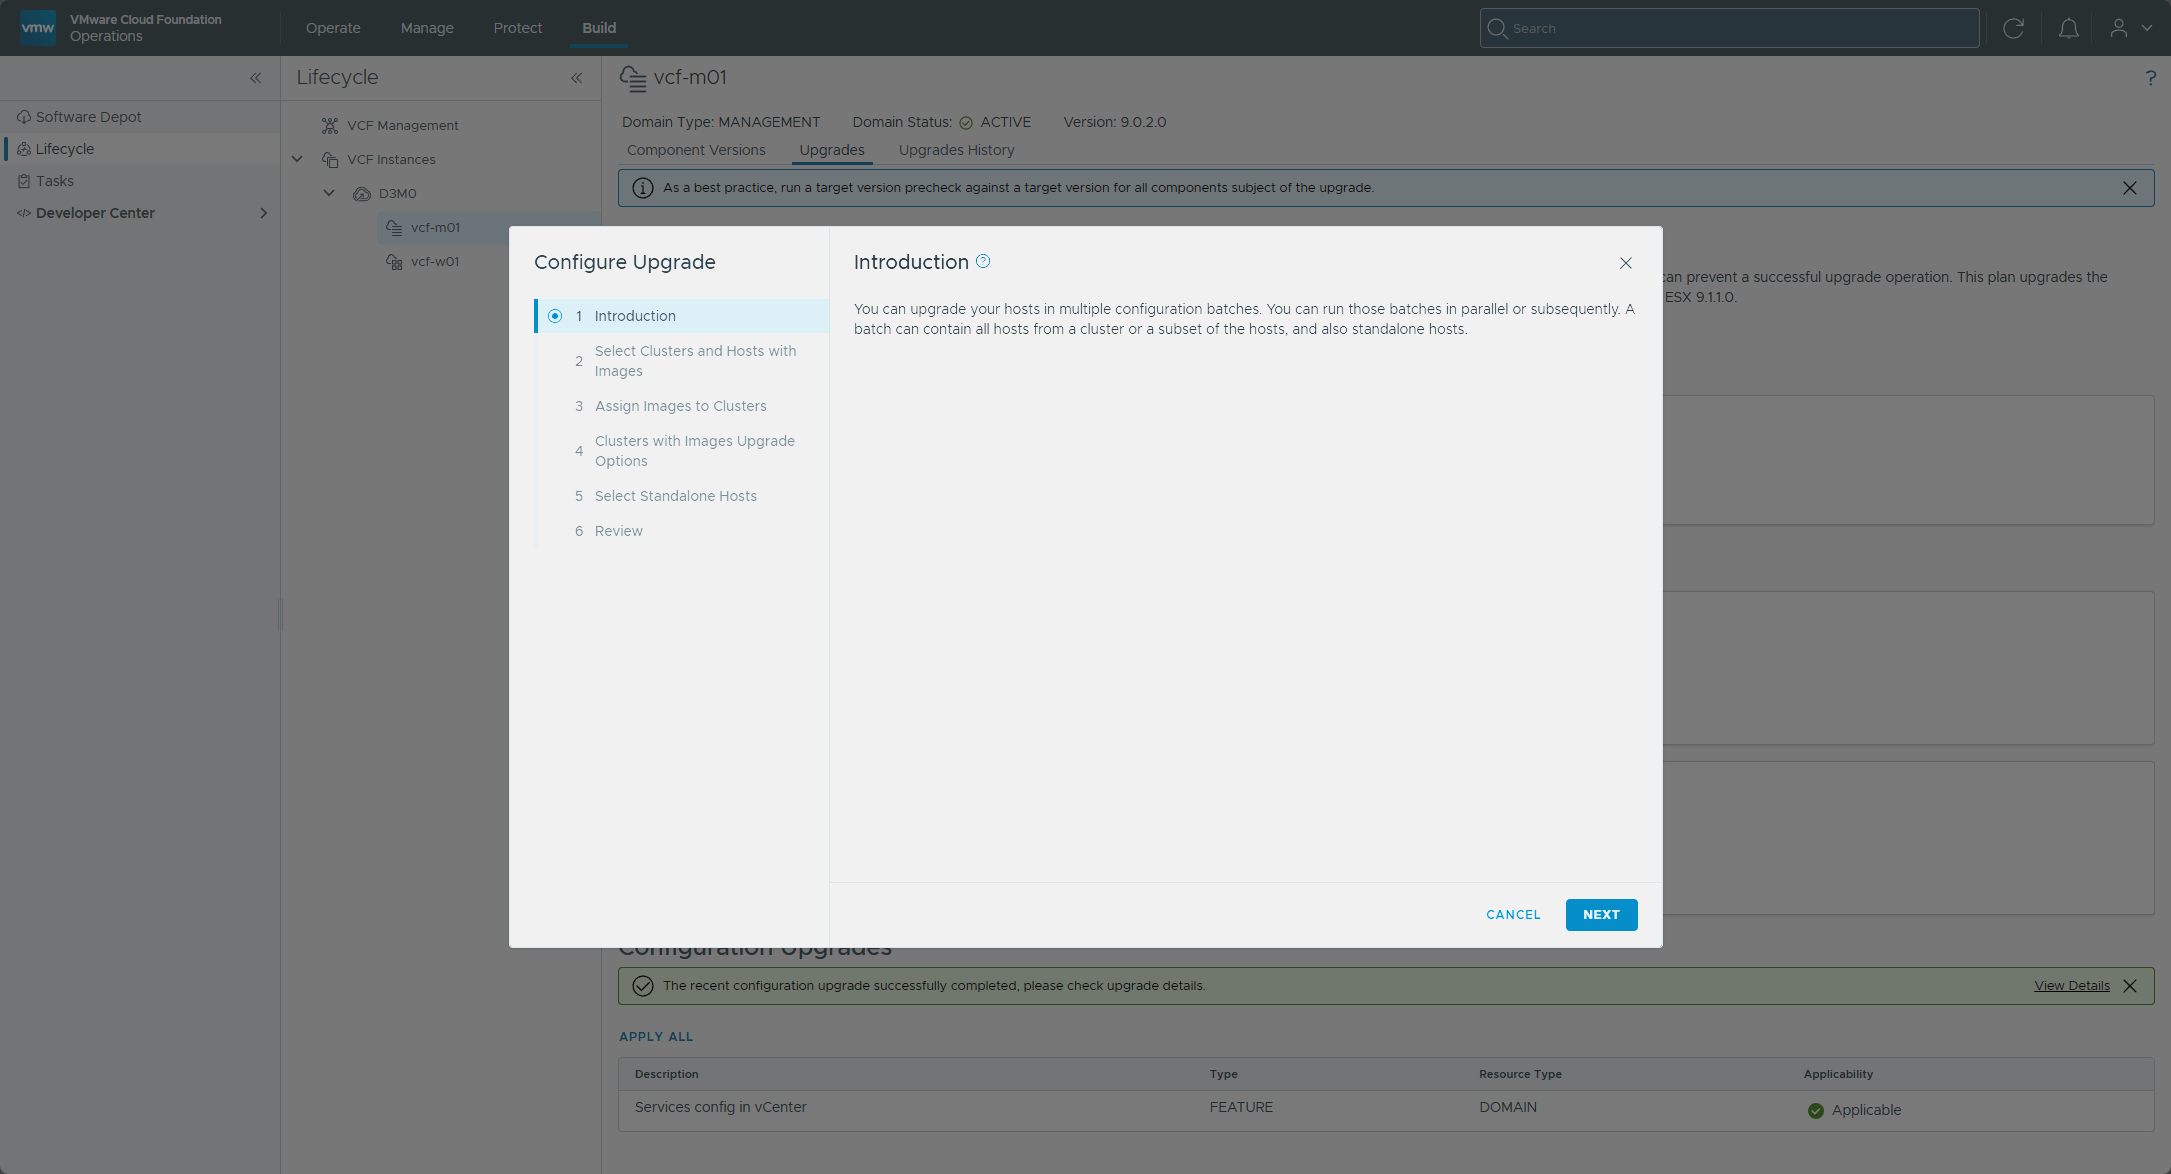
- Read the introduction and click Next.
- Select the clusters to upgrade and click Next. All clusters are selected by default, and Customize picks individual hosts.
- Select the cluster, click Assign Image, pick the imported image, click Assign Image again, and click Next.
- Set the upgrade options and click Next:
- Sequential or parallel clusters: clusters upgrade in parallel by default. If you select more than ten, the first ten run in parallel and the rest run sequentially.
- Quick Boot: it can reduce the upgrade time by skipping the physical reboot of the host.
- Migrate Powered Off and Suspended VMs: it migrates suspended and powered-off VMs off the hosts that have to enter maintenance mode.
- Retry policy: it sets whether to retry, the delay between attempts, and the number of attempts.
- Live Patch: it isn’t applicable to major upgrades, so choose Auto or leave it off.
- Select any standalone hosts and click Next.
- Review the configuration and click Finish.
- Under VMware ESX Upgrade, click Run Prechecks and review the report.
- Click Upgrade Now, or click Schedule to pick another time, and follow it with View Status.
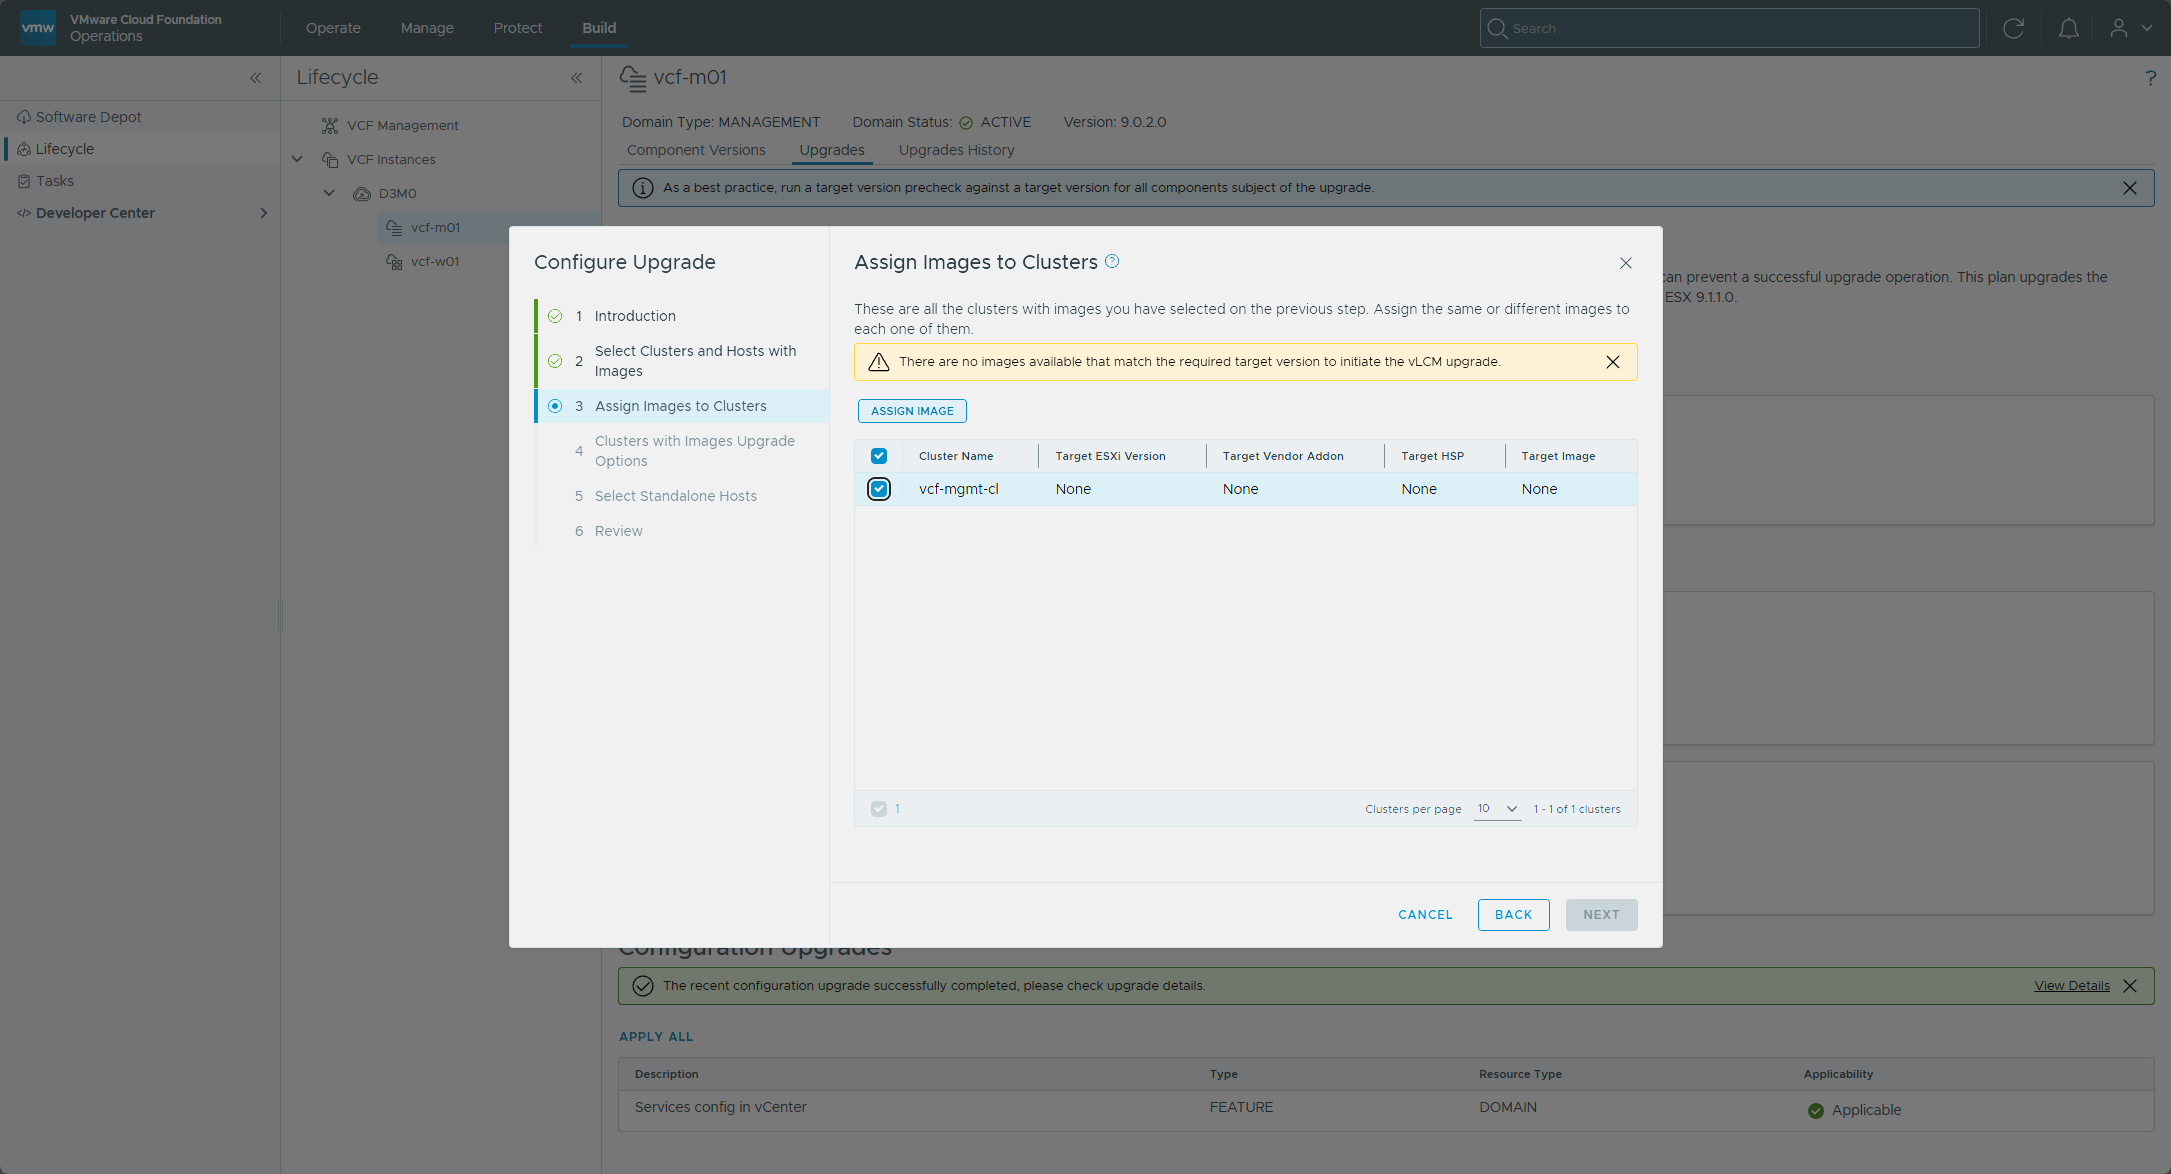
On Assign Images to Clusters, a warning said no images matched the required target version, and Next stayed grayed out.
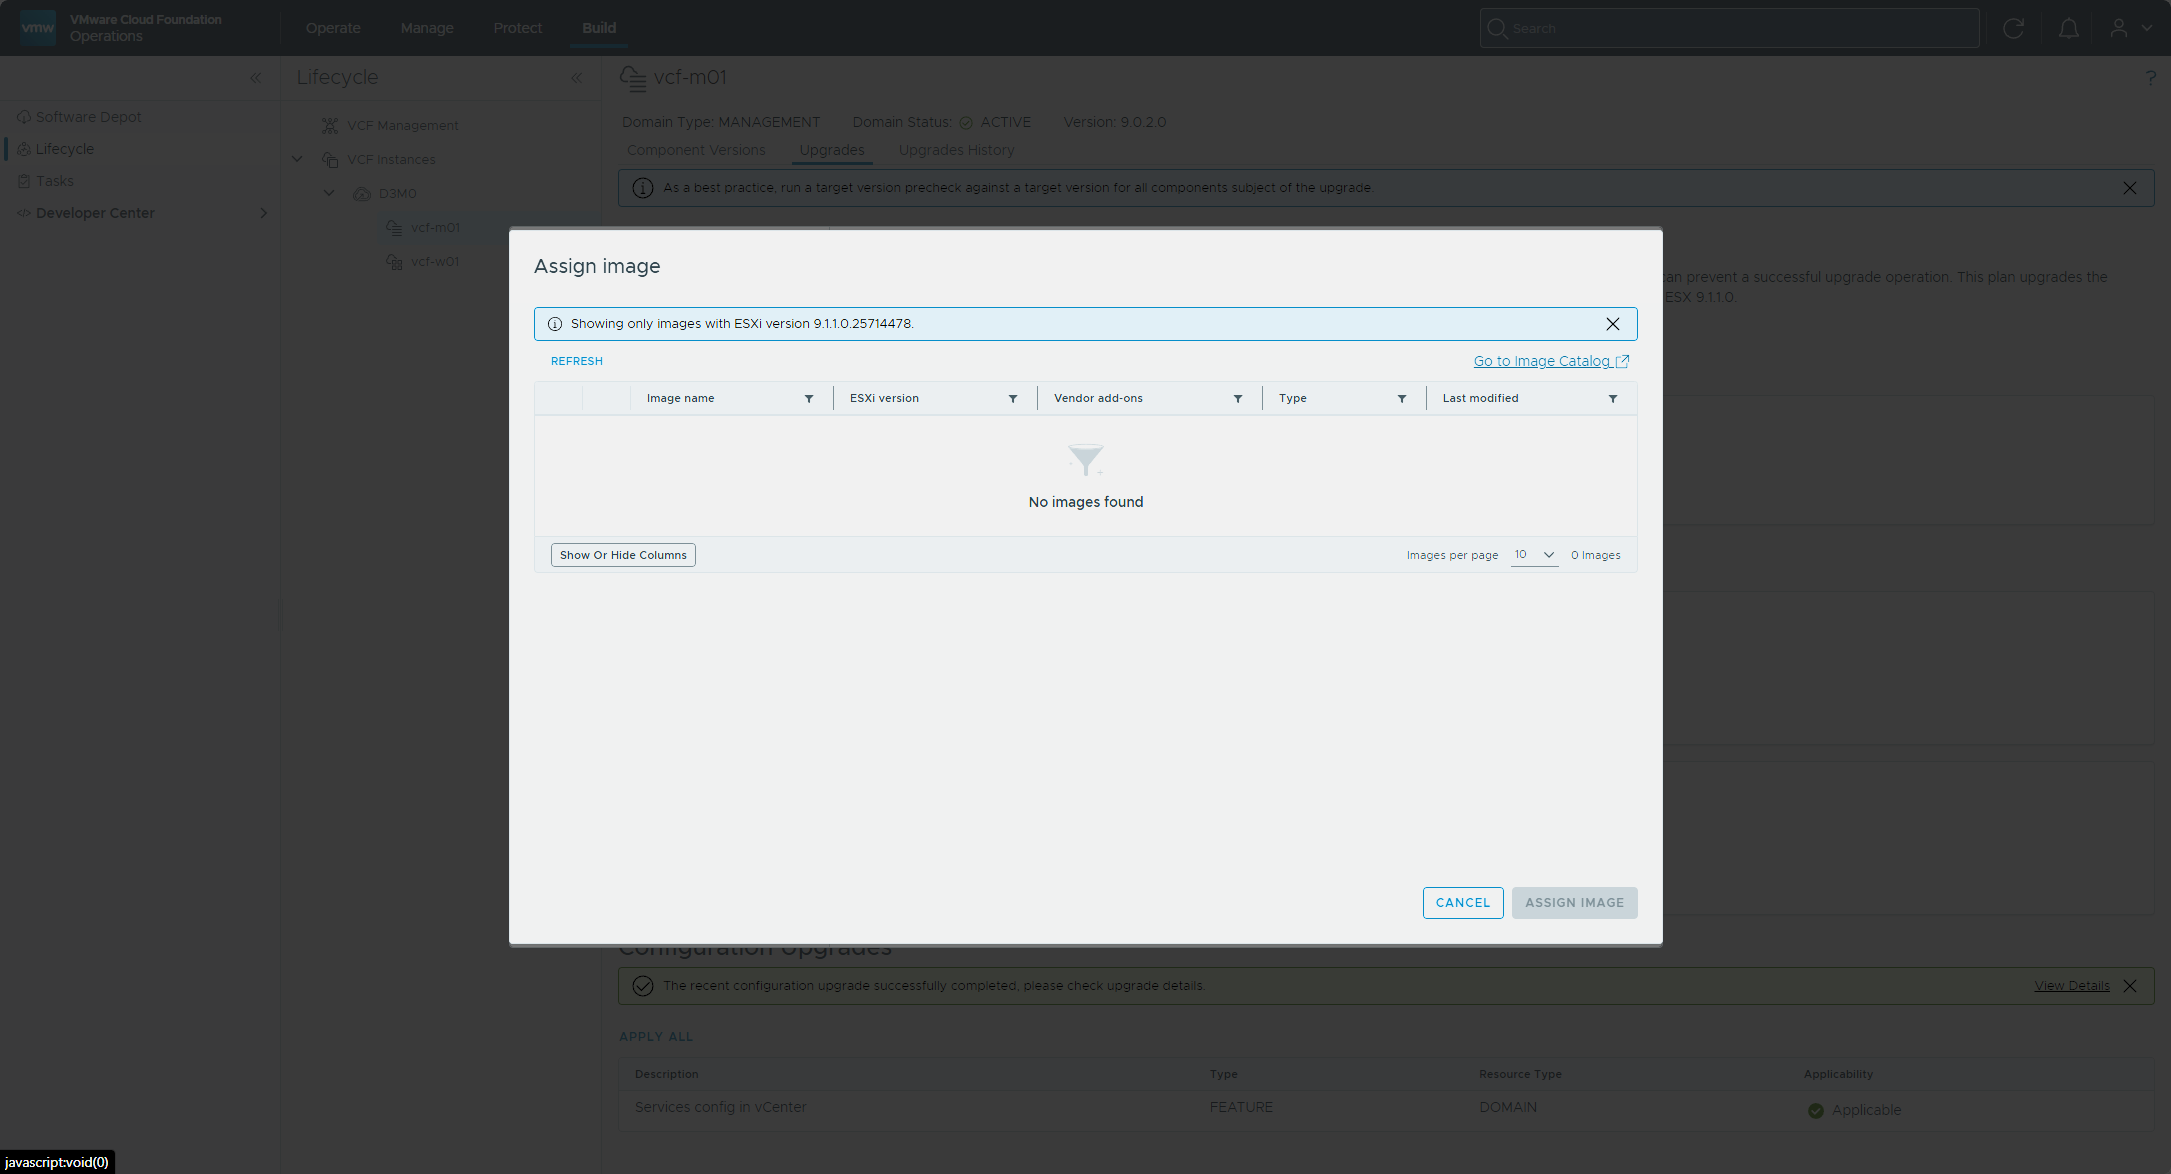
When I clicked Assign Image, the dialog said “Showing only images with ESXi version 9.1.1.0.25714478” and listed no images. My image was 9.1.1.0100.25782009, a different build, so it wasn’t offered.
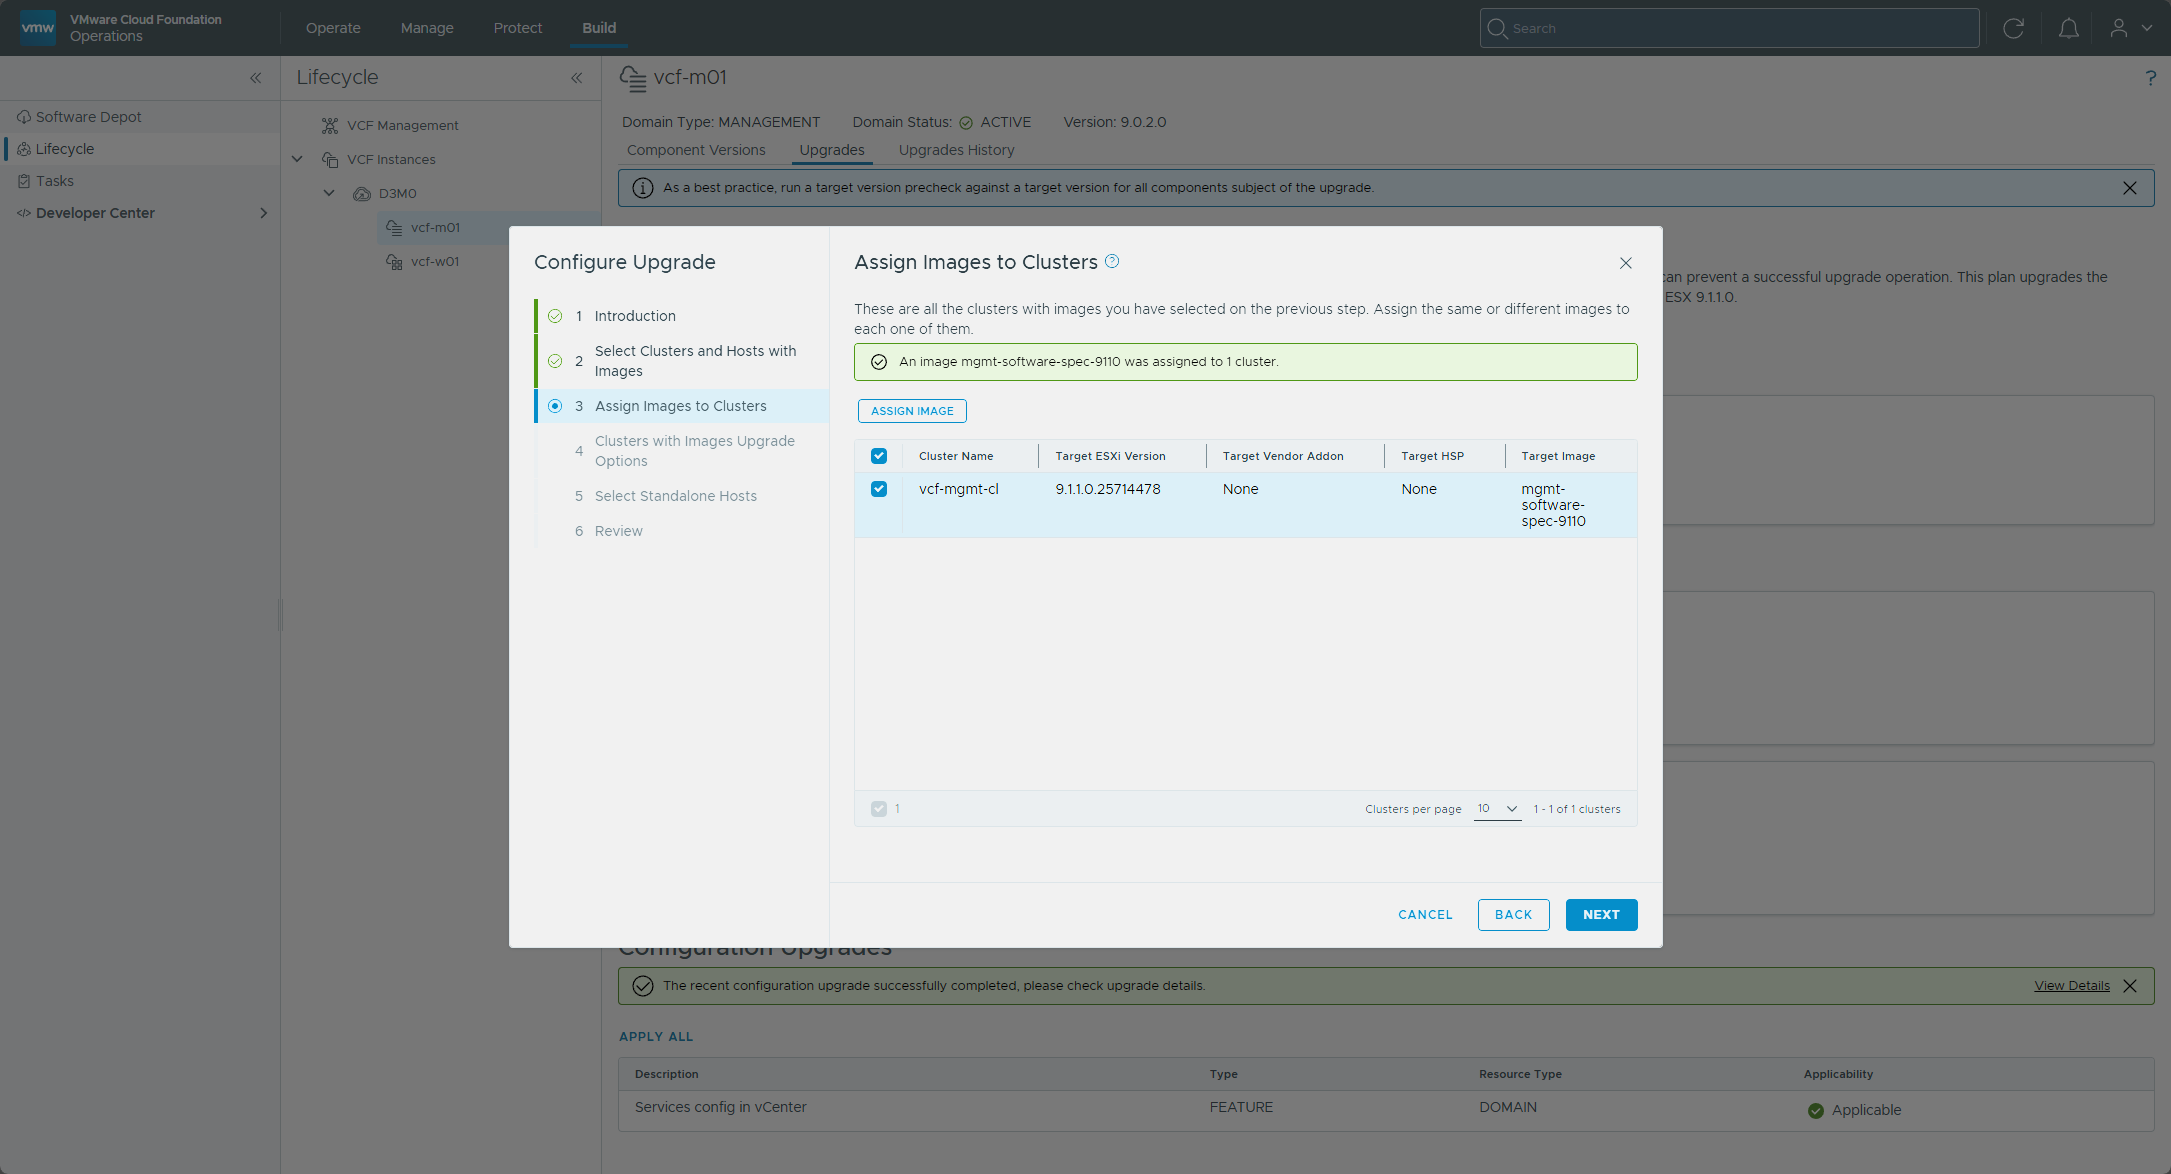
I edited the image in the vSphere Client, renaming it mgmt-software-spec-9110 and changing the ESXi version to 9.1.1.0.25714478, with the Nested vSAN ESA Mock HW component still on it. I validated it, saved it, and imported it into VCF Operations again. This time Assign Image listed it, and the wizard said the image was assigned to the cluster.
Options, review, and precheck
On the options step, Quick Boot was enabled and the VM power state was left on “Do not change power state.”
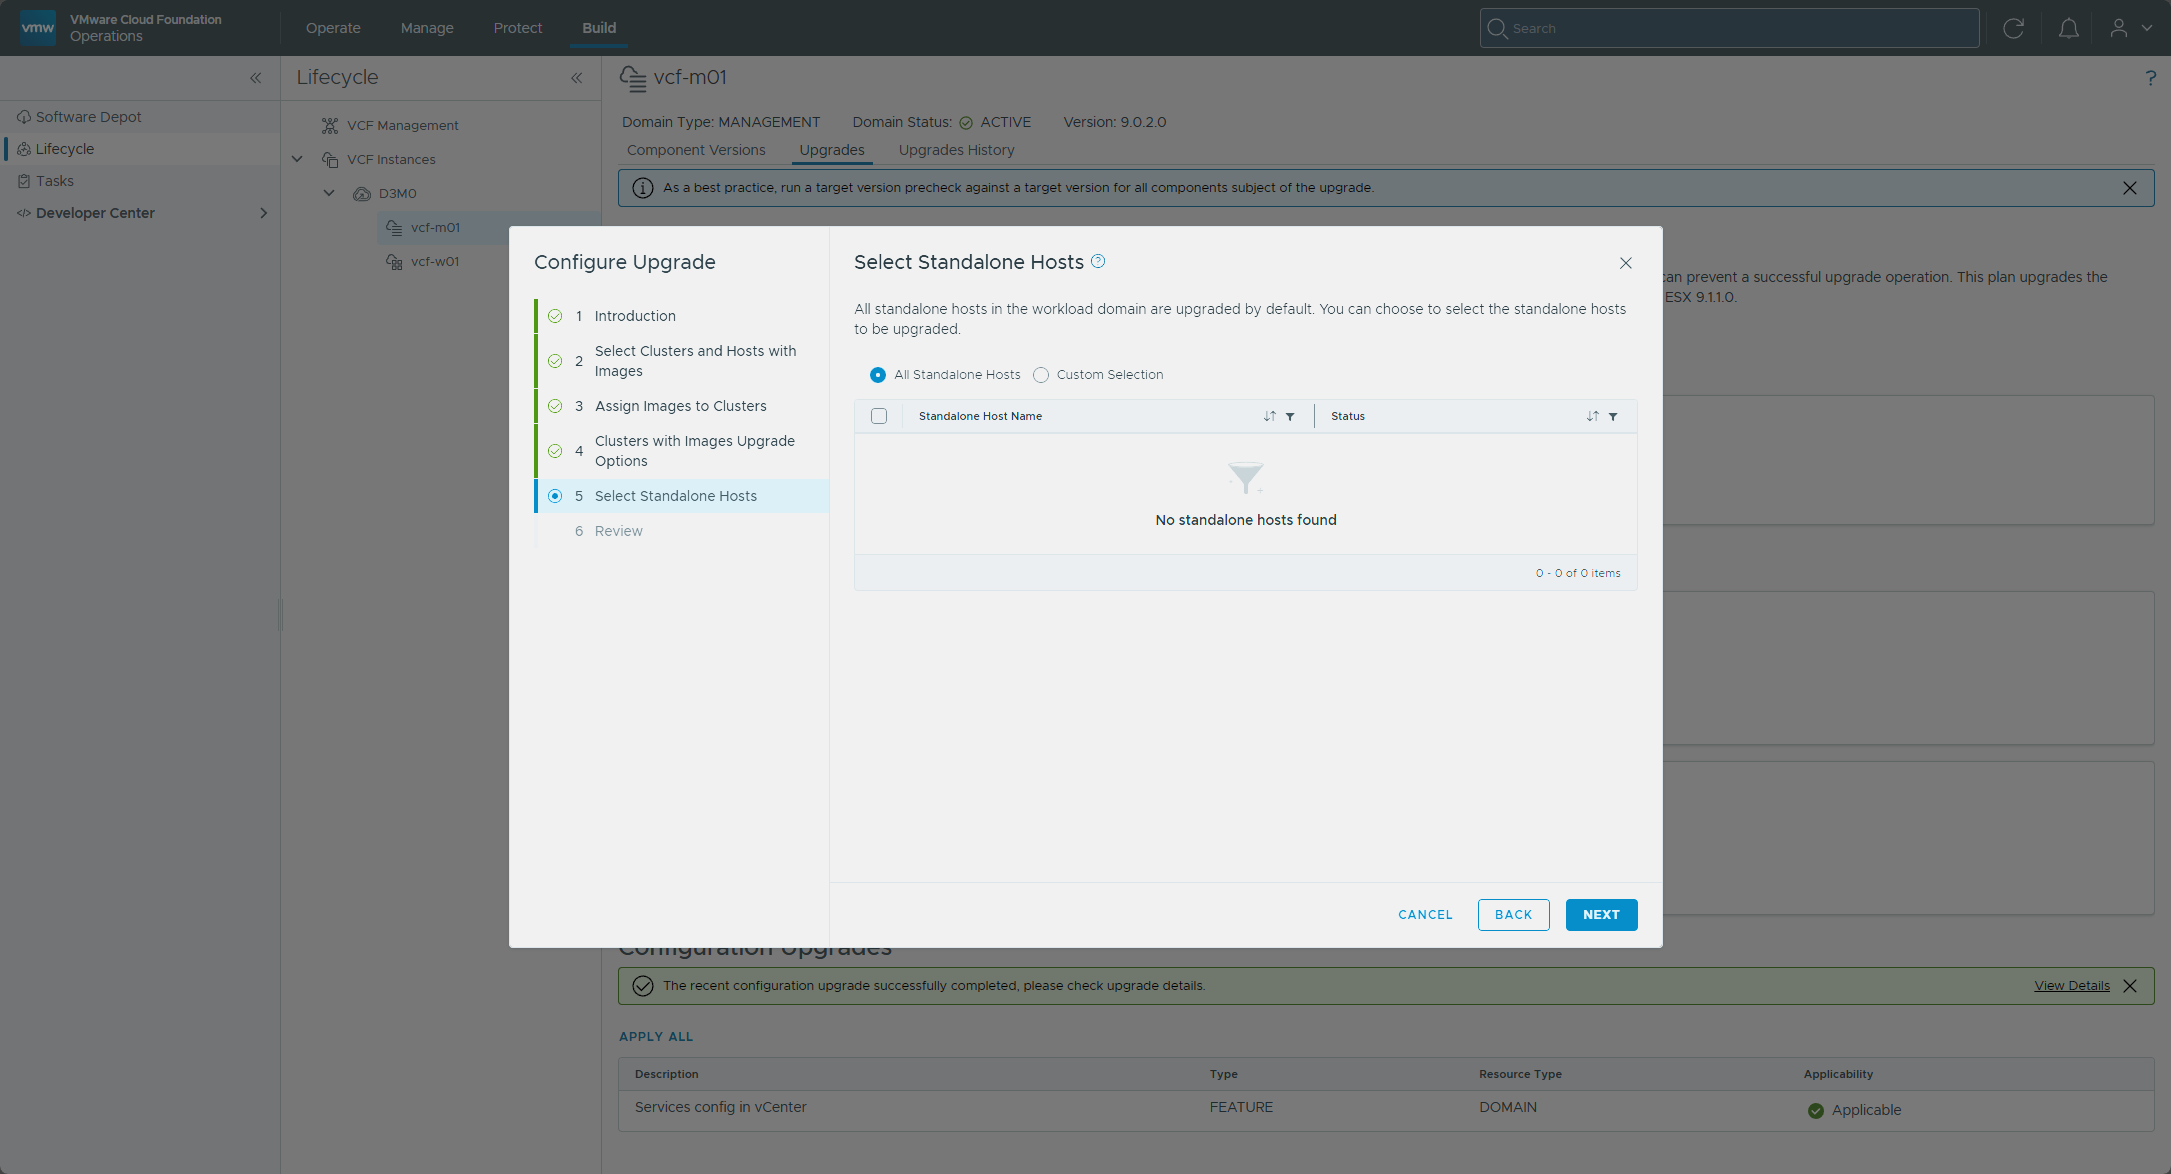
There were no standalone hosts, so I reviewed the configuration, clicked Finish, and ran the precheck.
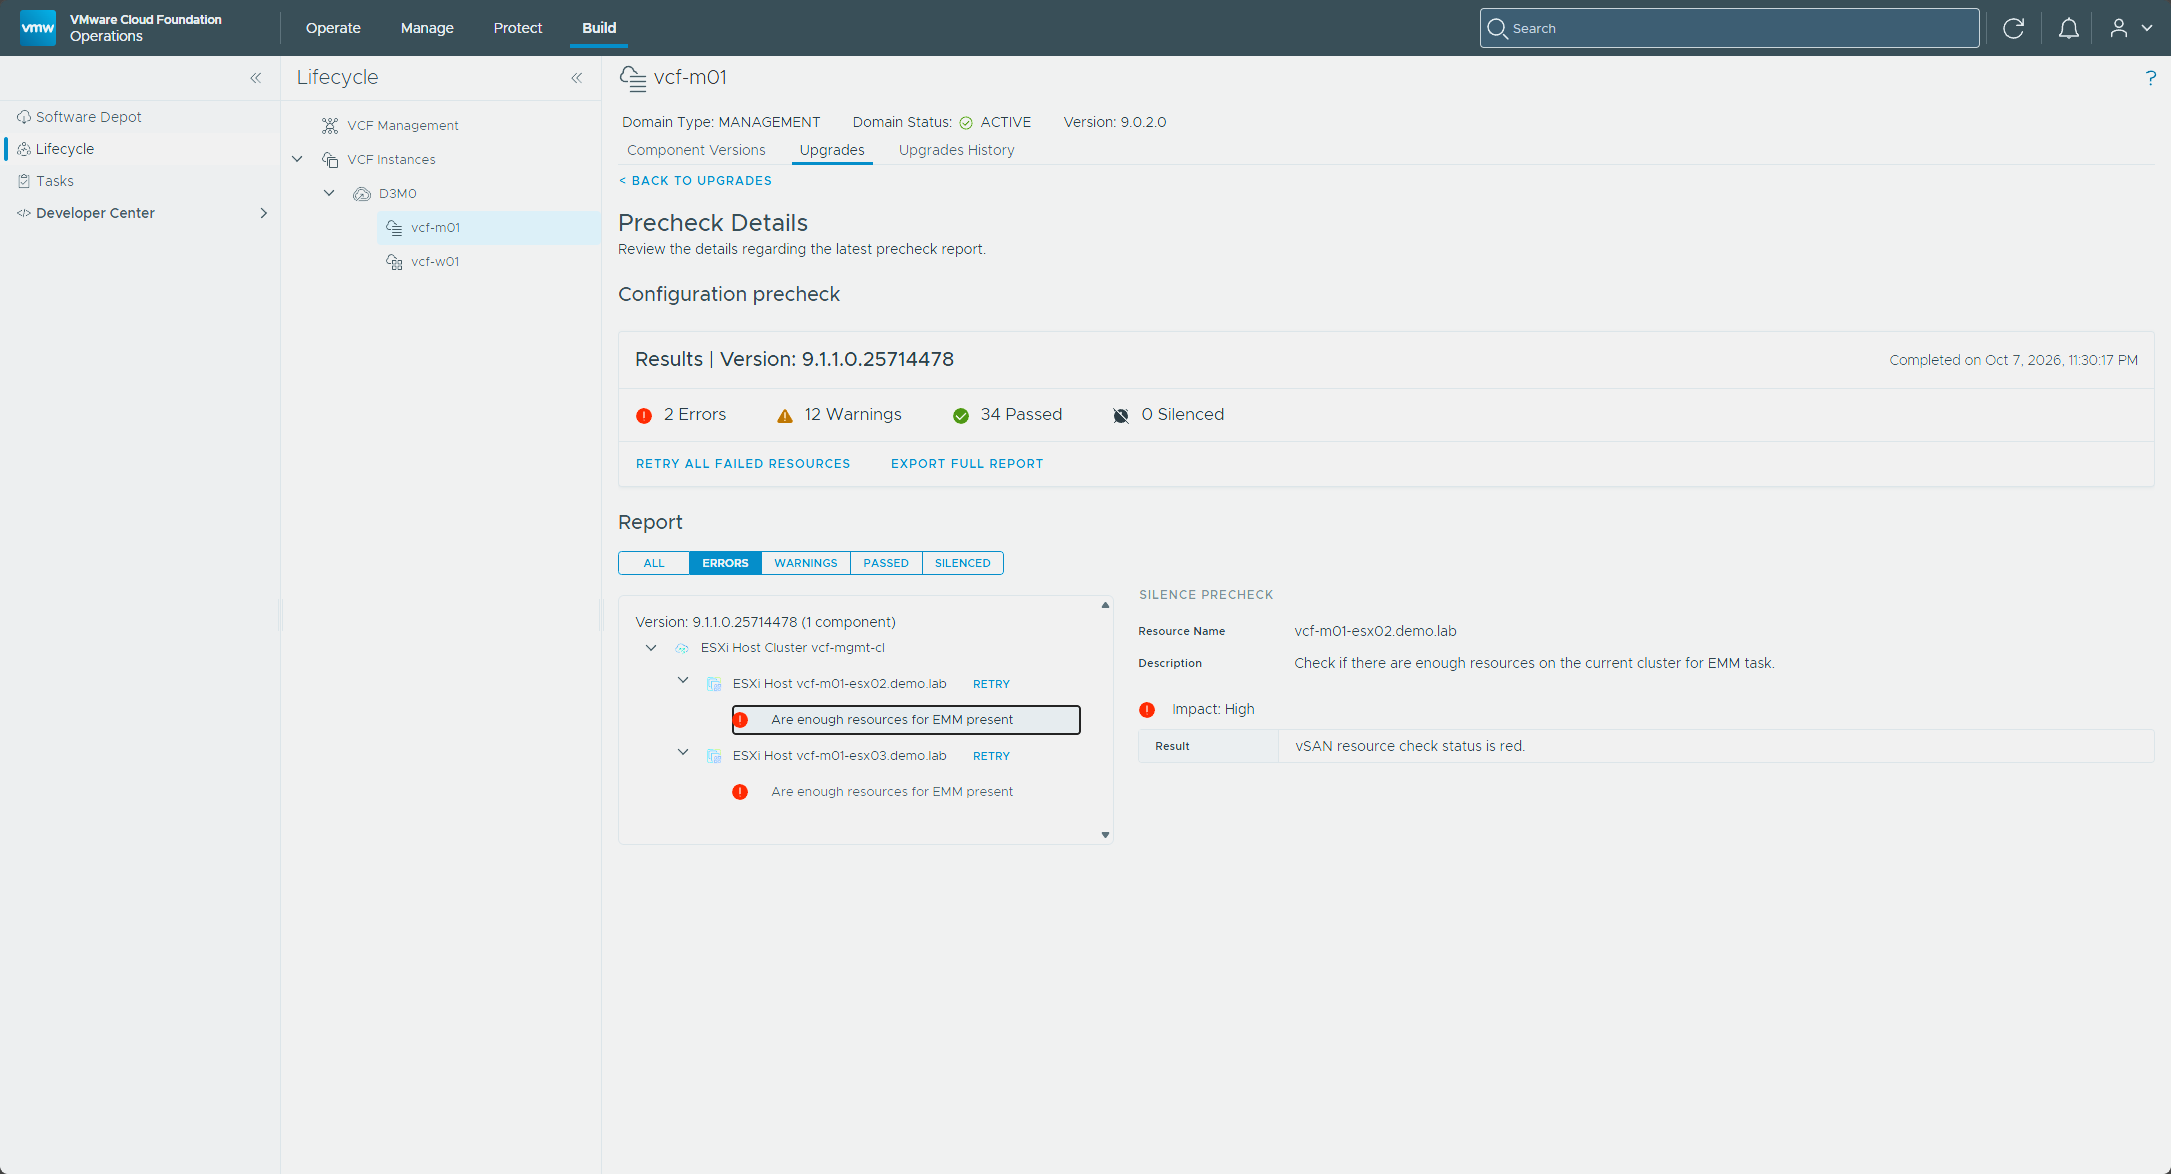
It came back with 2 errors and 12 warnings. Both errors were “Are enough resources for EMM present,” one for vcf-m01-esx02 and one for vcf-m01-esx03.
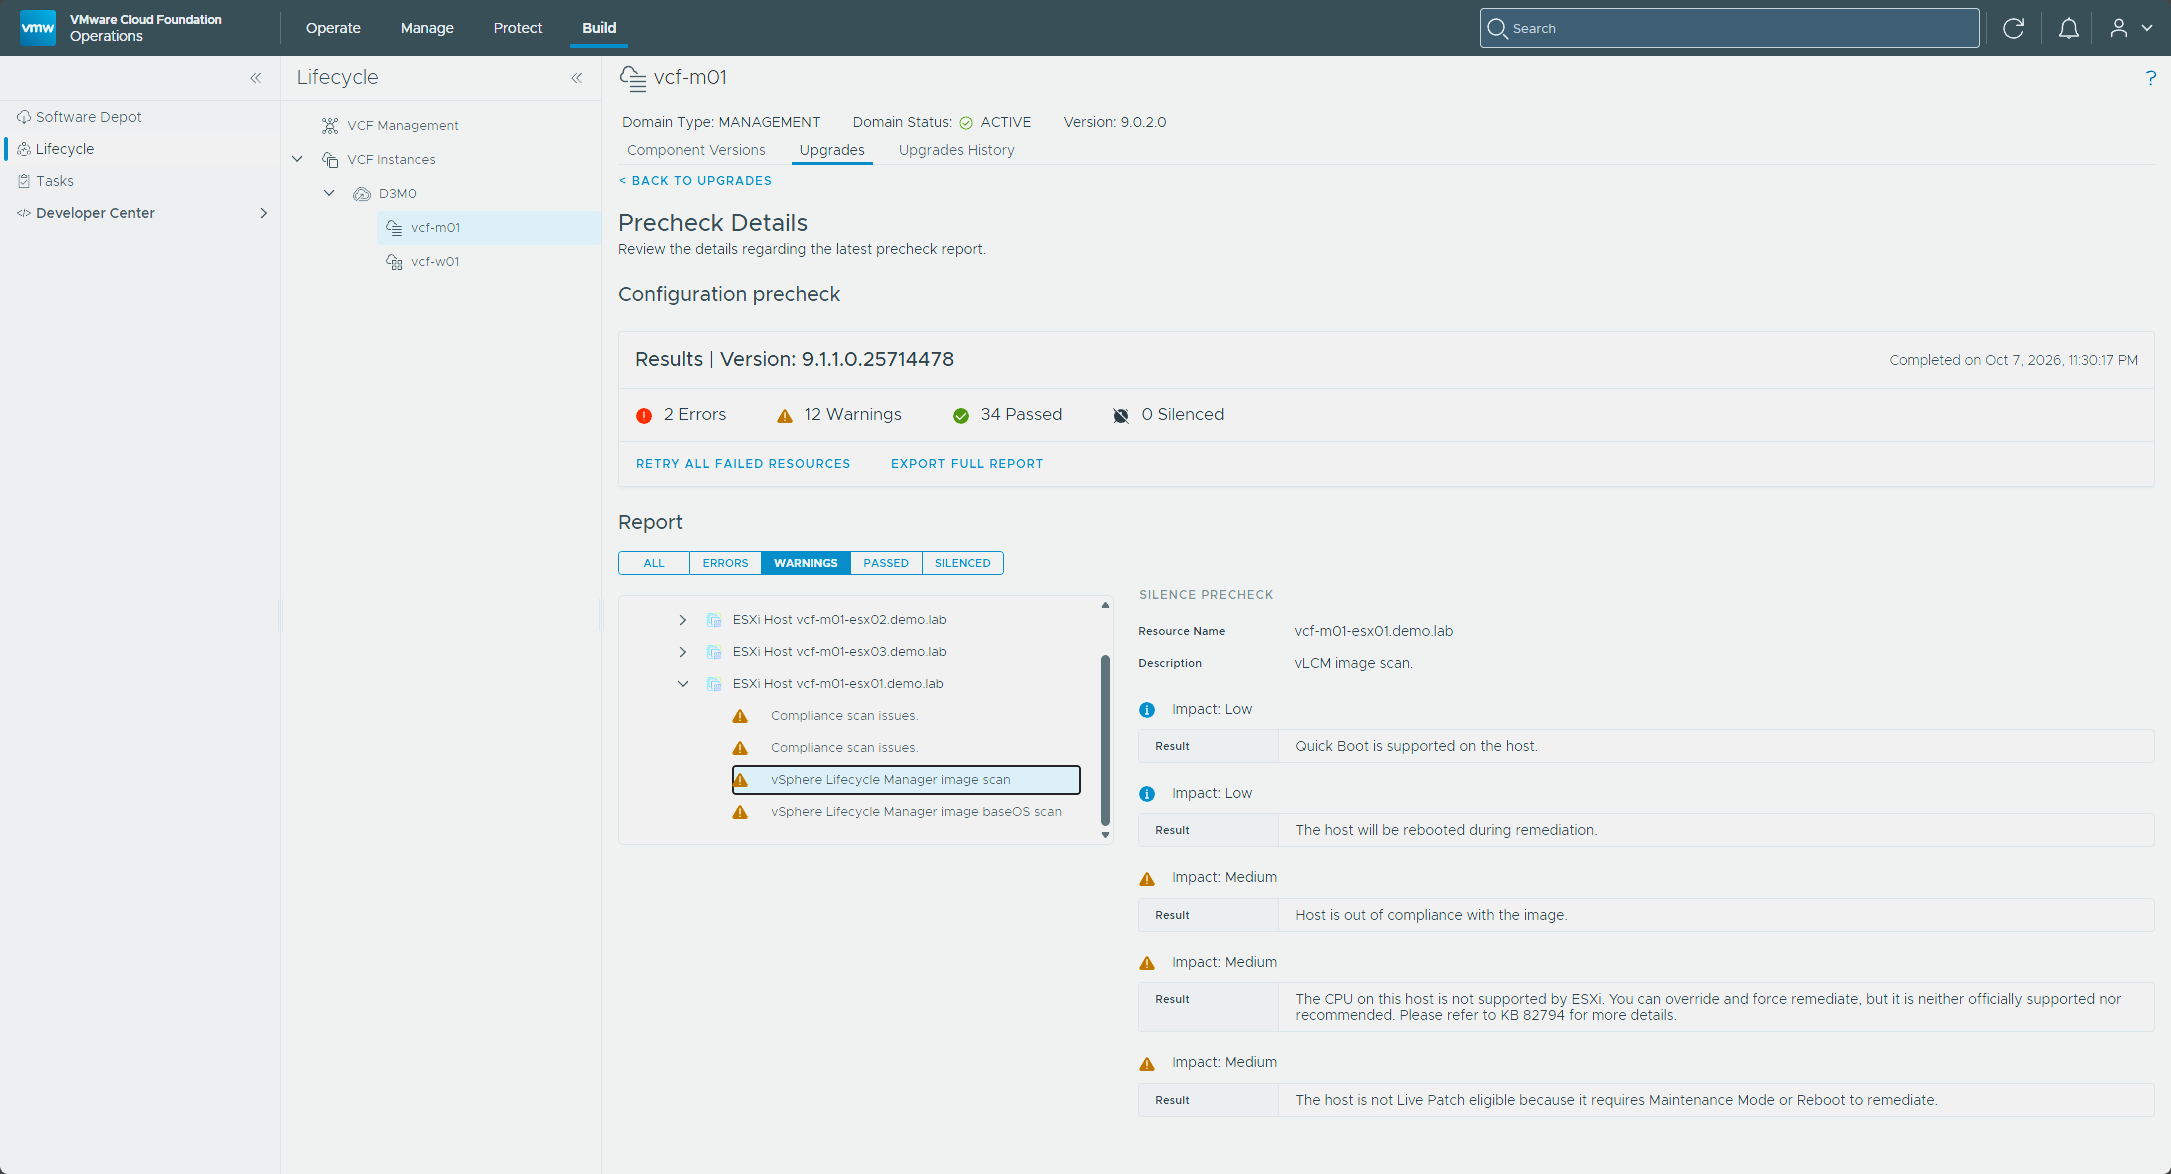
The 12 warnings were compliance and image scan results on the hosts. The one worth noting is that the CPU isn’t supported by ESXi, which can be overridden with a force remediate but is neither officially supported nor recommended (KB 82794). The remediation went through without a force remediate.
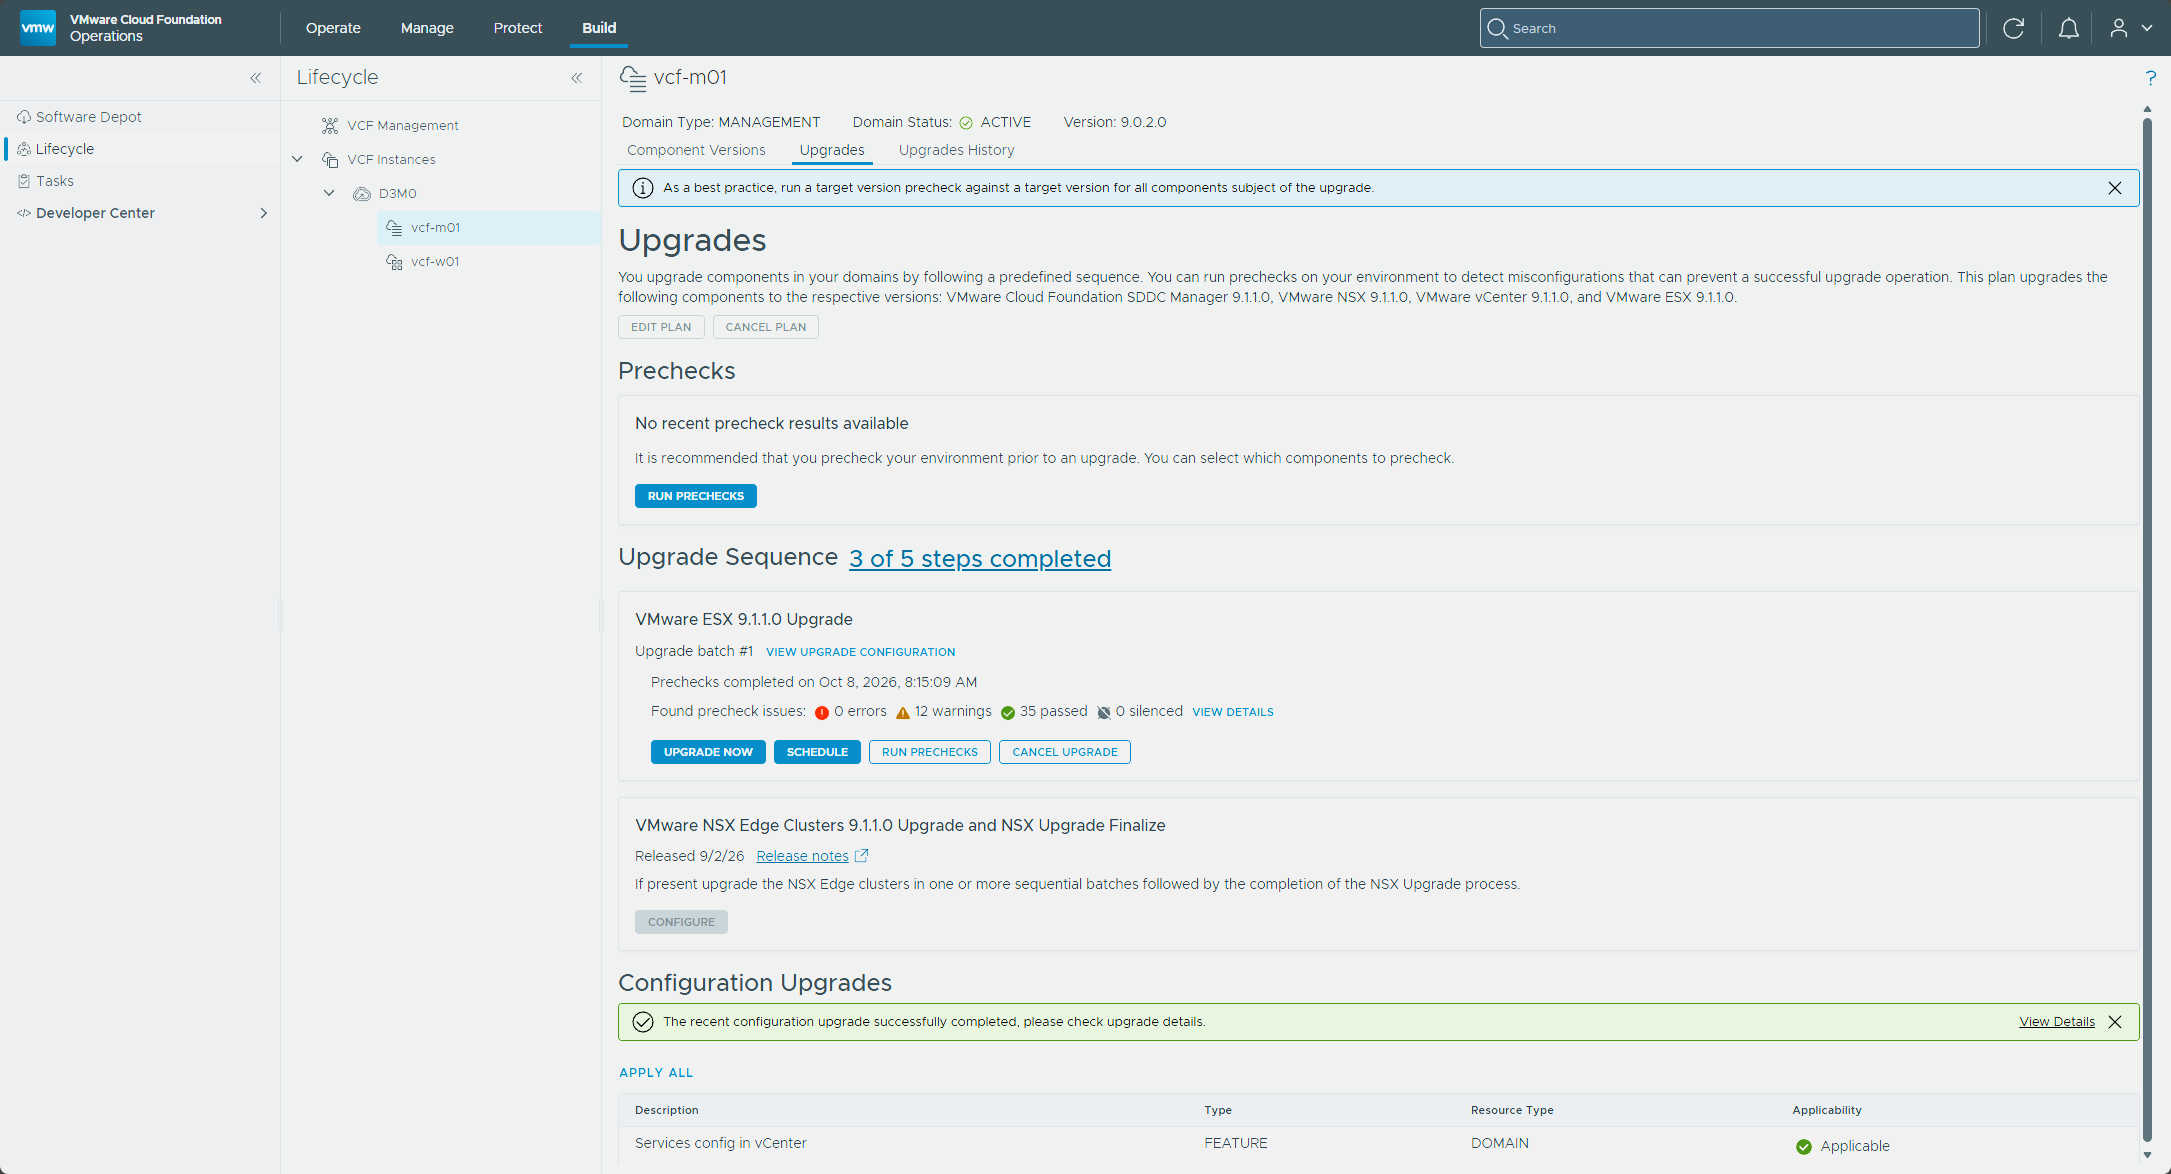
I ran the precheck again after the deletes. One error was left on vcf-m01-esx03, and a second run a few minutes later came back clean.
Running the ESX upgrade
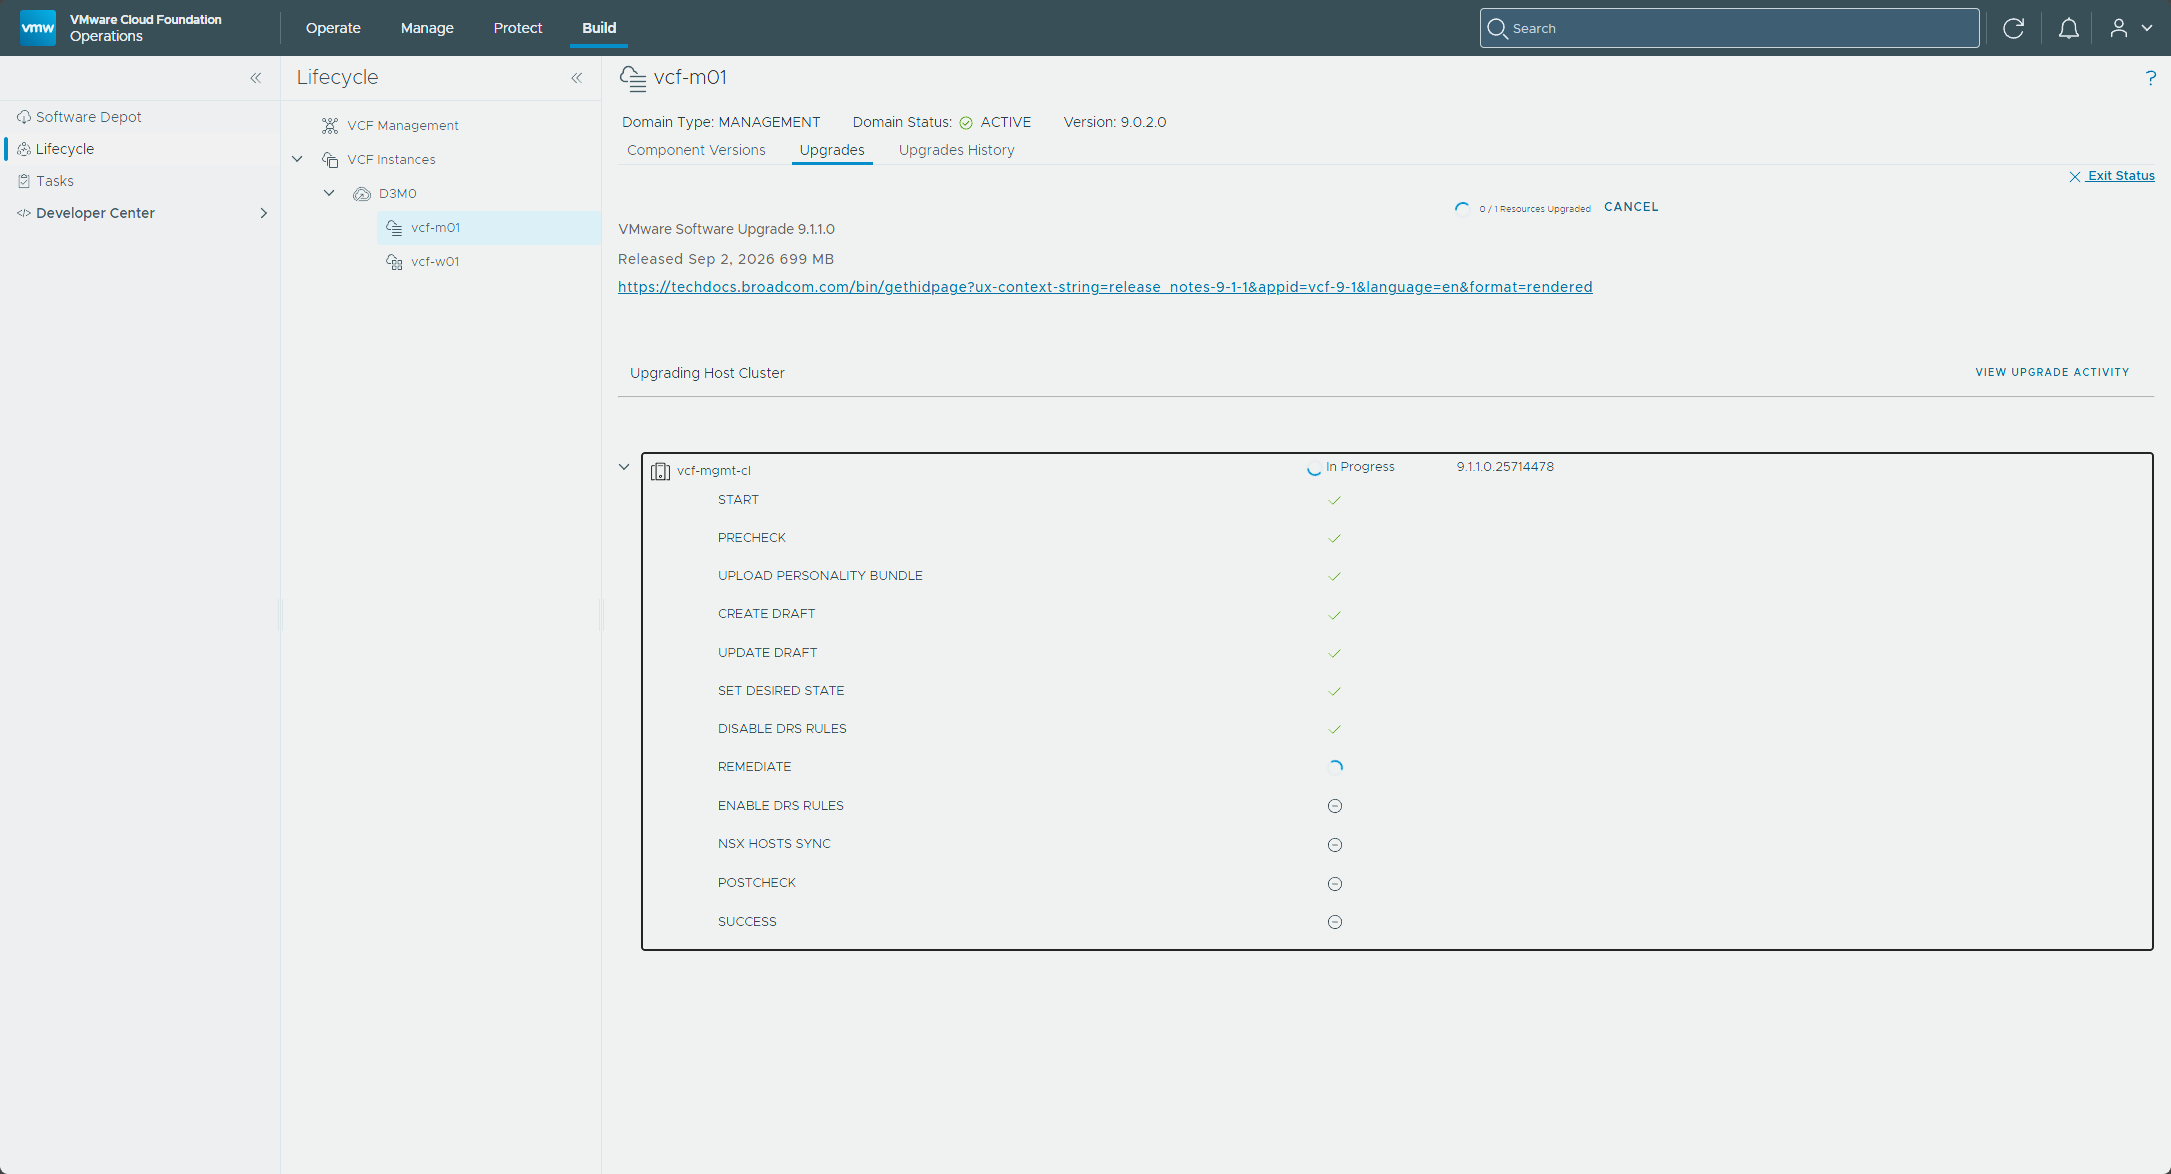
I clicked Upgrade Now and followed it from View Status.
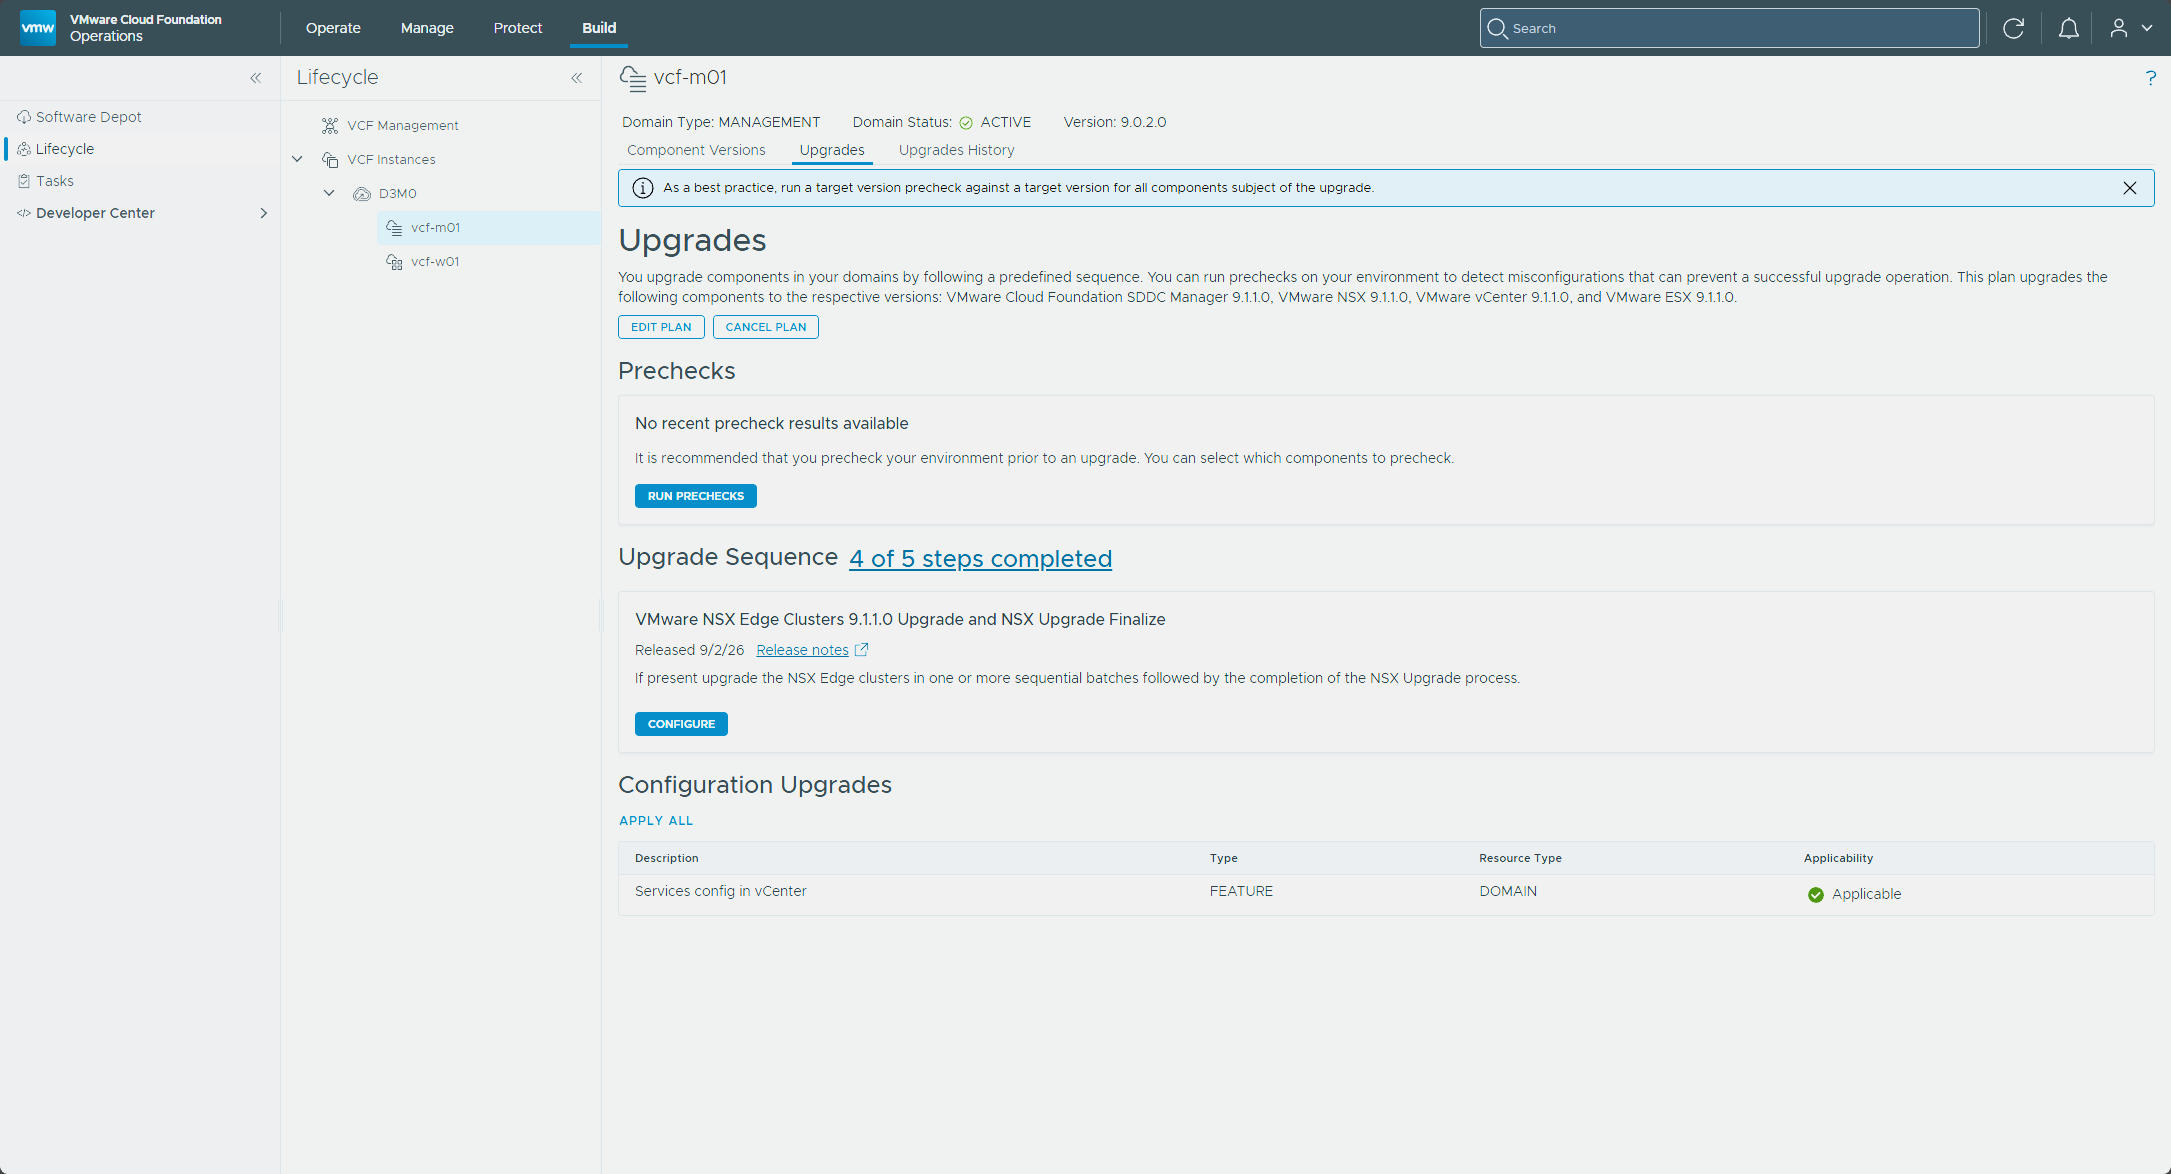
When the ESX upgrade finished, the Upgrade Sequence moved to 4 of 5 steps completed, the ESX tile was gone, and Configure was active on the NSX Edge Clusters Upgrade and NSX Upgrade Finalize tile.
Verify
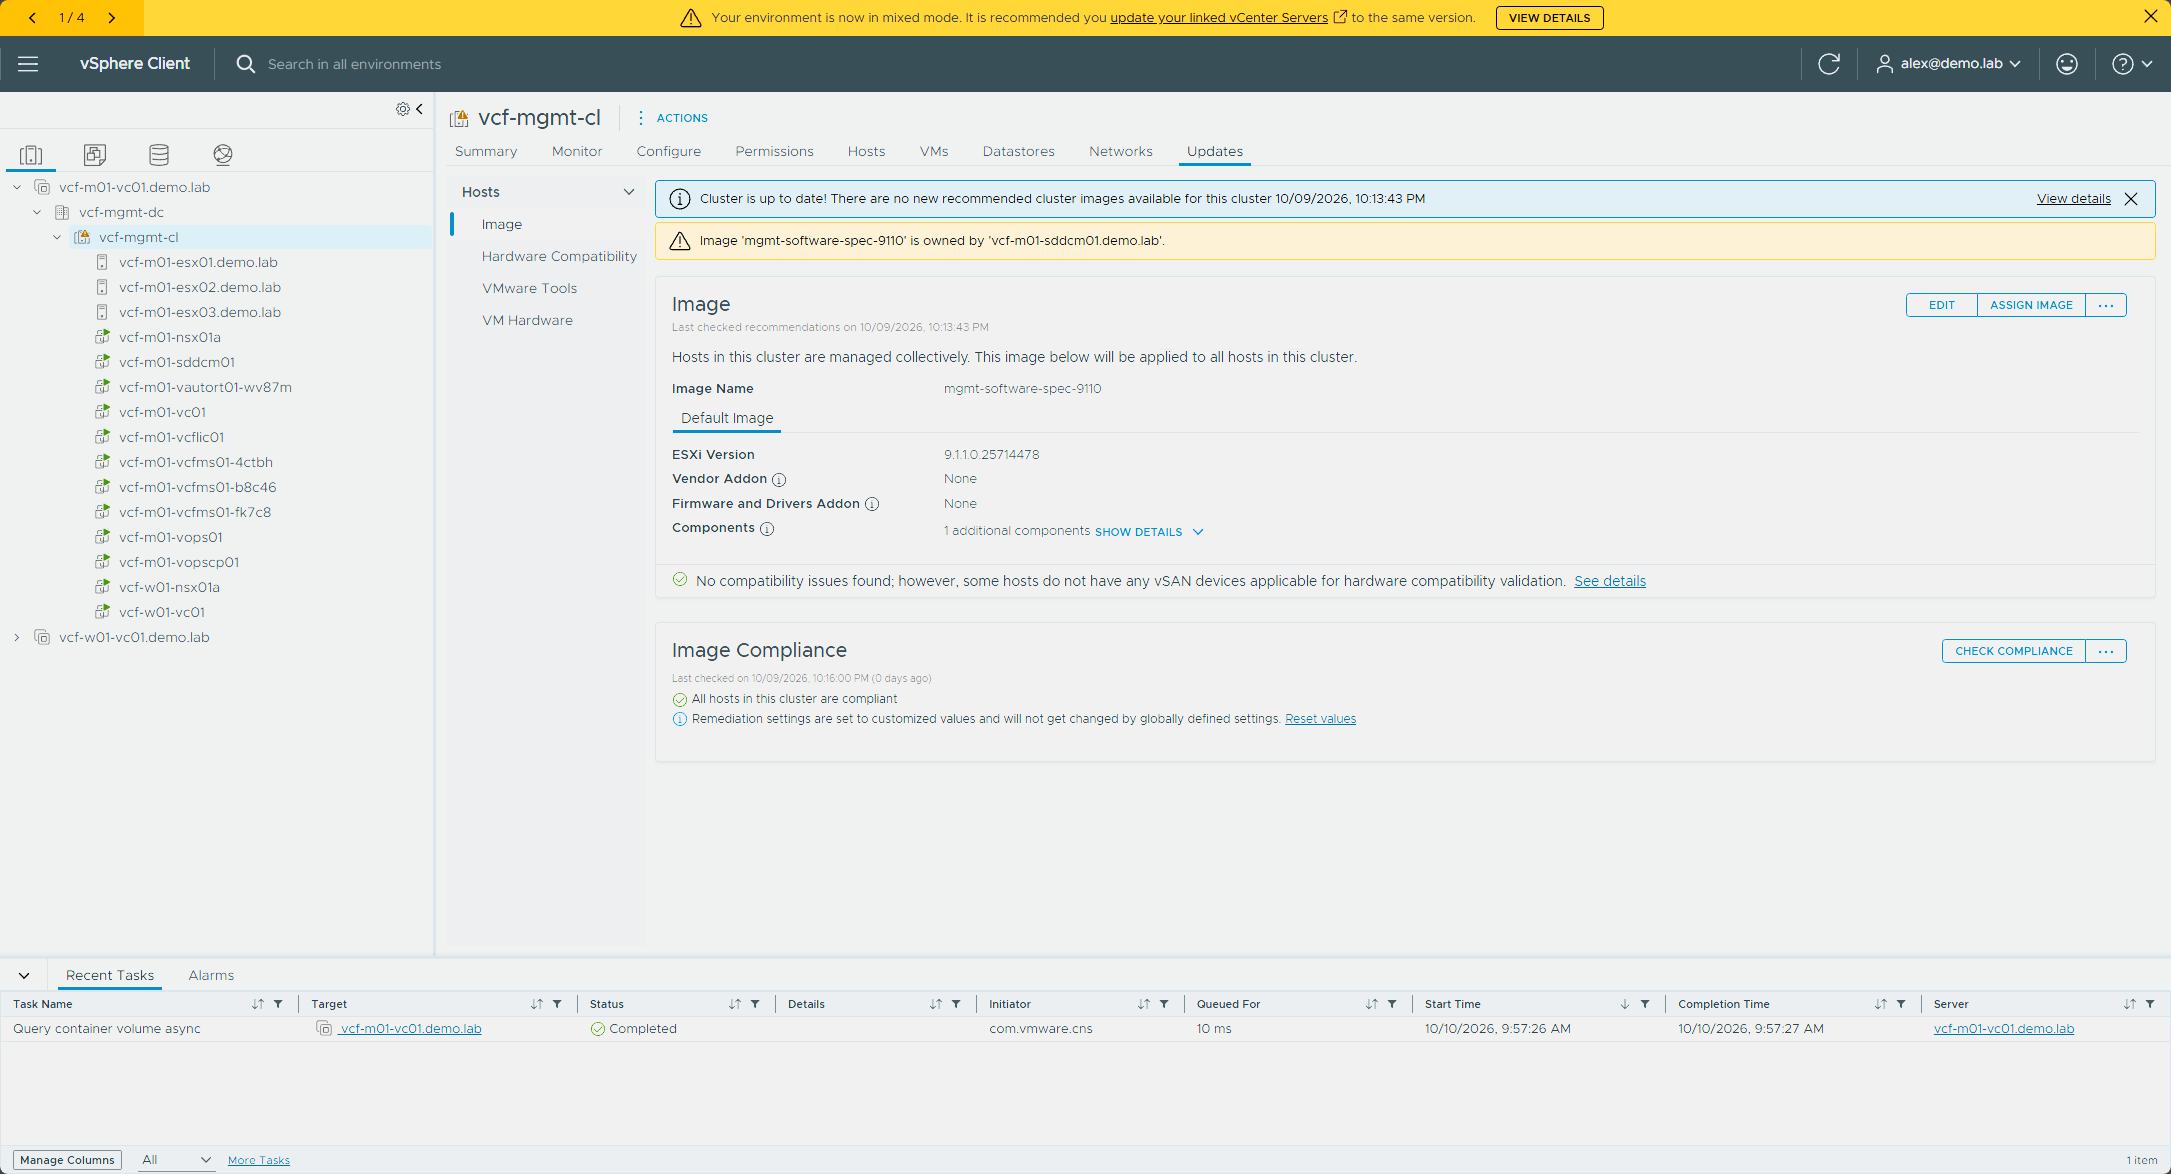
In the vSphere Client, the Updates tab for vcf-mgmt-cl said the cluster was up to date and all hosts were compliant with mgmt-software-spec-9110.
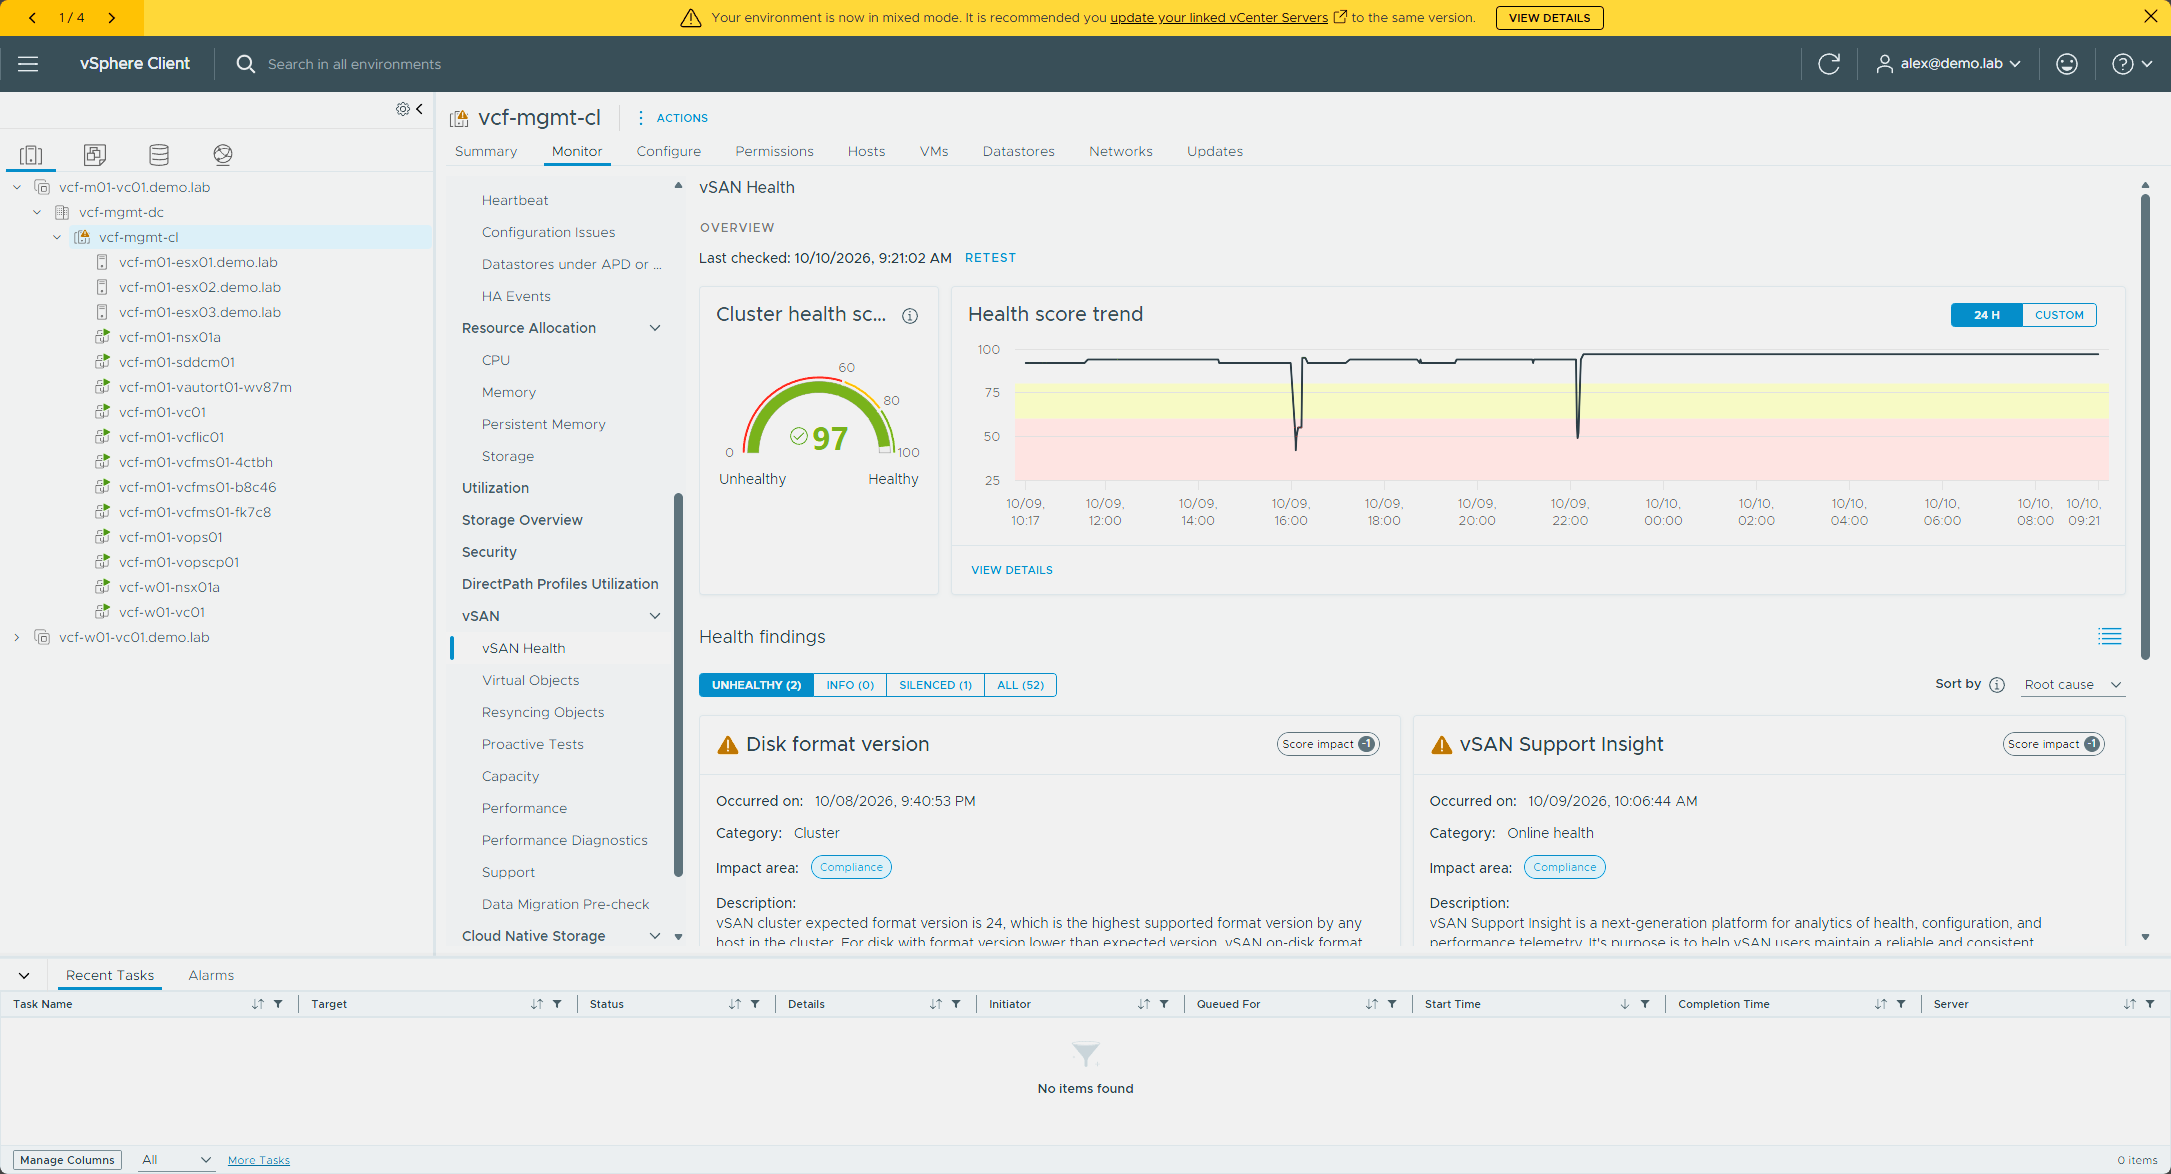
In the vSAN Skyline Health, the cluster’s health score was 97, with two unhealthy findings: Disk format version, which says the cluster expects format version 24, and vSAN Support Insight. The disk format one is the on-disk format upgrade I cover in Part 6.
Completing the NSX upgrade
The NSX Edge cluster upgrade shares a tile with the NSX finalize, VMware NSX Edge Clusters Upgrade and NSX Upgrade Finalize (Upgrade the NSX Edge Cluster and Finalize NSX Upgrade).
- On the Upgrades tab, click Configure on the VMware NSX Edge Clusters Upgrade and NSX Upgrade Finalize tile.
- Select the NSX Edge clusters to upgrade, sequentially or in parallel, and click Next.
- Review the configuration and click Finish.
- Click Upgrade Now, or click Schedule, and follow it with View Status.
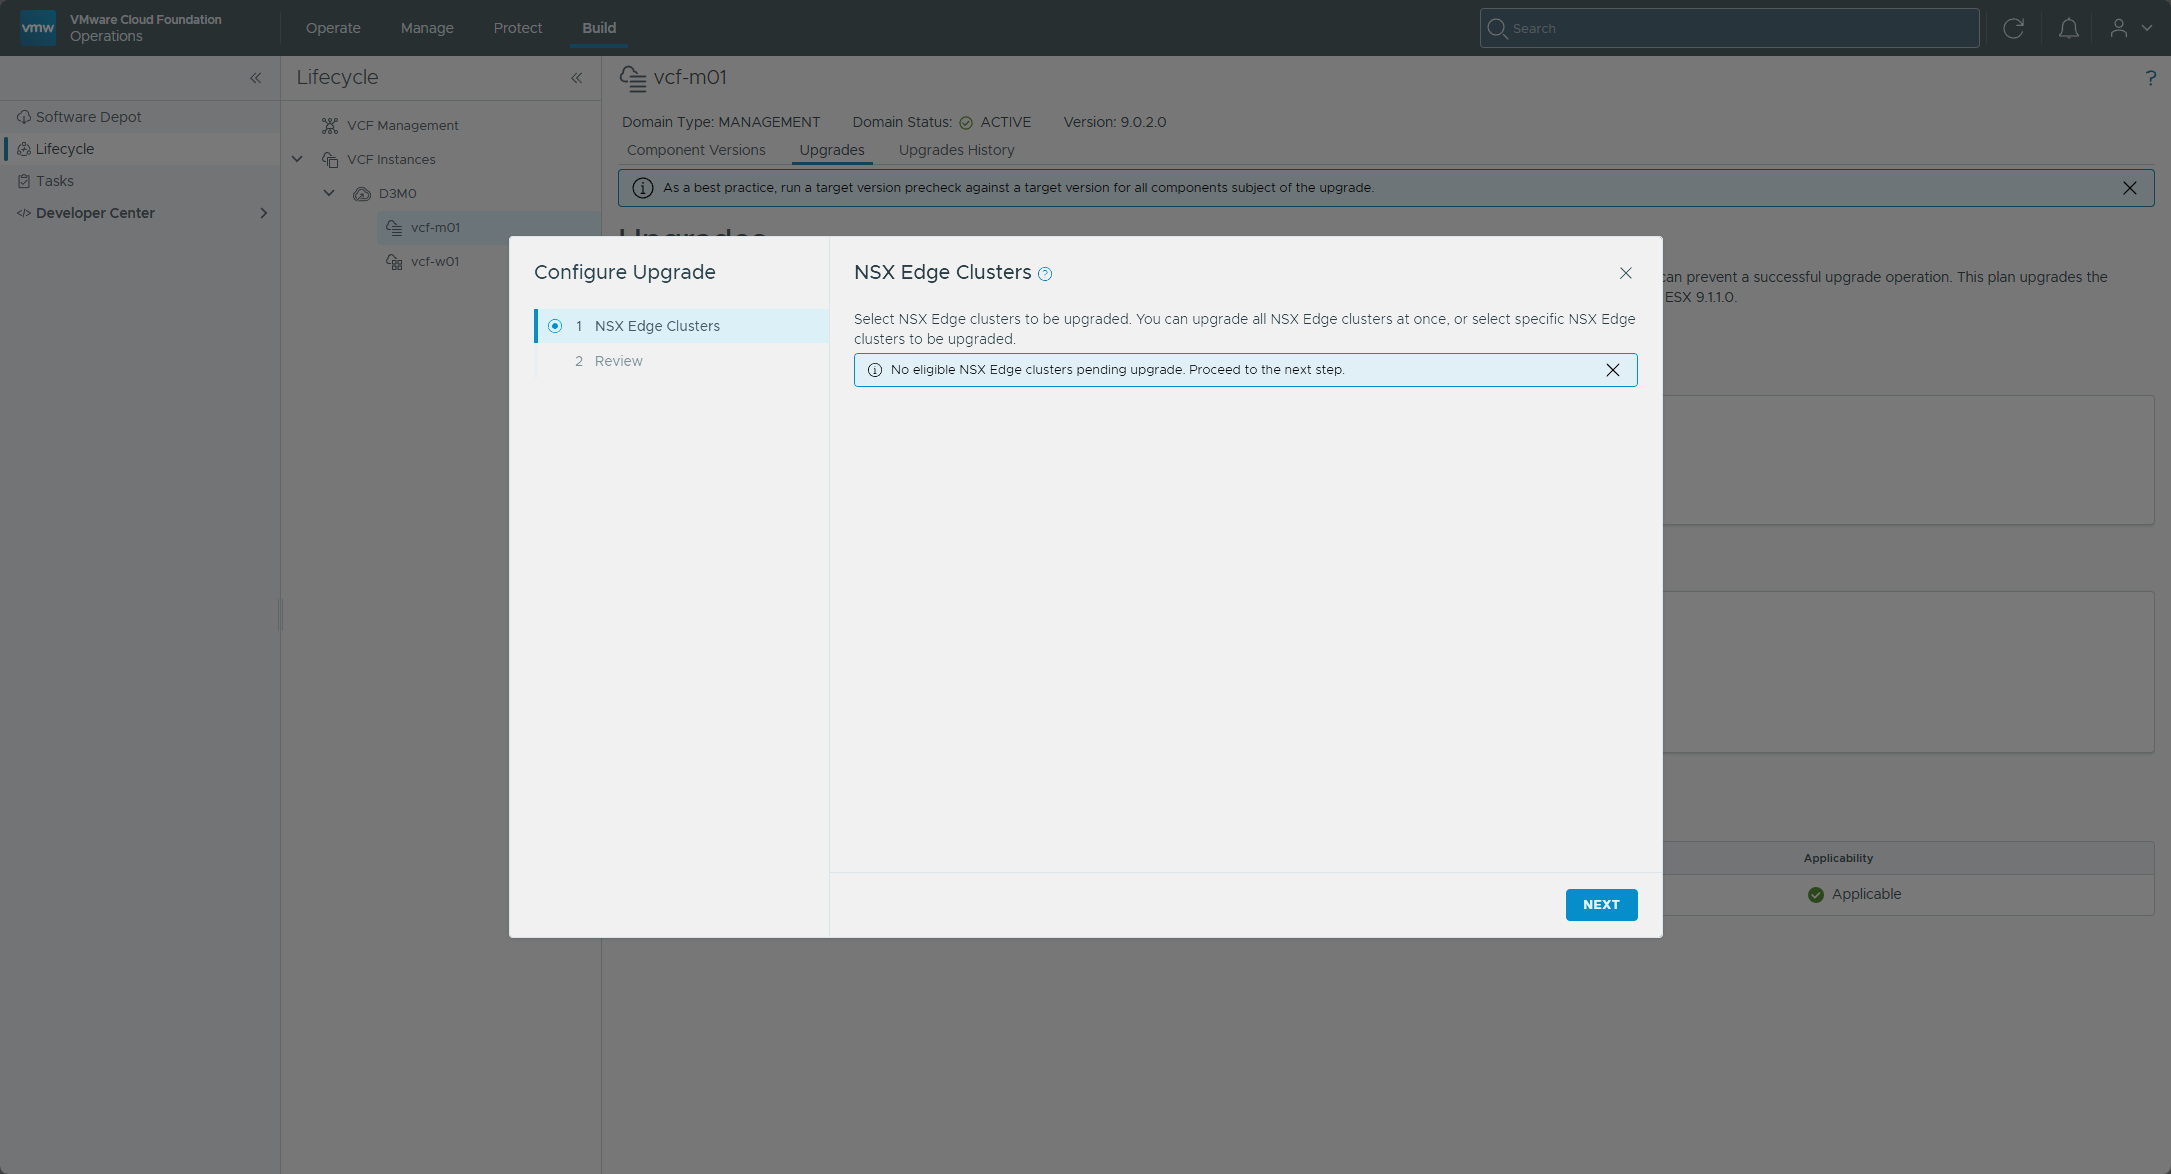
My management domain has no Edge clusters, so when I clicked Configure, the first step said “No eligible NSX Edge clusters pending upgrade,” and the review step said the NSX upgrade gets finalized. I clicked Finish.
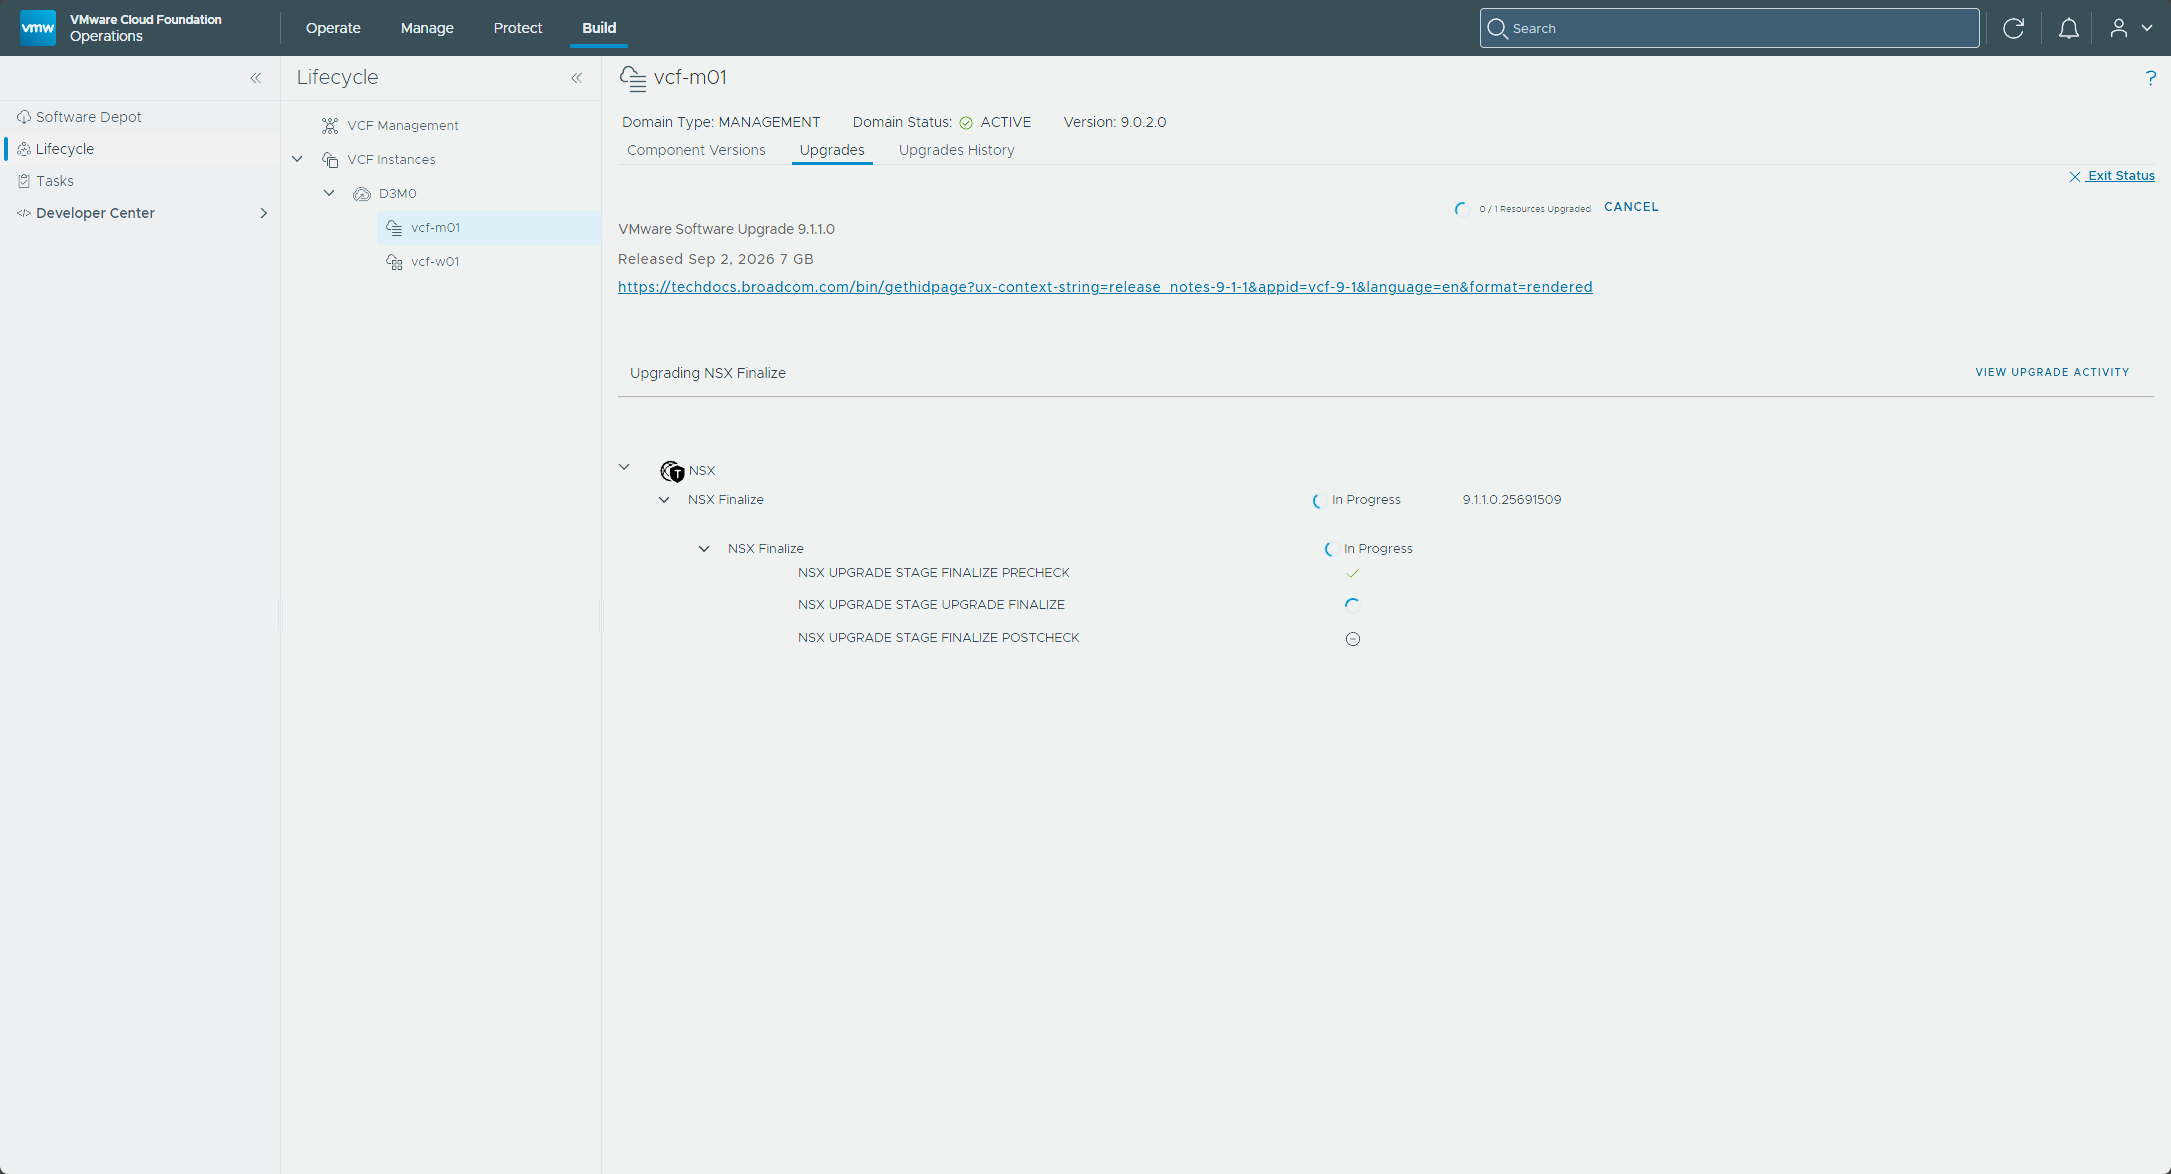
I clicked Upgrade Now. View Status showed a finalize precheck, the finalize itself, and a postcheck.
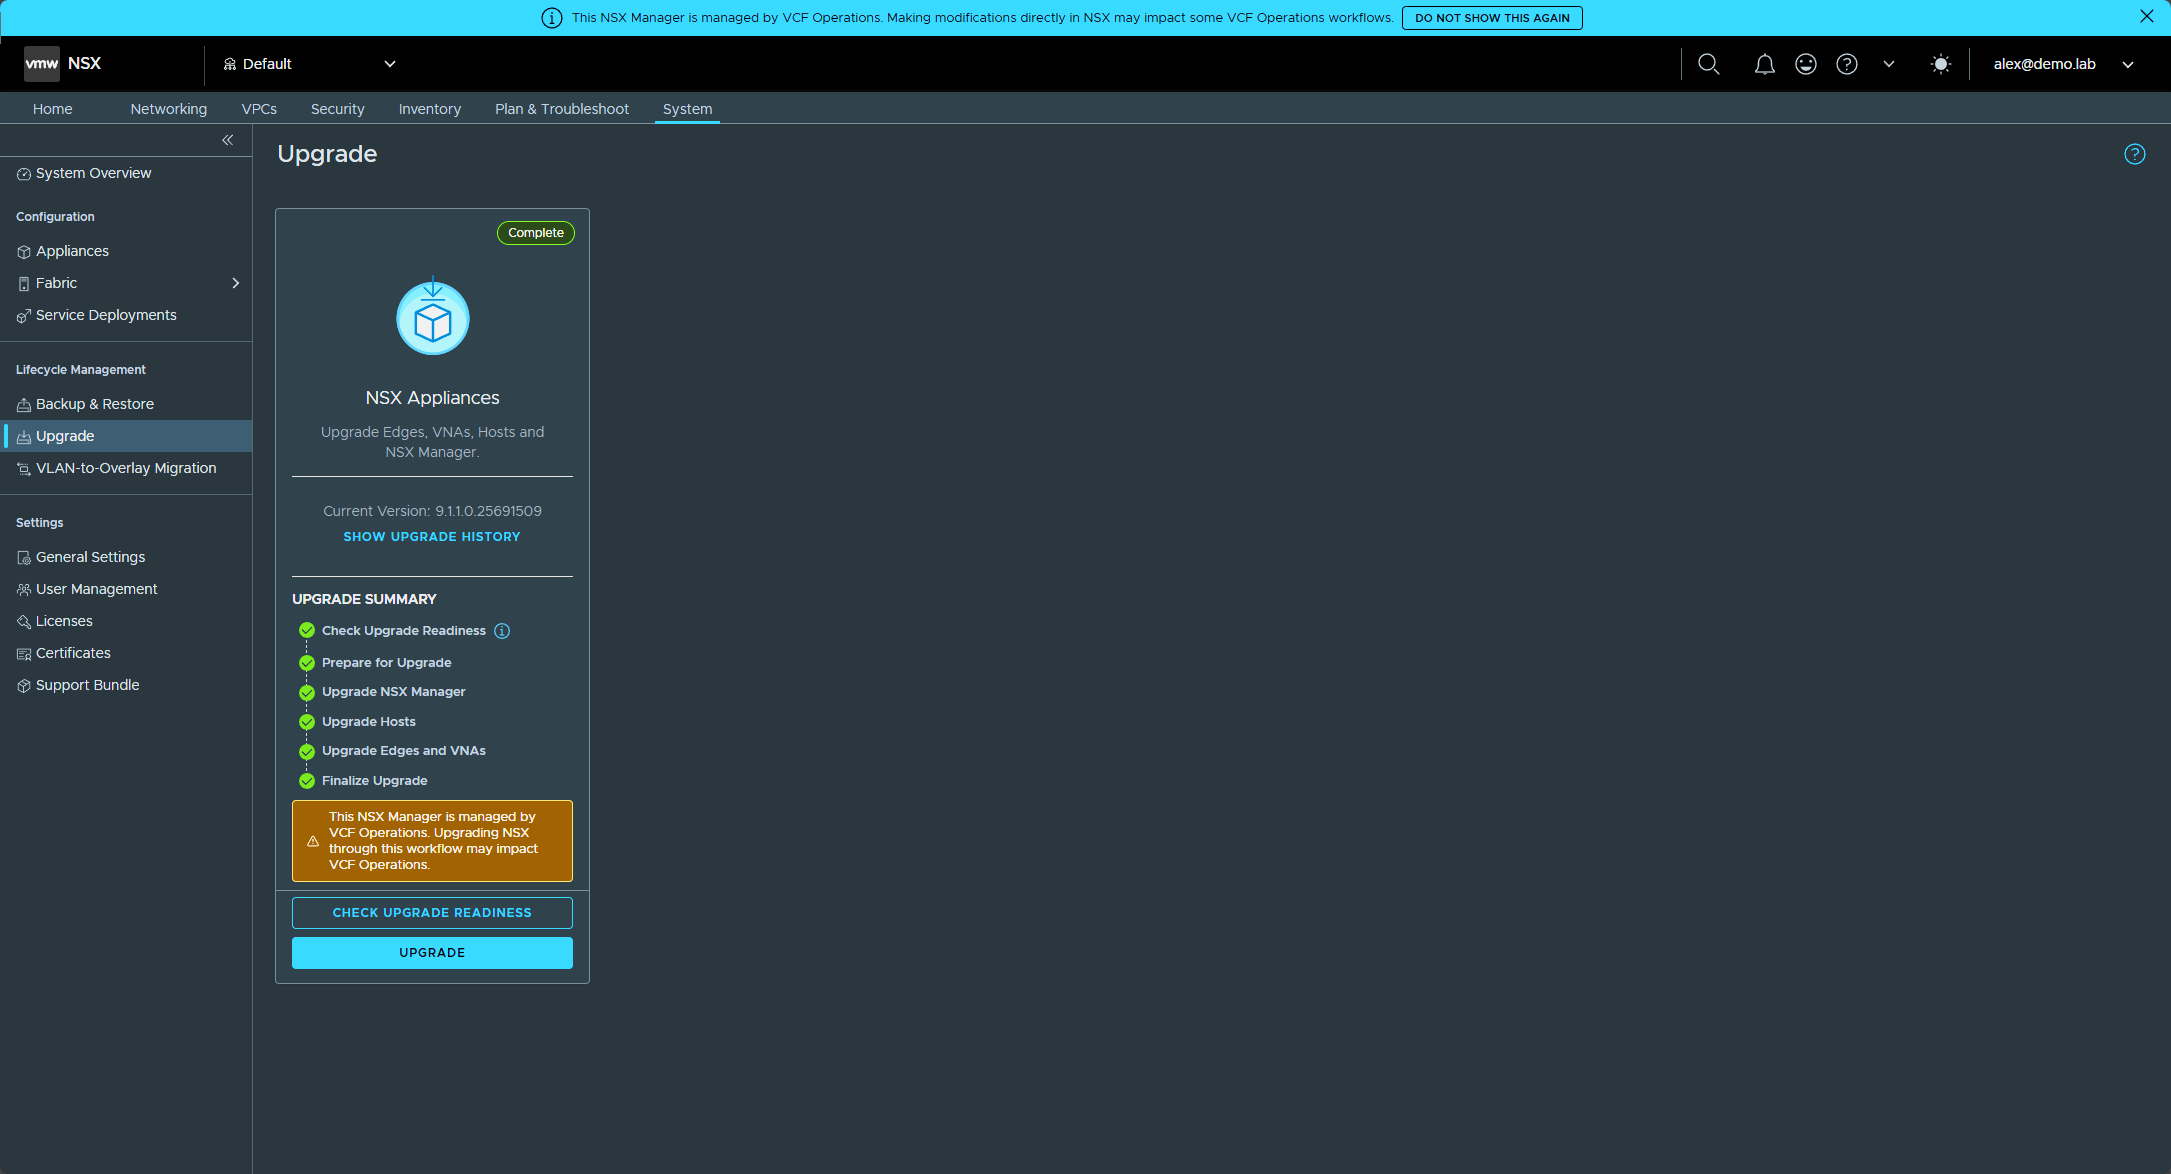
In the NSX Manager UI, System → Upgrade then showed Complete at 9.1.1.0.25691509, with every step from Check Upgrade Readiness to Finalize Upgrade checked.
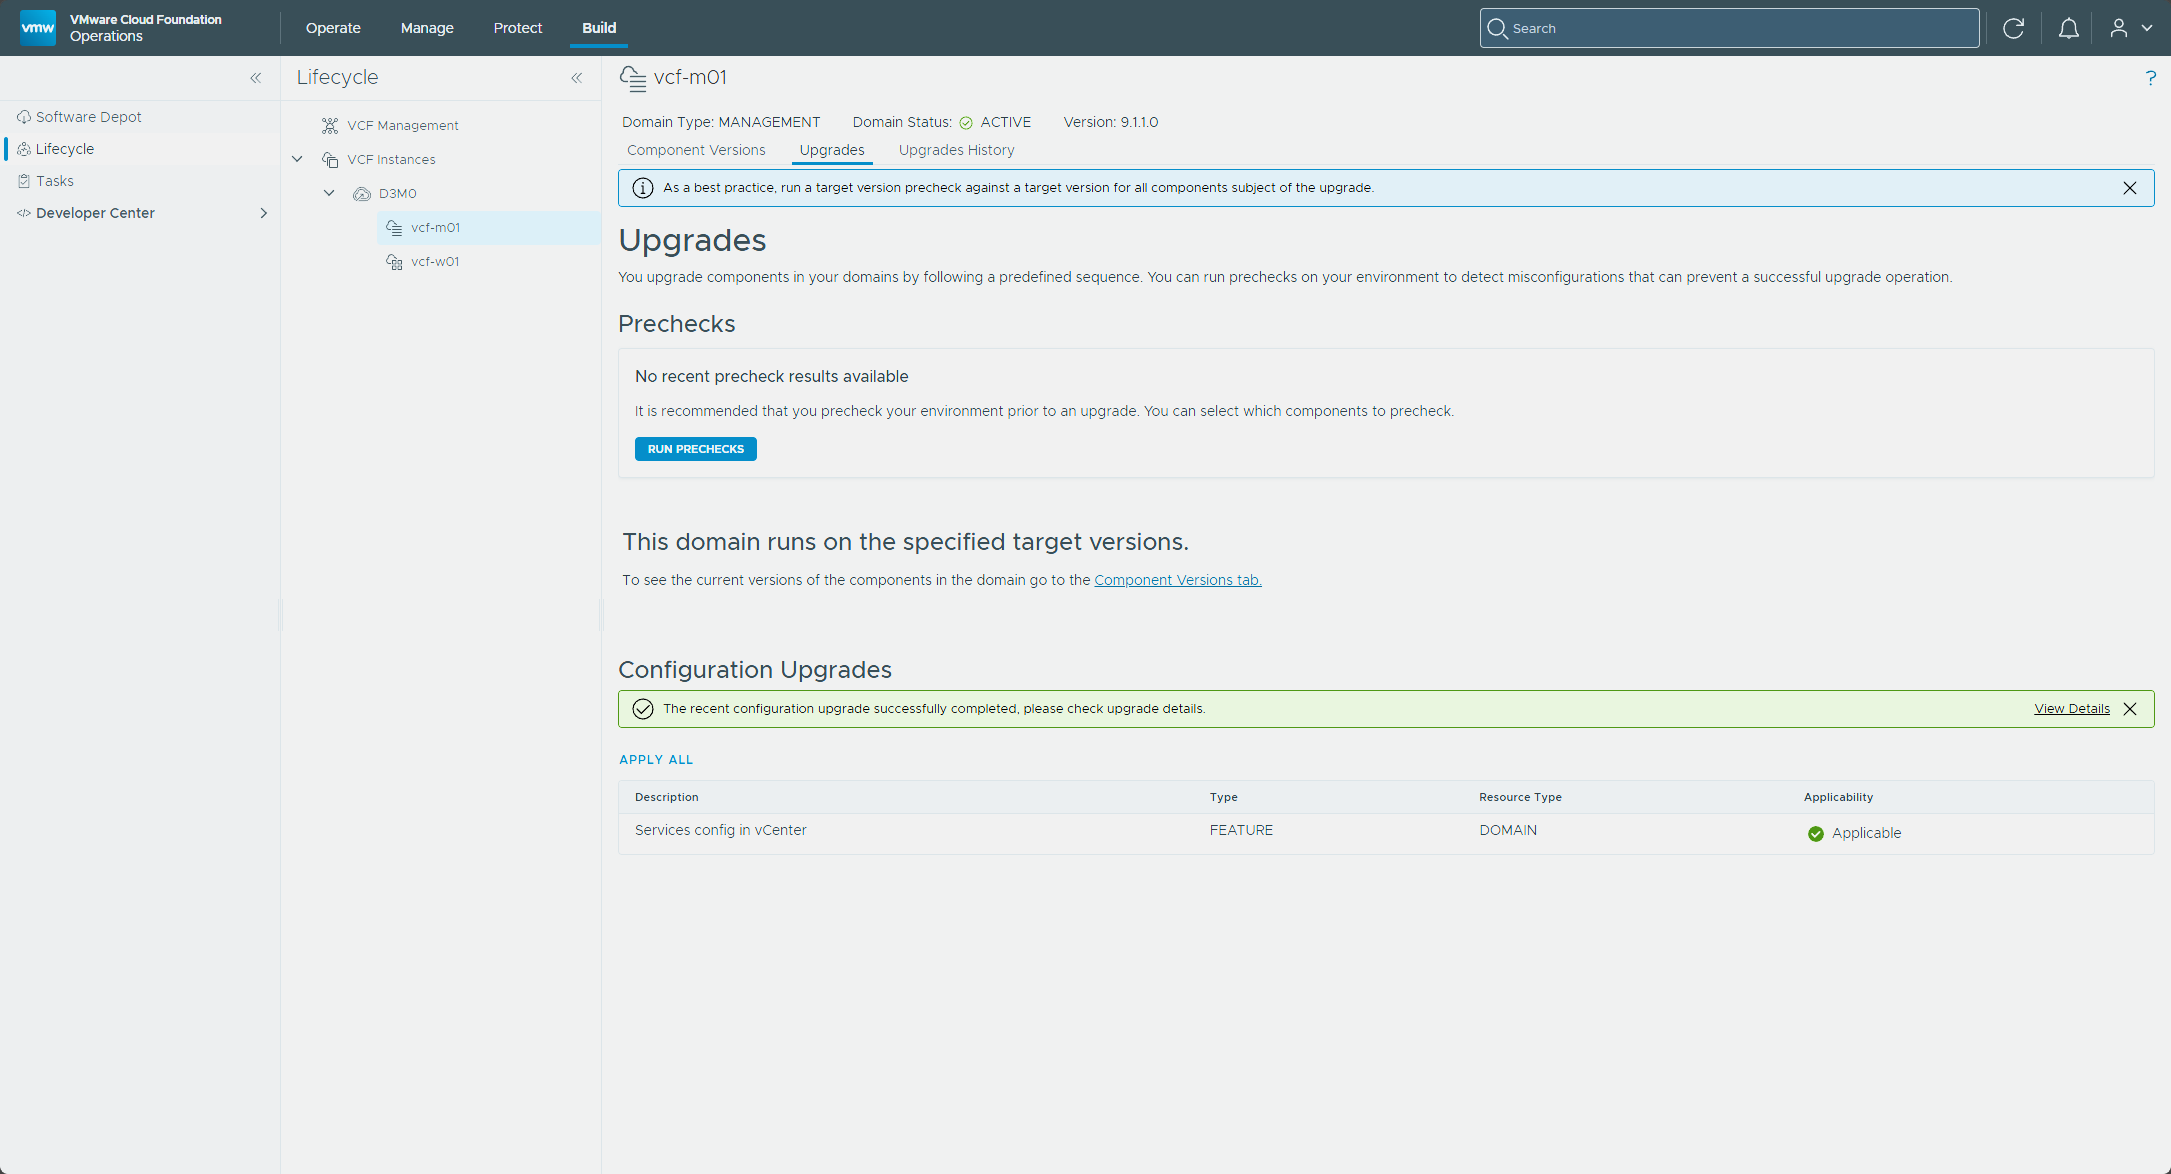
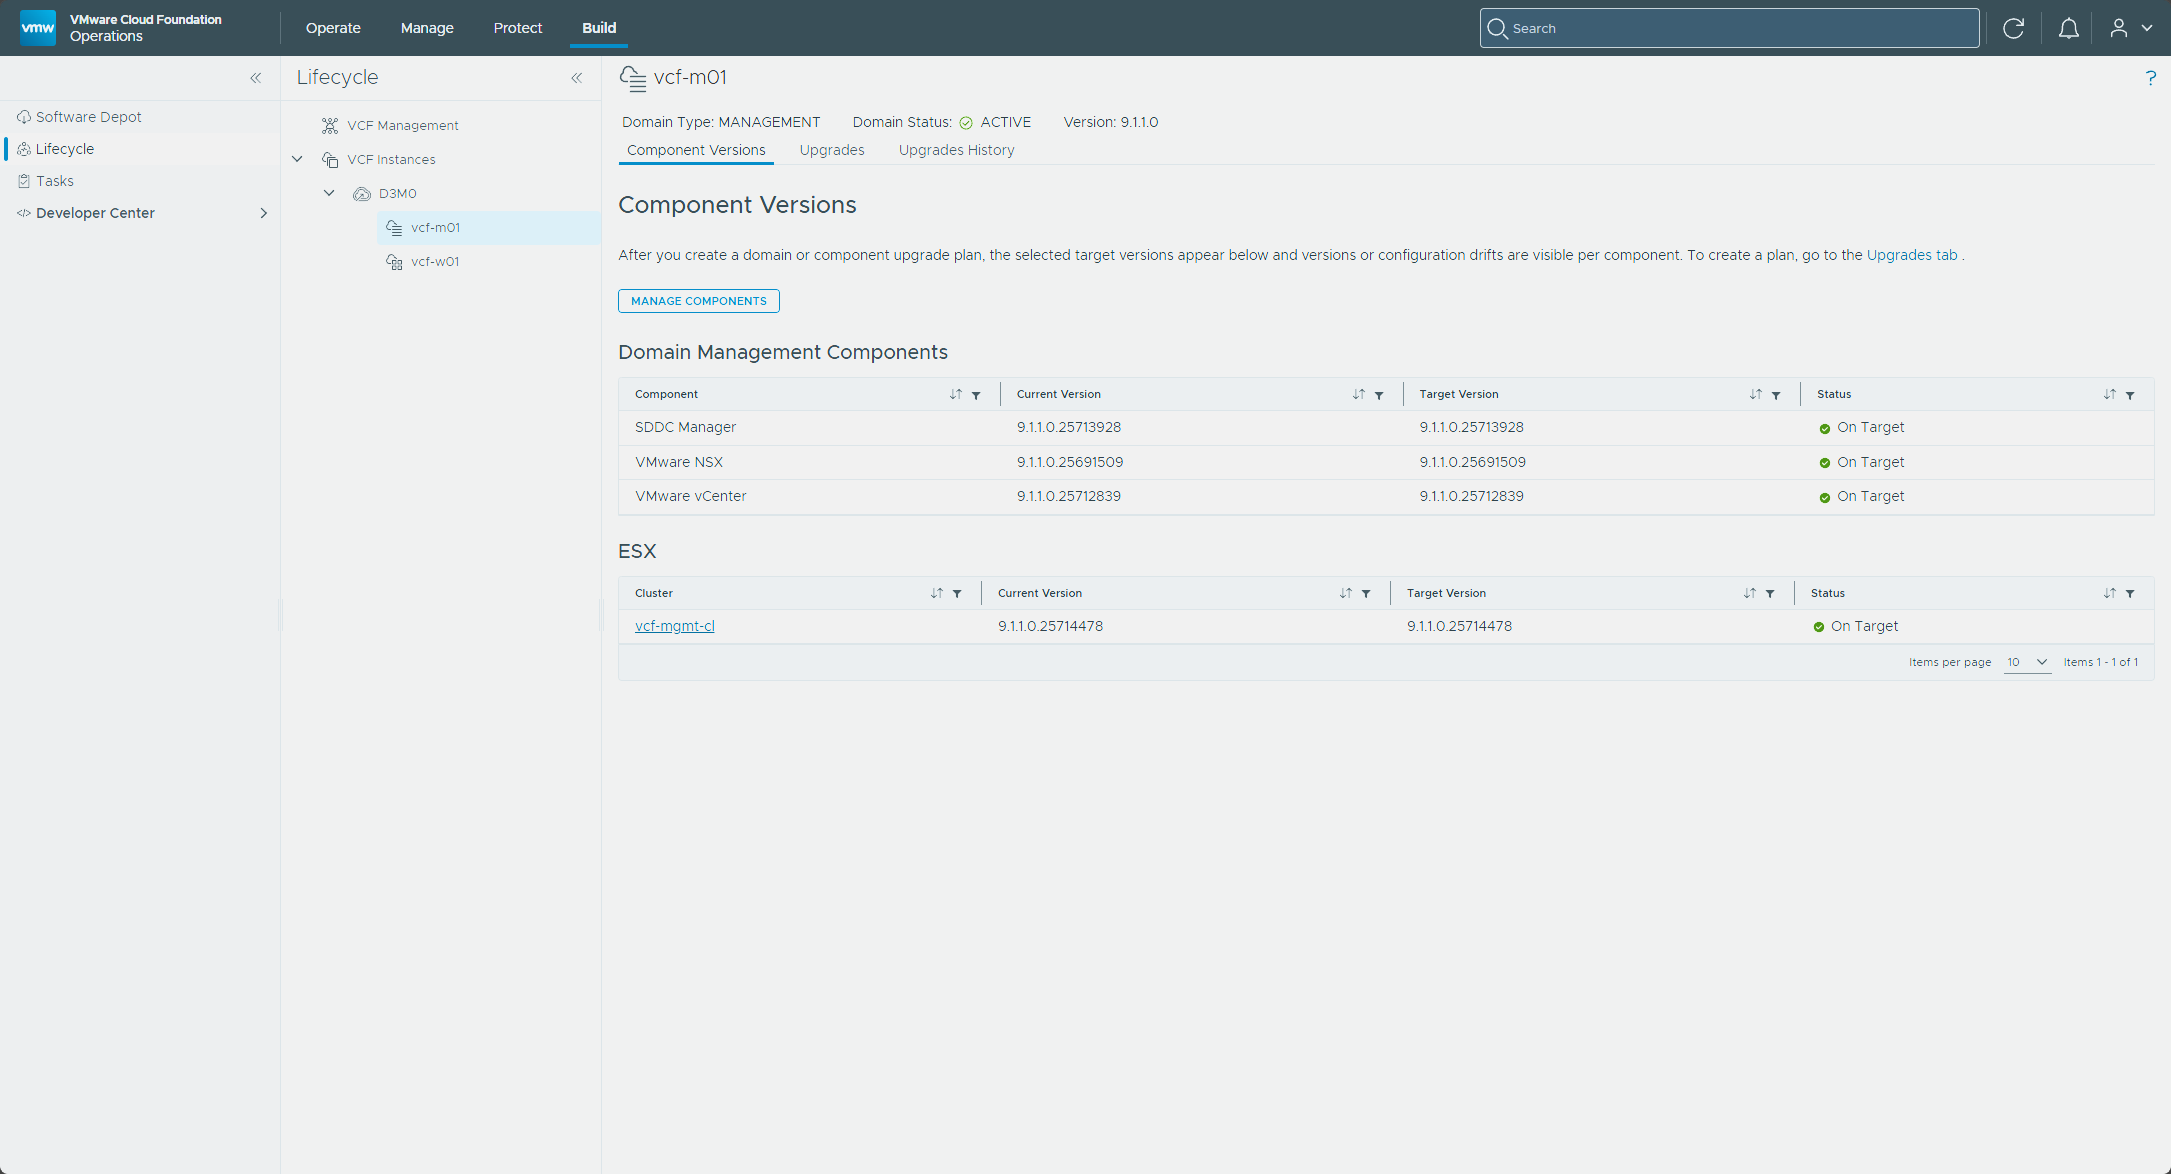
Back in VCF Operations, the management domain’s version read 9.1.1.0, with the message “This domain runs on the specified target versions.”
On the Component Versions tab in VCF Operations, SDDC Manager, NSX, vCenter, and the vcf-mgmt-cl ESX cluster were all On Target.
What’s next
In Part 6, I wrap up with the post-upgrade housekeeping, then repeat the relevant stages against the workload domain. One ordering note: Broadcom’s upgrade table puts the vSphere Distributed Switch upgrade after the NSX finalize, so it lands in Part 6.
Thanks for reading along.
-virtualex-
Comments